
You’re halfway through a tutorial. It tells you to open a terminal and run sudo apt install, or it assumes you have grep, curl, and a proper Bash shell sitting right there. Except you’re on Windows, and none of that exists by default. So you either give up, install a clunky virtual machine that eats into your RAM, or partition your drive and dual-boot into a second operating system just to follow along.
That’s exactly the problem Windows Subsystem for Linux, better known as WSL, was built to solve. WSL lets you run a real Linux environment directly alongside Windows 11, with no separate VM window, no rebooting into another operating system, and no 40GB disk partition carved out just in case. It’s been part of Windows since 2016, but the version most people use today, WSL 2, runs an actual Linux kernel. Microsoft also open-sourced much of WSL in May 2025, making the project considerably more transparent than it was during its early years.
Think of it less as an emulator and more as Windows and Linux sharing the same machine on genuinely good terms. You get Bash, apt or dnf, Python, Node.js, Docker, Git, and whatever else your workflow needs, sitting one command away from your regular Windows desktop.
Here’s what WSL actually is, how WSL 2 works, and exactly how to install Linux on Windows 11 using it.
What Is Windows Subsystem for Linux (WSL)?
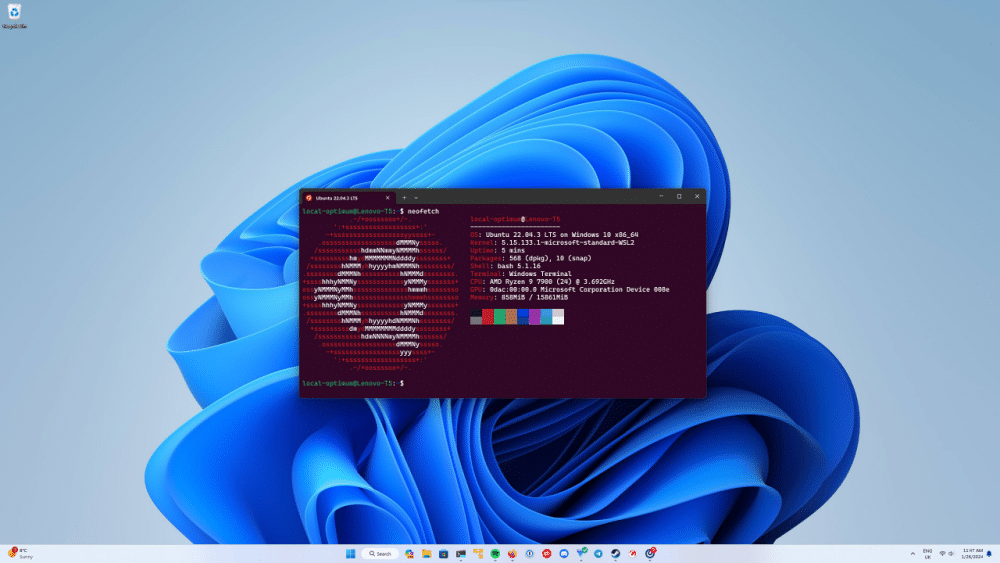
WSL is a Windows feature that lets you install and run a genuine Linux distribution, including Ubuntu, Debian, Kali Linux, openSUSE, and others, alongside your normal Windows installation.
Open Ubuntu inside Windows Terminal, for example, and you’ll get a proper Linux command-line environment without leaving Windows. It can feel a lot like SSHing into a Linux server, except that Linux environment is running locally on your own PC.
Once it’s running, you get familiar Linux tools such as Bash, sed, awk, grep, curl, and package managers, along with full support for development environments built around Python, Node.js, Ruby, Rust, Go, and plenty more.
You can run services too, including MySQL, PostgreSQL, MongoDB, and SSH. Windows and Linux applications can also interact with each other, so you’re not operating two completely isolated environments.
For anyone who writes code, manages Linux servers, experiments with Docker, or regularly follows tutorials written for macOS and Linux users, that’s the entire appeal in one sentence: you get Linux tools without needing a second computer or constantly switching operating systems.
WSL 1 vs. WSL 2: What’s the Difference?
The distinction between WSL 1 and WSL 2 matters because the two versions work very differently under the hood.
WSL 1 essentially worked as a translation layer. It intercepted Linux system calls and translated them into instructions Windows could understand.
It was a clever solution and surprisingly capable, but it had limitations. Some Linux system calls didn’t have clean Windows equivalents, which meant certain applications either didn’t work or behaved differently than they would on a native Linux system.
WSL 2 changed that architecture completely.
Instead of translating Linux system calls, WSL 2 runs a real Linux kernel inside a lightweight, managed virtual machine. Microsoft uses virtualization technology underneath, but the experience is very different from manually creating and maintaining a traditional Hyper-V, VMware, or VirtualBox virtual machine.
You don’t normally manage the VM yourself. WSL handles startup, memory allocation, networking, filesystem integration, and shutdown in the background.
Because WSL 2 uses a real Linux kernel, compatibility with Linux software is dramatically better, and filesystem performance inside the Linux environment is considerably faster for many development workloads.
There’s one performance detail worth knowing, though.
That speed advantage works best when your project files actually live inside the Linux filesystem.
For example:
~/projects/my-app
is generally a better place for a Linux-heavy development project than:
/mnt/c/Users/YourName/Documents/my-app
When you work extensively with files stored under /mnt/c/, WSL has to cross the Windows-to-Linux filesystem boundary repeatedly. Development workloads involving thousands of small files, such as Node.js projects, Git repositories, or package installations, can feel noticeably slower as a result.
Keep active Linux development projects inside your Linux home directory and use /mnt/c/ when you specifically need to access files stored on Windows.
That one habit can make the difference between WSL feeling almost native and WSL feeling strangely sluggish.
New WSL installations use WSL 2 by default, so unless you have a specific legacy requirement for WSL 1, there’s generally no reason to switch back.
What Do You Need to Run WSL on Windows 11?
The requirements are lighter than many people expect. If you’re using an up-to-date version of Windows 11, you’re already most of the way there. WSL is also supported on sufficiently recent versions of Windows 10, although Windows 11 provides the smoother overall experience, particularly for Windows Terminal and Linux GUI applications.
There are a few things worth checking before installation.
Make Sure Virtualization Is Enabled
WSL 2 relies on hardware virtualization.
Most modern PCs ship with virtualization enabled, but if installation fails with an error related to virtualization or Virtual Machine Platform, check your BIOS or UEFI settings.
Depending on your processor and motherboard, the option may appear as:
- Intel Virtualization Technology
- Intel VT-x
- AMD-V
- SVM Mode
The exact wording varies between manufacturers.
Windows 11 Home Works Too
You don’t need Windows 11 Pro just to use WSL.
WSL 2 works on Windows 11 Home, Pro, and other mainstream desktop editions, so WSL support shouldn’t influence which edition you buy.
If you’re still deciding, our Windows 11 Home vs. Pro comparison explains the features that actually separate the two editions.
And if you’re configuring a fresh PC, it’s worth going through our things to do after installing Windows 11 before you start building out your development environment.
You’ll also need administrator access because installing WSL enables Windows components that require elevated permissions.
How to Install WSL on Windows 11
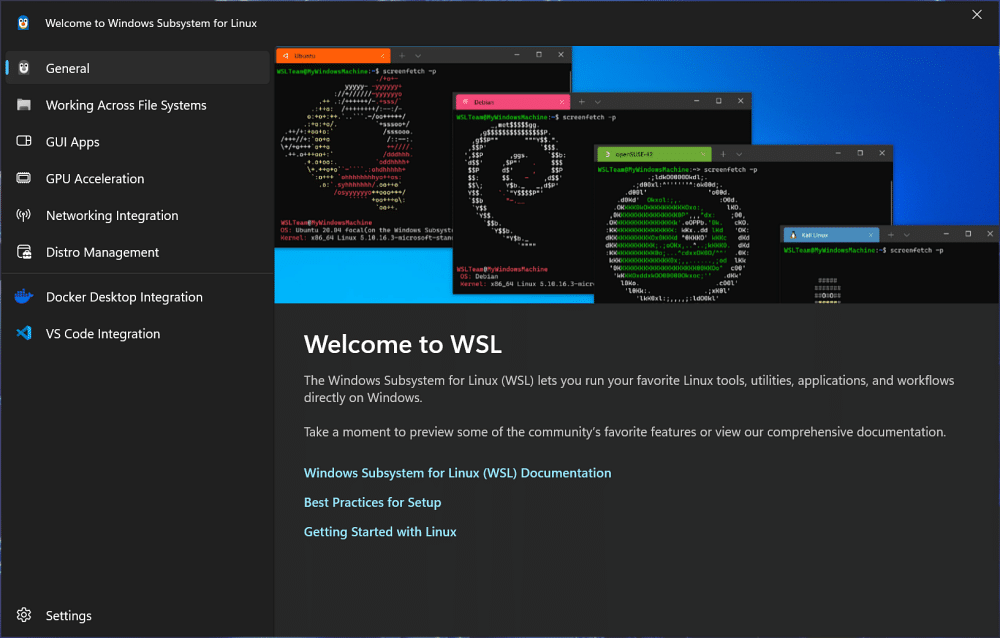
Installing WSL used to involve manually enabling Windows features, downloading a Linux kernel package, setting WSL 2 as the default, and then installing a distribution separately. Thankfully, Microsoft has condensed most of that process into a single command.
Step 1: Open Windows Terminal as Administrator
Right-click the Start button and select Terminal (Admin).
You can also search for PowerShell or Windows Terminal, right-click it, and choose Run as administrator.
Step 2: Run the WSL Install Command
Enter:
wsl --install
Press Enter.
This command installs the components WSL needs and, on a standard new setup, installs Ubuntu as the default Linux distribution with WSL 2.
Step 3: Restart Your PC
Restart Windows if prompted.
Don’t skip this step. Some of the underlying Windows components required by WSL won’t finish activating until Windows restarts.
Step 4: Set Up Your Linux Account
After restarting, launch Ubuntu if it doesn’t open automatically.
The first launch completes the Linux installation and asks you to create a Linux username and password.
This account is separate from your Windows account. Your Linux username doesn’t have to match your Windows username, and the password you create here is the one you’ll use whenever a Linux command requires sudo privileges.
Once that’s finished, you have a working Linux environment running inside Windows 11.
What If wsl --install Doesn’t Install Ubuntu?
If running wsl --install displays WSL usage information instead of beginning a fresh installation, WSL may already be present on your PC.
You can check the available distributions with:
wsl --list --online
You’ll see the Linux distributions currently available for installation.
You can then install one directly using the -d option.
For example:
wsl --install -d Ubuntu
Once installed, launch the distribution from Windows Terminal or the Start menu and complete the username and password setup.
How to Install Debian, Kali Linux, or Another WSL Distribution
Ubuntu is the default for a reason. It’s widely documented, beginner-friendly, and many Linux tutorials already assume you’re using an Ubuntu or Debian-based environment.
But you’re not locked into it.
Run:
wsl --list --online
to see the distributions currently available through WSL.
You can then install another distribution with:
wsl --install -d Debian
Replace Debian with the exact distribution name shown in the available list.
Which distro should you choose?
For most beginners, Ubuntu remains the easiest recommendation because of its enormous documentation and community support.
If your production servers run Debian and you want your development environment to resemble them more closely, Debian makes sense. Kali Linux is aimed primarily at penetration testing and security work, so there’s little reason to choose it just because it sounds more advanced.
For most Windows users who simply need Linux development tools, Ubuntu is still the path of least resistance.
Can WSL Run Linux GUI Apps on Windows 11?
Yes, and this is one of the biggest improvements over the early versions of WSL.
Through WSLg, Windows 11 can run graphical Linux applications alongside regular Windows applications instead of limiting you to command-line tools.
Launch a supported Linux GUI editor, utility, or other graphical application from the WSL terminal, and its window can appear directly on your Windows desktop with normal window controls and taskbar integration.
There’s no traditional Linux desktop sitting inside a separate VM window.
WSL 2 also supports GPU acceleration for supported compute workloads. That becomes particularly useful for developers and data scientists working with machine learning, AI, and other Linux software that can take advantage of GPU compute.
It doesn’t turn WSL into a replacement for a full Linux desktop, but it dramatically expands what you can do without leaving Windows.
Best WSL Settings and Tips for Everyday Use
Getting WSL installed is easy. Getting it set up so you actually enjoy using it every day takes a few additional tweaks.
Keep Development Projects Inside Linux
This is the performance tip worth repeating.
If your project relies heavily on Linux tools, keep it somewhere such as:
~/projects
rather than under:
/mnt/c/Users/...
You’ll generally get better filesystem performance, particularly with Git, Node.js dependencies, compilers, and projects containing thousands of small files.
Use systemd When Your Tools Need It
Modern WSL supports systemd, which is important for Linux services and development tools that expect it.
If you need to configure it manually, edit:
/etc/wsl.conf
and add:
[boot]systemd=true
Then shut down WSL from Windows:
wsl --shutdown
Launch your distribution again and the configuration will take effect.
Use VS Code With WSL
If you use Visual Studio Code, Microsoft’s WSL integration is one of the easiest ways to edit projects stored inside your Linux environment without sacrificing the Windows desktop interface.
You can keep the files and development tools on the Linux side while running the familiar VS Code interface on Windows.
This avoids repeatedly editing a Linux project through the slower /mnt/c/ filesystem path.
Docker Works Particularly Well With WSL 2
Docker Desktop can use WSL 2 as its backend on Windows, which is one reason WSL has become such a useful part of modern Windows development setups.
For container-heavy development, the combination of WSL 2 and Docker Desktop removes much of the friction Windows developers used to deal with.
Access WSL Files From Windows File Explorer
You don’t need to live entirely inside a terminal to access Linux files.
Open File Explorer and enter:
\\wsl.localhost\
in the address bar.
From there, you can browse the filesystems of your installed WSL distributions using the normal Windows interface.
It’s particularly useful when you just need to copy or inspect a file without navigating through Linux commands.
Keep WSL Updated
WSL can receive updates separately from major Windows feature releases, so it’s worth checking for updates occasionally.
Run:
wsl --update
to install the latest available WSL update.
You can also check your current configuration and WSL version using commands such as:
wsl --status
and:
wsl --version
Microsoft open-sourcing much of WSL has also made the project more transparent and easier for developers to follow. That doesn’t mean every component involved in Windows and WSL is suddenly open source, but WSL itself is considerably more open than it was during its early years.
Is WSL Better Than a Virtual Machine or Dual Boot?
It depends entirely on what you’re trying to accomplish. If your goal is to write code, run Linux command-line tools, work with Docker, test server software, or follow Linux-based development tutorials, WSL is usually much more convenient than maintaining a traditional virtual machine.
You don’t have to allocate a fixed chunk of RAM to a VM every time you start it, stare at a second desktop environment, or reboot your computer whenever you need Linux.
Dual boot still makes sense when you need a complete native Linux desktop, direct hardware control, or want Linux to be your primary operating system for certain workloads.
A traditional VM is also useful when you specifically need strong environment separation or want to test a complete operating system installation.
WSL sits somewhere in between. It gives developers most of the Linux environment they actually need while keeping Windows as the desktop operating system they interact with all day.
Final Thoughts
WSL isn’t a replacement for every dedicated Linux server, virtual machine, or dual-boot setup, and it was never trying to be. What it solves is smaller and considerably more useful for everyday Windows users: the friction of needing Linux tools on a Windows PC without constantly switching operating systems or maintaining another virtual machine.
For most people, getting started is as simple as opening Windows Terminal as an administrator and running wsl --install.
From there, keep Linux-heavy development projects inside the Linux filesystem, use Windows integration when it makes your workflow easier, and occasionally run wsl --update to stay current.
That’s genuinely most of what you need to know to make WSL useful rather than simply having it installed.
Don’t miss these related reads: