Installing Windows 11 is just the beginning. Right after installing Windows 11, there are a few important setup steps that can make your system more secure, faster, and easier to use. A fresh install may look clean, but it often ships without the latest updates, proper drivers, and optimized privacy settings. Spend a few minutes getting things right from the start, and you’ll avoid performance issues, security risks, and unnecessary frustration later.
1. Run Windows Update Before You Do Anything Else
It sounds obvious, but many people skip this and jump straight to installing apps. Don’t. The Windows 11 image on your installation media, or the one that shipped with your machine, could be months behind the current build. Those gaps aren’t just cosmetic. They often include critical security patches, stability fixes, and under-the-hood improvements that the rest of your setup will depend on.
Head to Settings > Windows Update and hit Check for updates. Let it run, reboot if it asks, then check again. Windows Update has a habit of revealing a second or third batch of updates only after you’ve installed the first round. Keep going until the queue is empty.
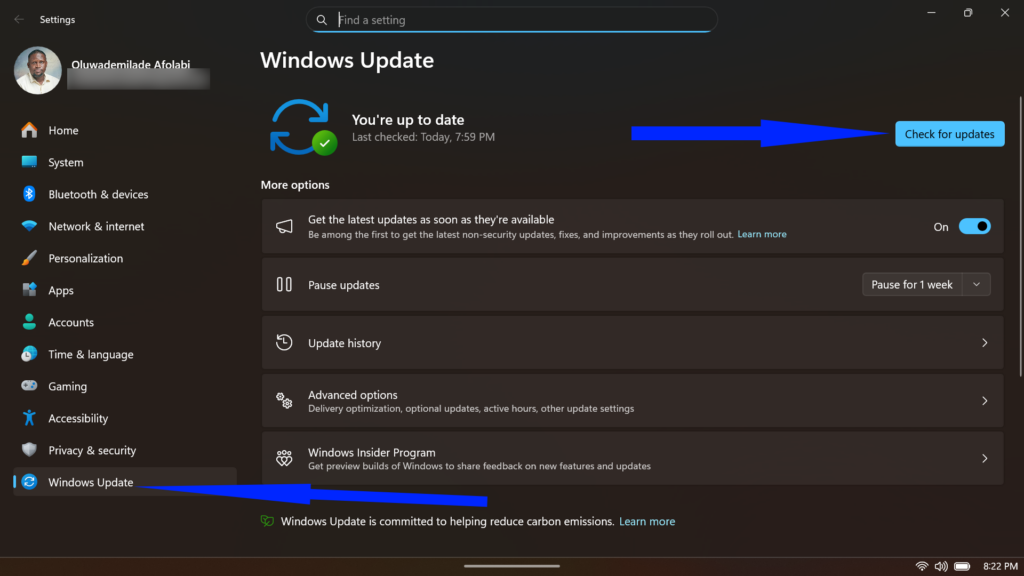
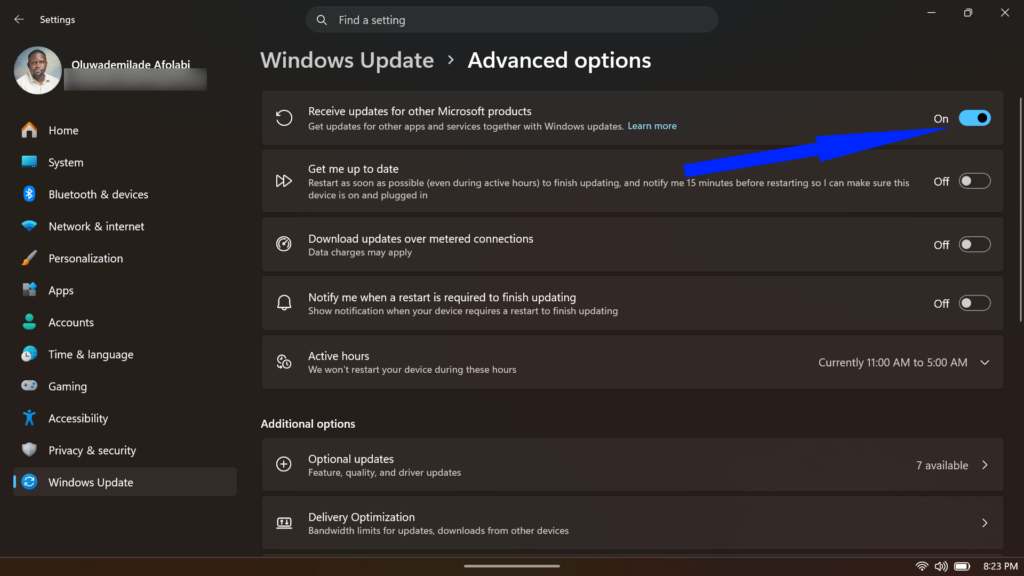
While you’re there, click Advanced options and toggle on Receive updates for other Microsoft products. This pulls in updates for Office, the .NET runtime, and other Microsoft components, all in one place, making it easier to manage later.
2. Hunt Down and Install Your Missing Drivers
Windows 11 is reasonably good at auto-installing drivers, but “reasonably good” isn’t the same as “complete.” Audio, GPU, Wi-Fi adapters, and Bluetooth controllers are common culprits that Windows either installs generic versions of or skips entirely. Generic drivers work, but they often strip out vendor-specific features such as NVIDIA’s performance overlays, AMD’s upscaling tools, Realtek’s audio enhancements, and so on.
Go directly to your hardware manufacturer’s website rather than relying on third-party driver tools. For desktops, that typically means visiting your motherboard manufacturer’s support page and your GPU maker’s driver portal (NVIDIA, AMD, or Intel). For laptops, your OEM’s support page — Dell, HP, Lenovo, ASUS — is usually the single best source for everything.
A quick shortcut is to open Device Manager (right-click the Start button) and look for anything flagged with a yellow warning triangle. Those are your immediate priorities.
3. Lock Down Your Privacy Settings
Windows 11 ships with a generous number of data-sharing features switched on by default, and the Privacy & security section of Settings is where you’ll want to spend a few deliberate minutes right after setup.
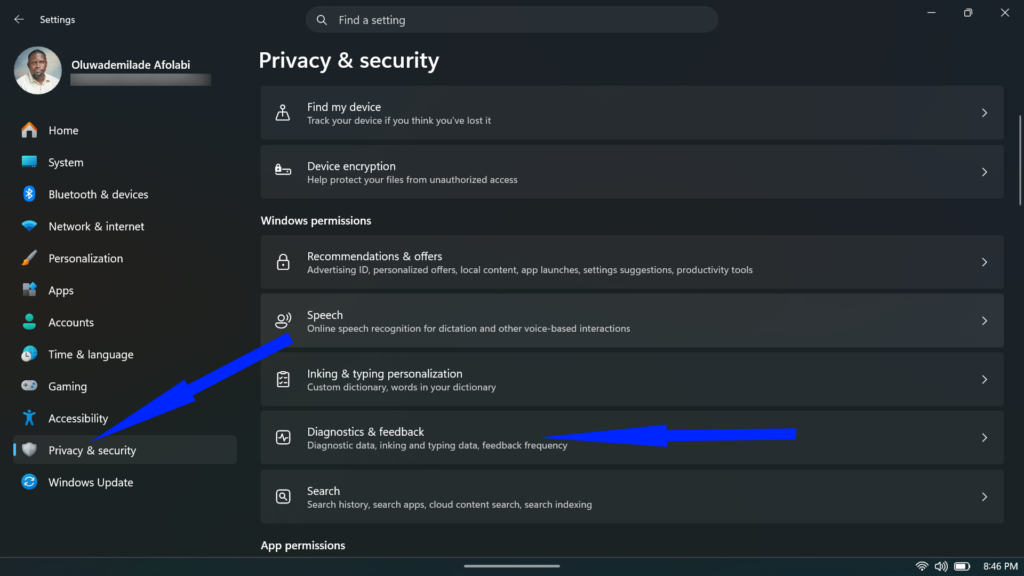
- Start with Diagnostics & feedback. By default, Windows sends Microsoft what it calls “required diagnostic data,” which is a baseline it won’t let you turn off entirely. What you can control is the optional layer. Make sure Send optional diagnostic data is toggled off. This stops Windows from transmitting information about the websites you browse, how you use apps and features, and enhances error reporting. Microsoft will tell you that your device operates normally either way, and that’s true; you’re not losing any functionality by disabling it.
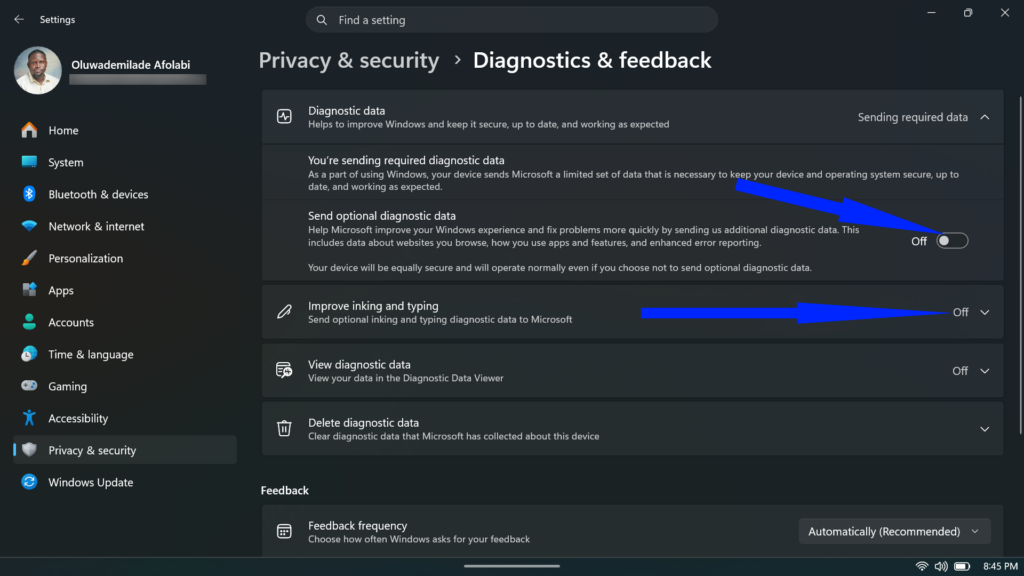
- While you’re here, also switch off Improve inking and typing, which sends typing and handwriting data back to Microsoft in the background.
- Next, navigate to Privacy & security > Recommendations & offers. This panel is easy to overlook, but it’s doing some work. Turn off Personalized offers, which serve you targeted tips and ads based on your Windows activity.
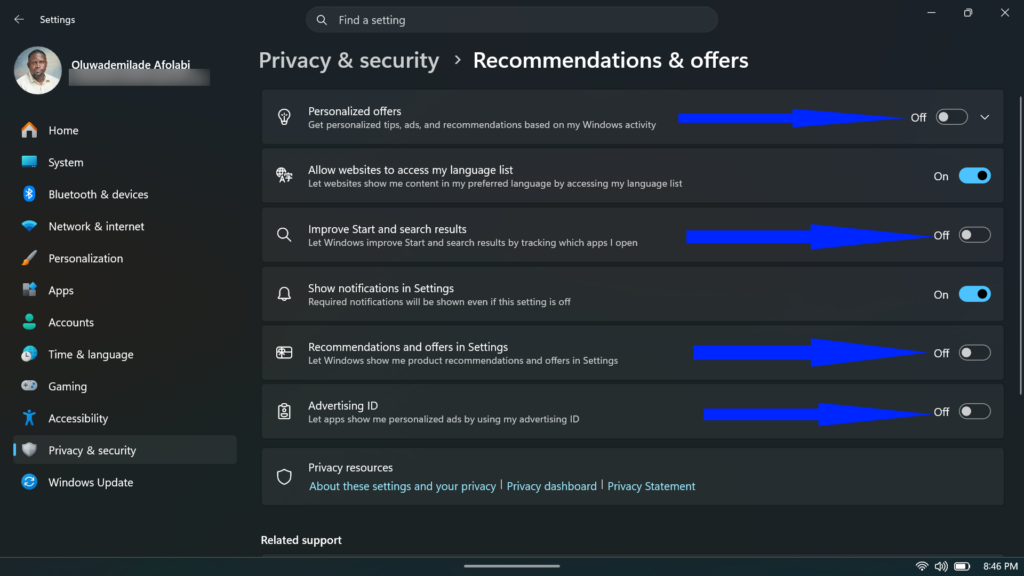
- Disable Improve Start and search results too, as this one tracks which apps you open to refine Microsoft’s recommendations, which is more surveillance than utility for most users.
- You’ll also want to switch off Recommendations and offers in Settings, which lets Microsoft surface product promotions directly inside your Settings app. That one is particularly brazen.
- Finally, confirm that Advertising ID is toggled off. This ties a unique identifier to your account and feeds personalized ads across apps that tap into the Windows advertising ecosystem.
None of these changes will degrade your experience, as Windows runs just as well without them. What they do is ensure you’re making an active choice rather than consenting by inertia.
Related: 5 Useful Windows 11 Changes You Can Make with Winaero Tweaker
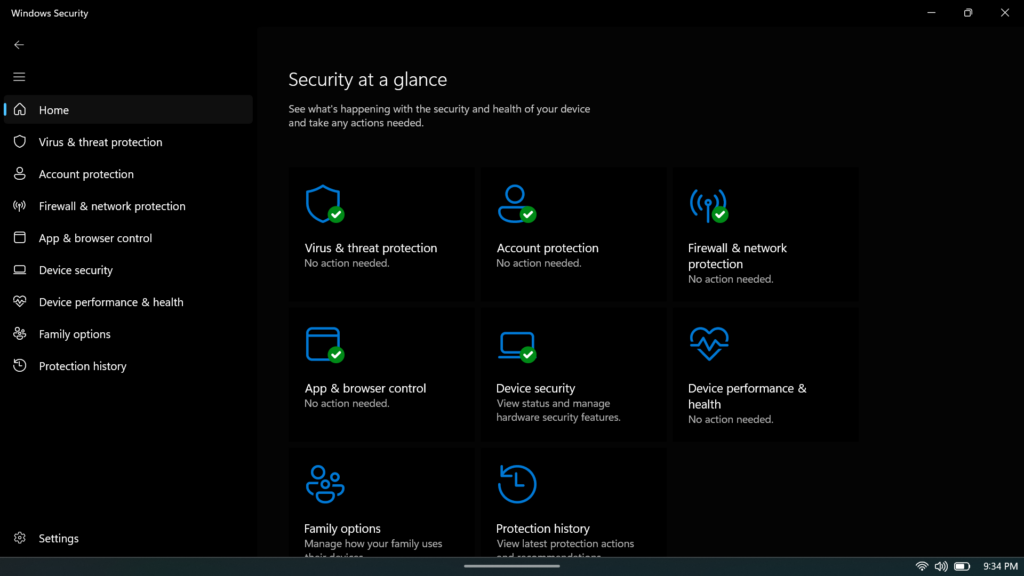
4. Set Up Windows Security and Your First Backup
Windows Security, Microsoft’s built-in antivirus and firewall suite, is more capable than its reputation suggests. For most home users, it holds its own against third-party alternatives.
- Open it from the Start menu and confirm that Virus & threat protection, Account protection, Firewall & network protection, App & browser control, and Device security are all showing green. If anything is flagged, address it before moving on.
- Then, set up a backup before your machine has anything valuable on it. This is a principle rather than a chore: it’s far easier to establish a backup routine on a clean system than to retrofit one after two years of accumulated files.
- File History (found in the Control Panel) is a straightforward option if you have an external drive.
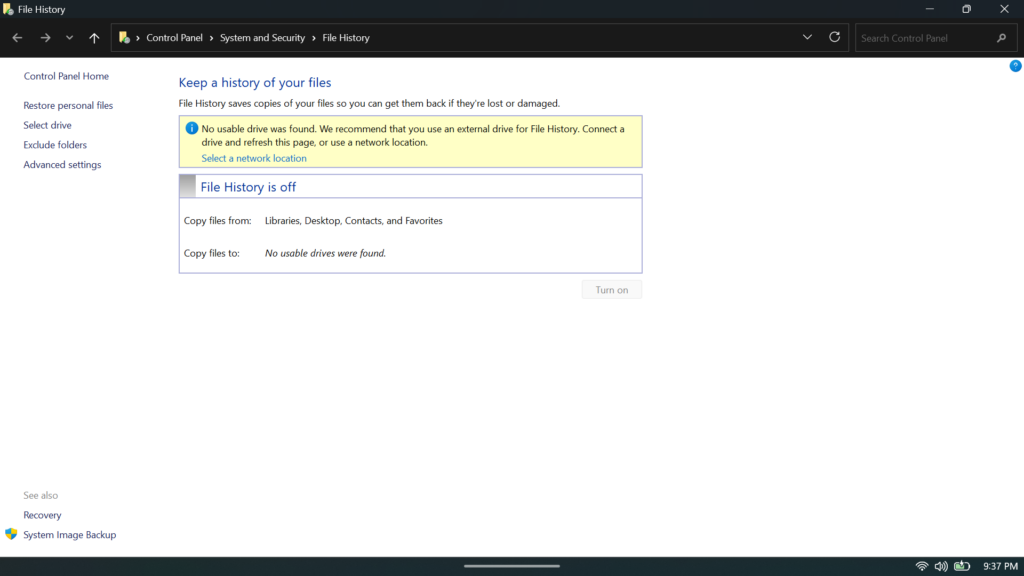
- For cloud redundancy, OneDrive’s built-in integration with Windows 11 is seamless, though you’ll want to check Settings > System > Storage > Advanced storage settings to confirm which folders are actually being synced versus just appearing local.

- File History (found in the Control Panel) is a straightforward option if you have an external drive.
5. Personalize the Start Menu and Taskbar to Actually Make Sense
The default Windows 11 taskbar is centered, pinned with apps you may never use, and, until recently, stubbornly resistant to customization. It’s improved, but it still needs a human hand.
- Right-click the taskbar and open Taskbar settings to toggle off widgets, Task View, and other icons that don’t earn their place.
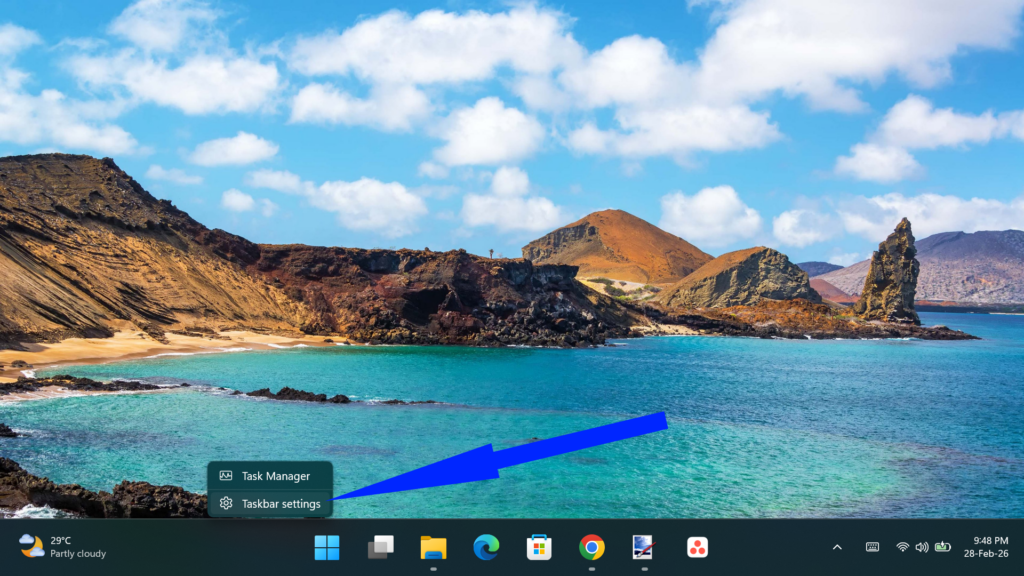
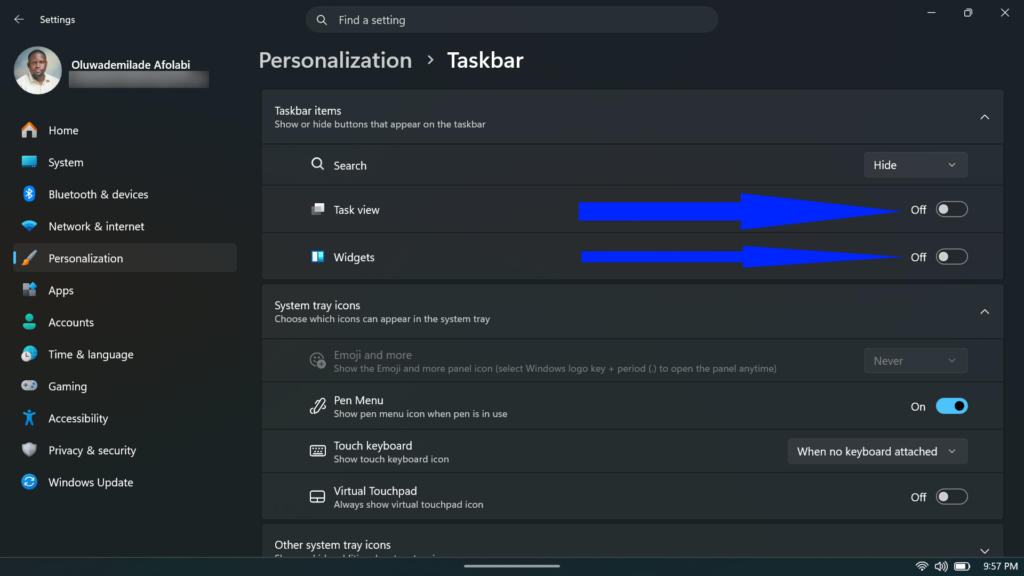
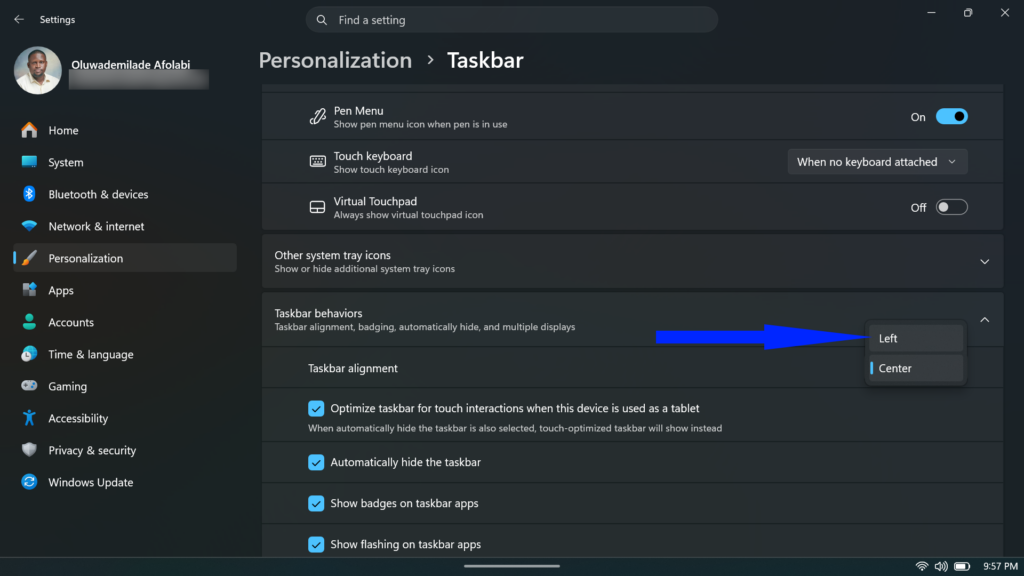
- If a left-aligned taskbar feels more familiar, you can shift it back under Taskbar behaviors.
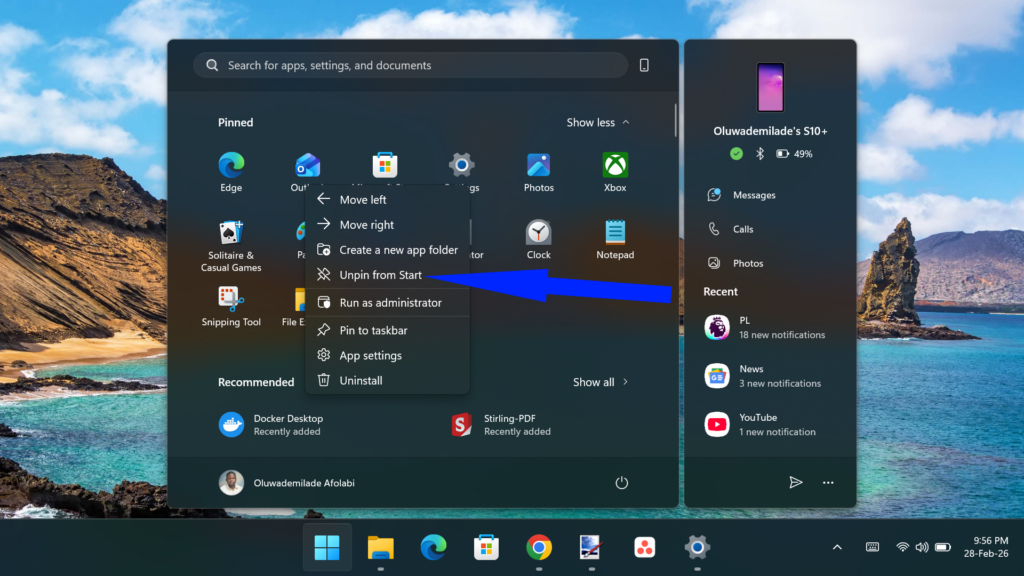
- In the Start menu, take stock of what’s pinned by default. Right-click anything you won’t use and select Unpin from Start. Then pin the things you actually reach for.
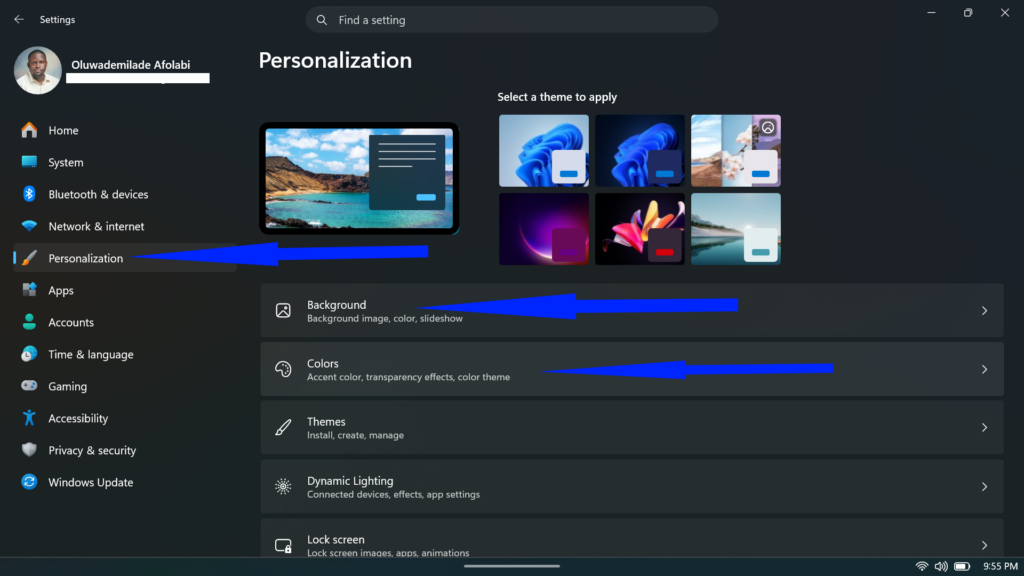
- Finally, visit Settings > Personalization to set a wallpaper, choose between Light and Dark mode, and apply an accent color. It’s not strictly functional, but a desktop that feels like yours makes the whole machine feel less like a rental.
Conclusion
None of these steps takes long individually. Block out thirty minutes right after installation, work through them in order, and you’ll have a system that’s secure, current, properly equipped, and shaped around how you actually work — rather than how Microsoft assumed you would.
Related articles worth reading: