Microsoft has finally addressed one of Windows 11’s most contentious features: the Start menu. After years of complaints about wasted space, sluggish performance, and limited customization, the company is rolling out a substantially revamped design that takes better advantage of your screen real estate. While the update is being deployed gradually, you don’t have to wait there are ways to unlock it right now.
What’s New in Windows 11’s Redesigned Start Menu
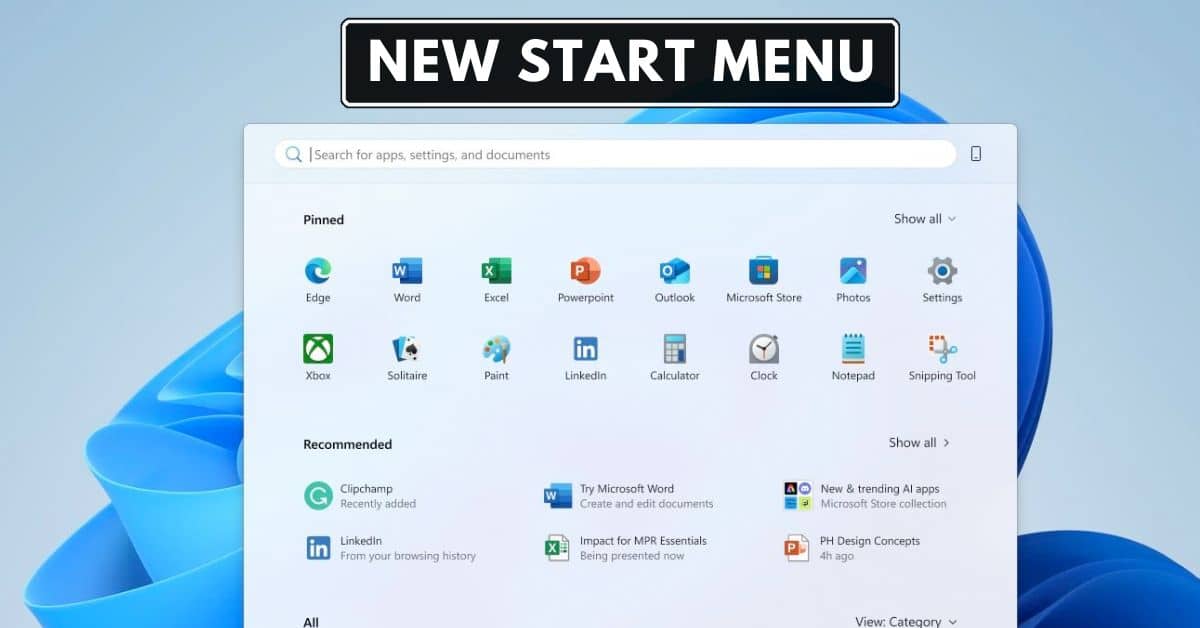
The new Start menu marks a clear departure from the old design. Instead of feeling claustrophobic and compartmentalized, the updated interface consolidates everything into a single, scrollable page that automatically adapts to your display resolution.
The redesign introduces three distinct sections: Pinned apps appear at the top, showing two rows with up to eight pins each. Below that sits the Recommended section, which surfaces recent files and applications (though you can now disable it entirely if you find it obtrusive). Finally, the All apps section displays your complete application roster without requiring additional clicks.
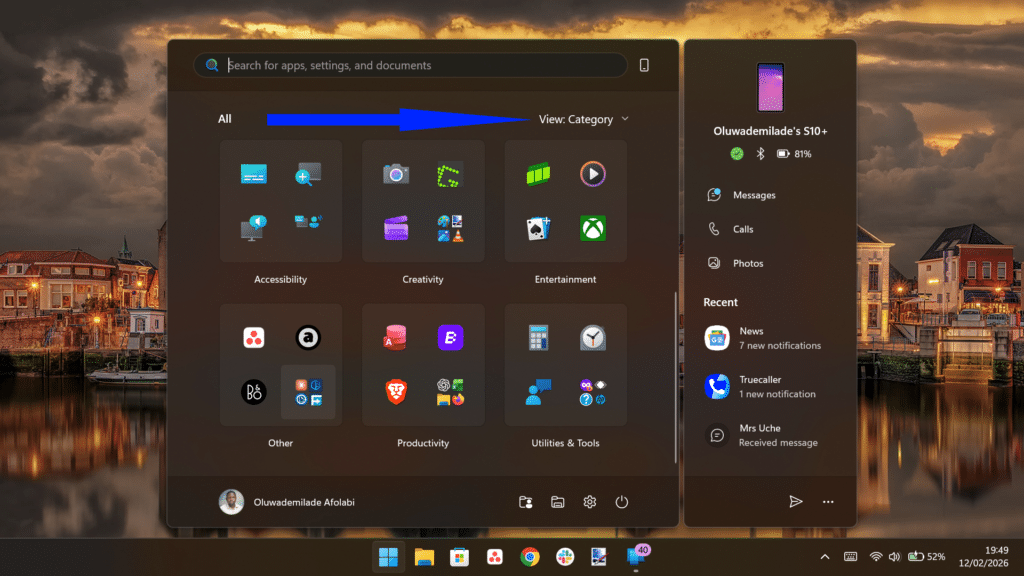
Perhaps the most consequential improvement is automatic app categorization. Similar to how iOS and Android organize your applications, Windows 11 now intelligently groups apps into categories such as “Productivity,” “Developer Tools,” and “Entertainment” based on Store metadata. Media Player is under Entertainment, while Terminal and PowerShell nest under Productivity. These categories only manifest when you have at least three apps that belong together.
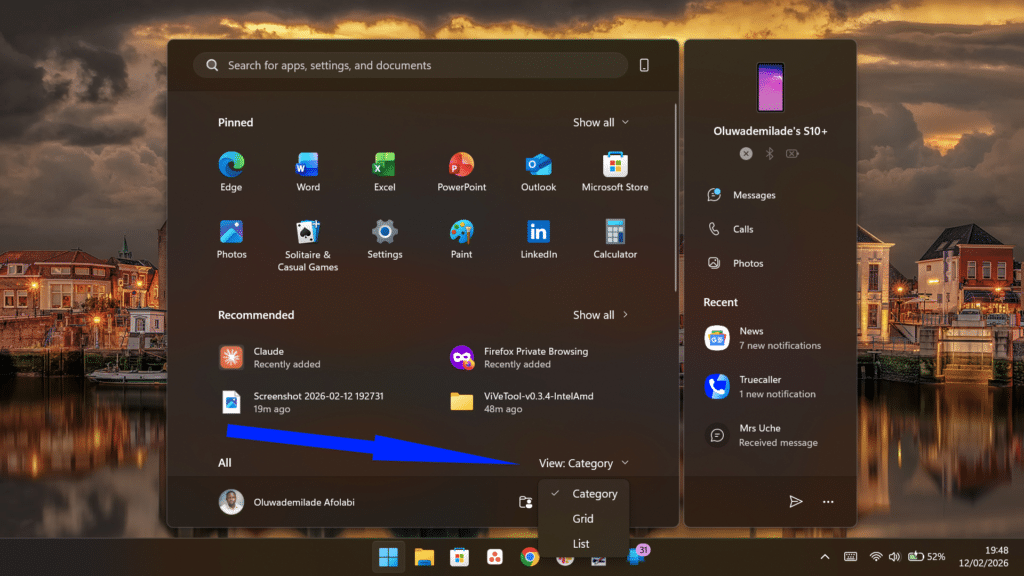
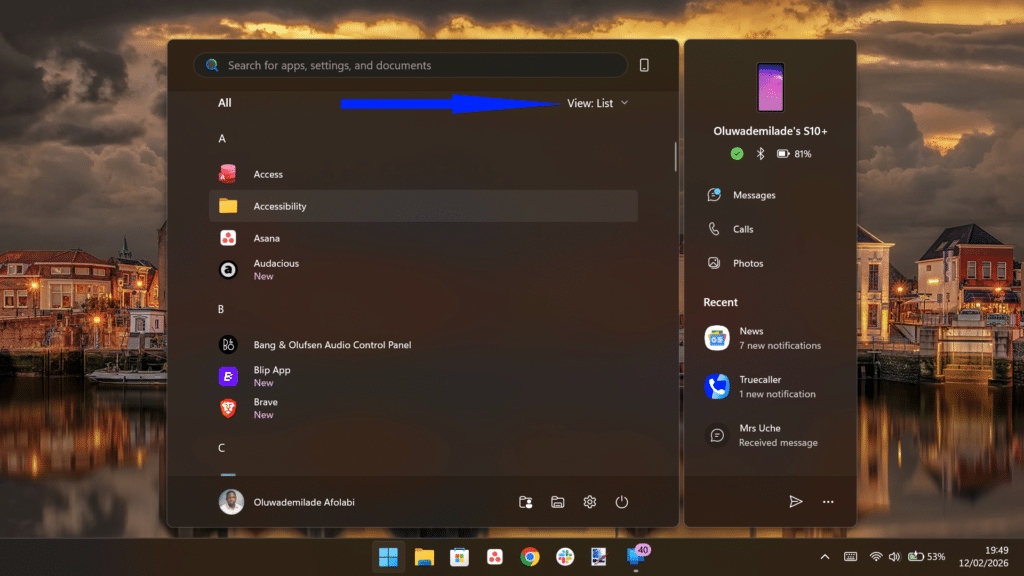
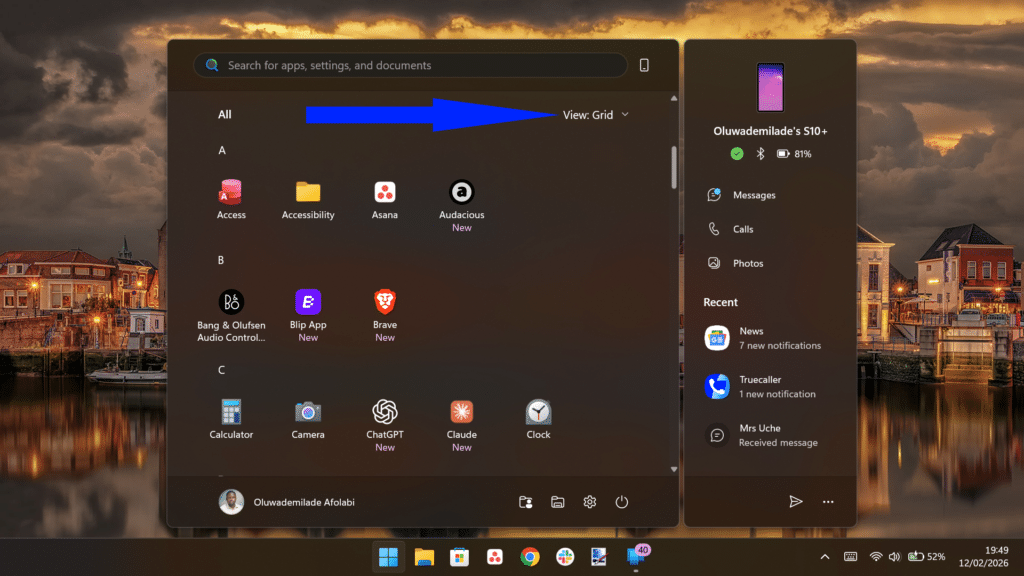
If categorization feels too prescriptive, you can toggle between Category view, Grid view (displaying apps alphabetically in a dense layout), or the nostalgic List view that channels Windows XP and 7’s verticality. The translucent acrylic design language permeates the interface, giving it a contemporary shimmer.
How to Enable the New Start Menu via Windows Update
The simplest path to the new Start menu is through official channels. Microsoft bundles the feature with the KB5067036 update, which is gradually rolling out to Windows 11 users. More recently, the KB5074109 update has accelerated deployment.
To expedite access:
- Open Settings and navigate to Windows Update.
- Toggle on “Get the latest updates as soon as they’re available”.
- Click Check for updates and install any available patches.
- Restart your computer.
Once your system reboots, the new Start menu should materialize when you press the Windows key. Note that Microsoft’s staged rollout means timing varies. Some users received it in October 2025, while others are still waiting. The company maintains this deliberate approach based on user feedback and telemetry, though it can feel agonizingly slow if you’re perpetually on the wrong side of the deployment lottery.
if you like to read, How to to Screen Record on Windows 11.
How to Enable the New Windows 11 Start Menu Using ViVeTool
If you’re unwilling to wait, ViVeTool offers a workaround. This open-source command-line utility lets you manually flip hidden feature flags that Microsoft has already embedded in Windows but hasn’t officially activated for your region or cohort.
Here’s how to wield it:
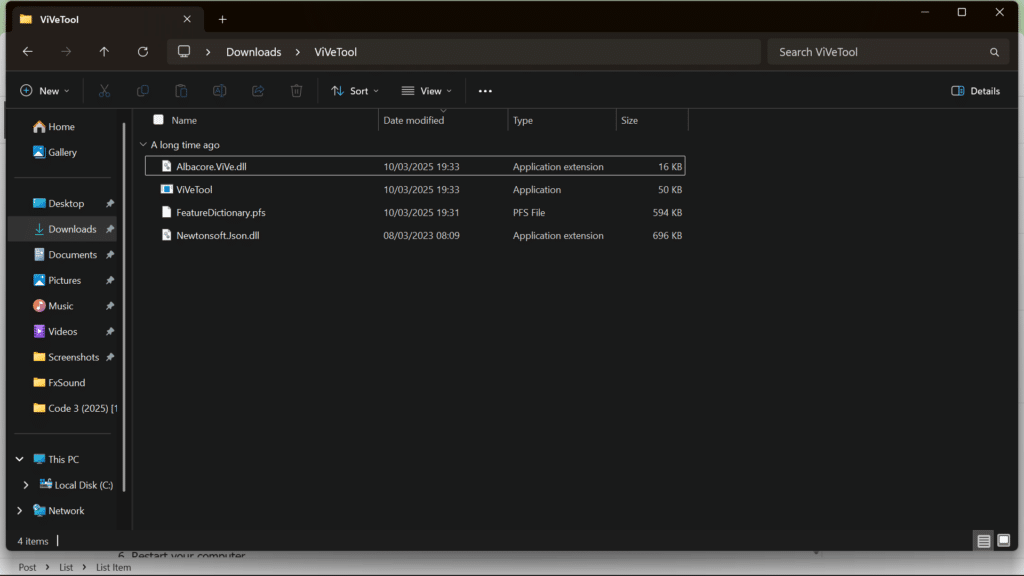
- Visit the ViVeTool GitHub repository and download the latest release.
- Extract the ZIP file to a location you’ll remember (like your Downloads folder).
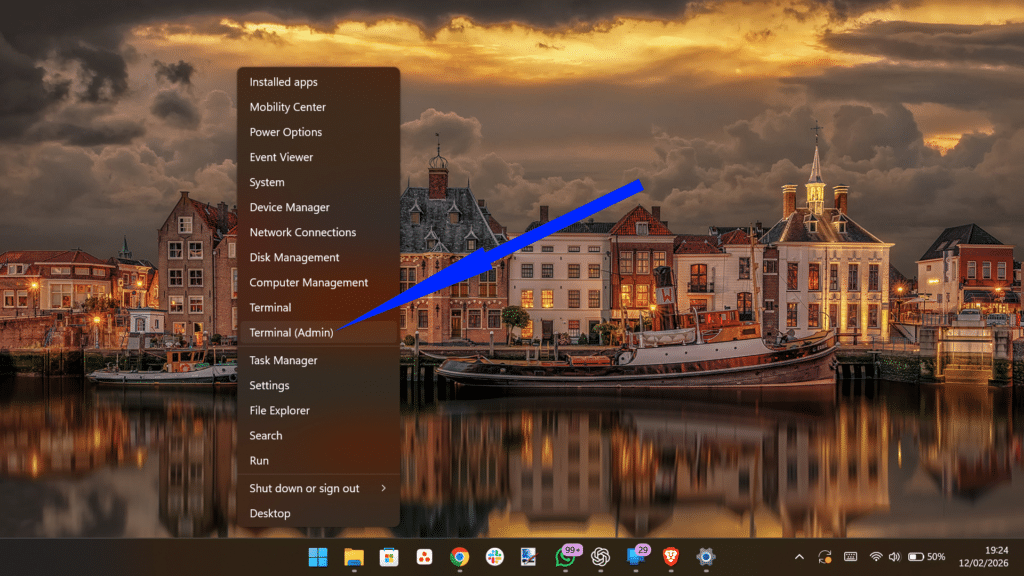
- Right-click the Start button and select Terminal (Admin) or search for Command Prompt and choose Run as administrator.
- Navigate to the ViVeTool folder using the
cdcommand. For example:cd C:\Users\YourName\Downloads\ViVeTool - Execute this command:
.\ViVeTool.exe /enable /id:47205210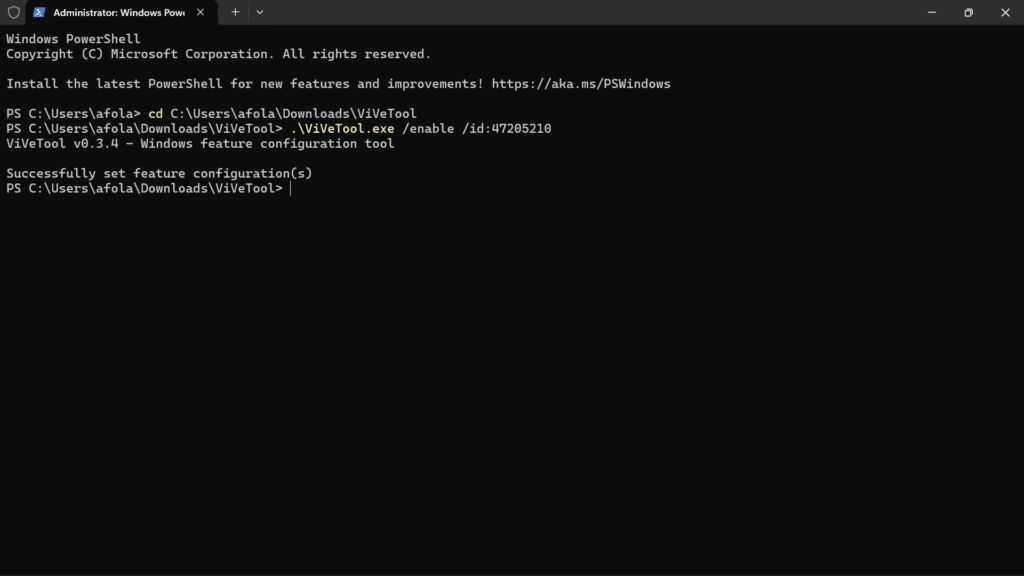
- Restart your computer.
When your PC boots back up, the new Start menu will greet you. Note that you’ll need at least the 24H2 update installed for this feature flag to be available. You may find that some guides reference longer command strings with multiple IDs, but as the feature approaches general availability, the single ID suffices for versions 24H2 and 25H2.
If you decide the new design isn’t for you, perhaps you find it occupies too much vertical space, you can revert by running the same command with /disable instead of /enable.
How to Customize Your New Start Menu Layout on Windows 11
Once enabled, the Start menu offers several customization avenues through the Settings app:
- Switch viewing modes: Click the dropdown in the All apps section to toggle between Category, Grid, and List views. Each offers distinct advantages: categories for organization, grid for density, and list for the classic Windows feel.
- Remove the Recommended section: If promoted Microsoft Store apps and recent files feel intrusive, you can eliminate this section entirely through Start menu settings or using Winaero Tweaker, reclaiming valuable space.
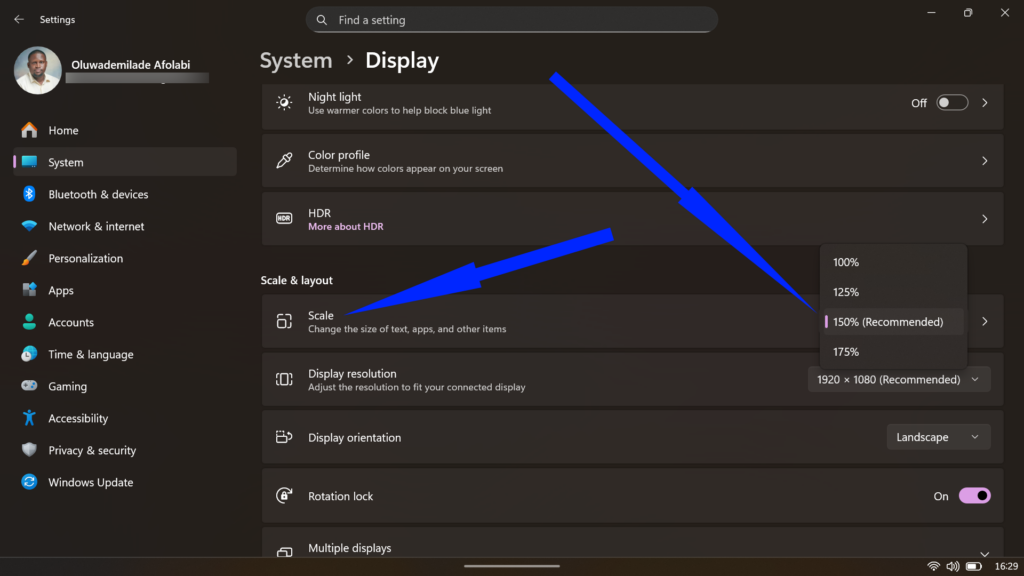
- Adjust display scaling: If the Start menu appears disproportionately tall, you can adjust it in Settings > System > Display scaling options. The menu uses scaled pixels to determine its dimensions, so a 1920×1080 display at 100% scale will show a much taller menu than a 4K display at 150% scale. Finding the sweet spot in your configuration can significantly improve visual balance.
Related:
Unfortunately, Microsoft hasn’t restored the manual resize handle that Windows 10 offered, nor can you reposition the taskbar to the top or sides, which are decisions the company justifies by citing animation flow concerns.
Conclusion
The new Start menu won’t revolutionize your Windows experience, but it meaningfully addresses legitimate grievances that have festered since Windows 11’s launch. Whether you access it through patient waiting or ViVeTool’s expedient intervention, it’s worth exploring what Microsoft has finally gotten right.