Windows 11 is a formidable operating system, but it arrives with a fair amount of cruft in the form of pre-installed applications, telemetry services, and background processes that can nibble away at your system resources. If your PC feels slower than it should, or you just want to claw back a bit of performance, debloating Windows 11 can make a noticeable difference. Here’s how to trim the excess and get your system running leaner and faster.
Remove Preinstalled Bloatware Apps in Windows 11
As we mentioned earlier, Microsoft bundles Windows 11 with an assortment of preinstalled applications, many of which you’ll likely never use. These range from game apps like the Xbox app to productivity apps like OneNote, all of which consume storage space and occasionally run background processes.
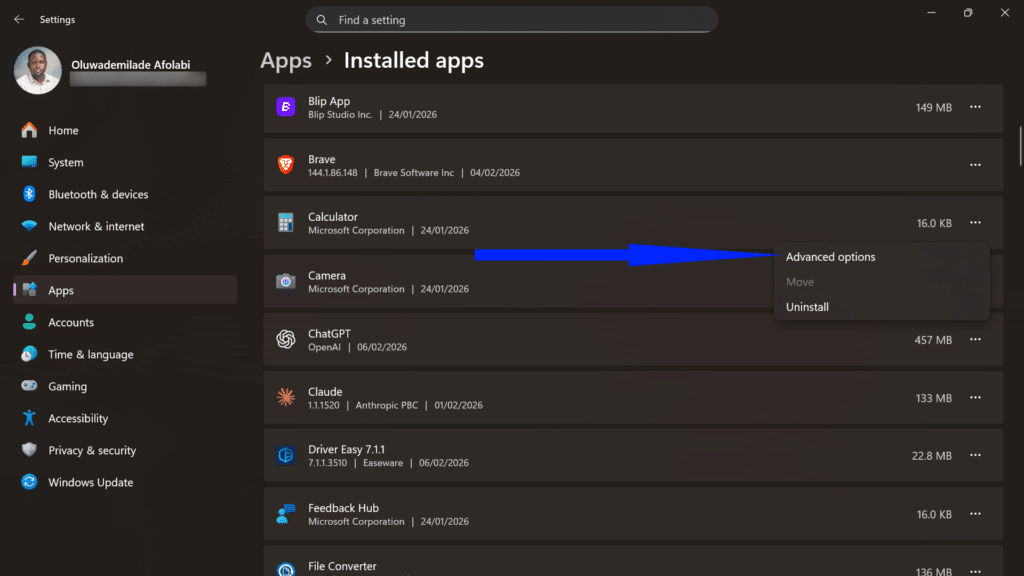
- Navigate to Settings > Apps > Installed apps to survey your system’s software inventory.
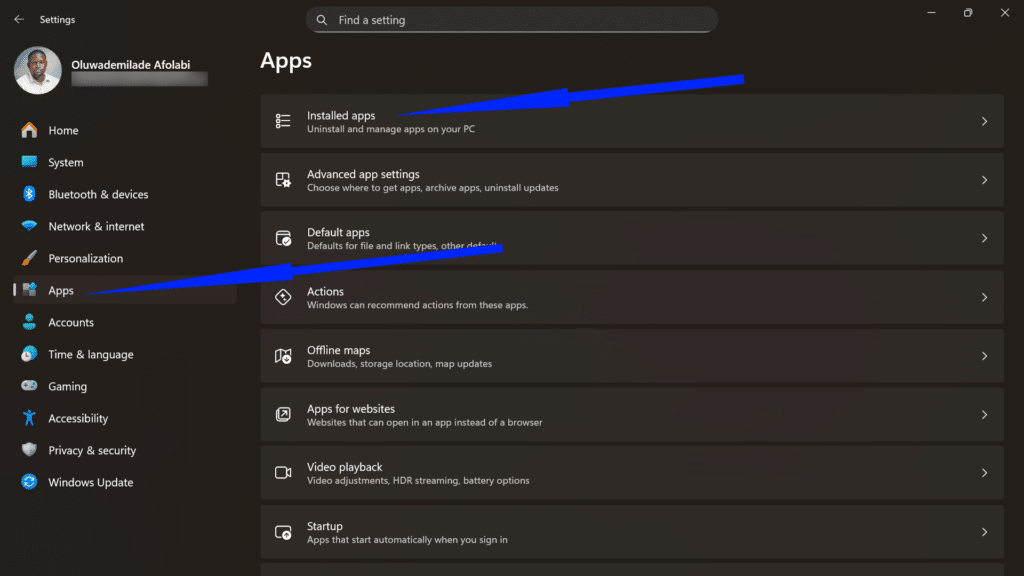
- Scroll through the list and identify applications you don’t recognize or need. Click the three-dot menu beside each unwanted app and select Uninstall.
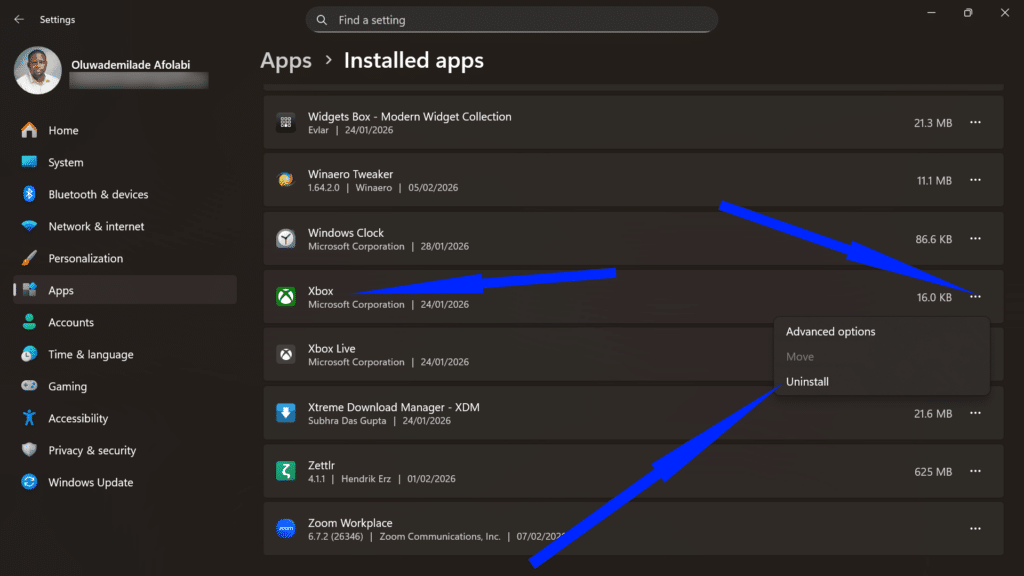
Exercise caution when removing essential system components, as this can impair functionality.
Use Win11Debloat to Automate Windows 11 Debloating
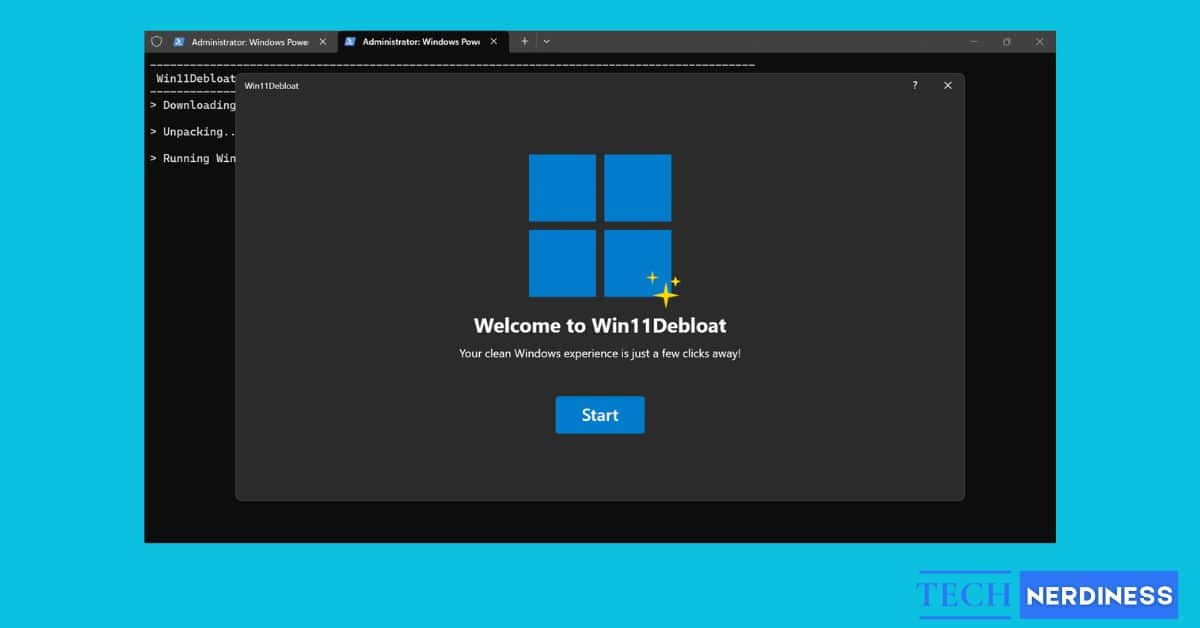
If you find manual curation too tedious, Win11Debloat (developed by Raphire) has emerged as a quintessential community favorite. It is a lightweight, open-source PowerShell script that automates the removal of over 80 unnecessary applications and optimizes dozens of system settings in one fell swoop.
To utilize this tool effectively:
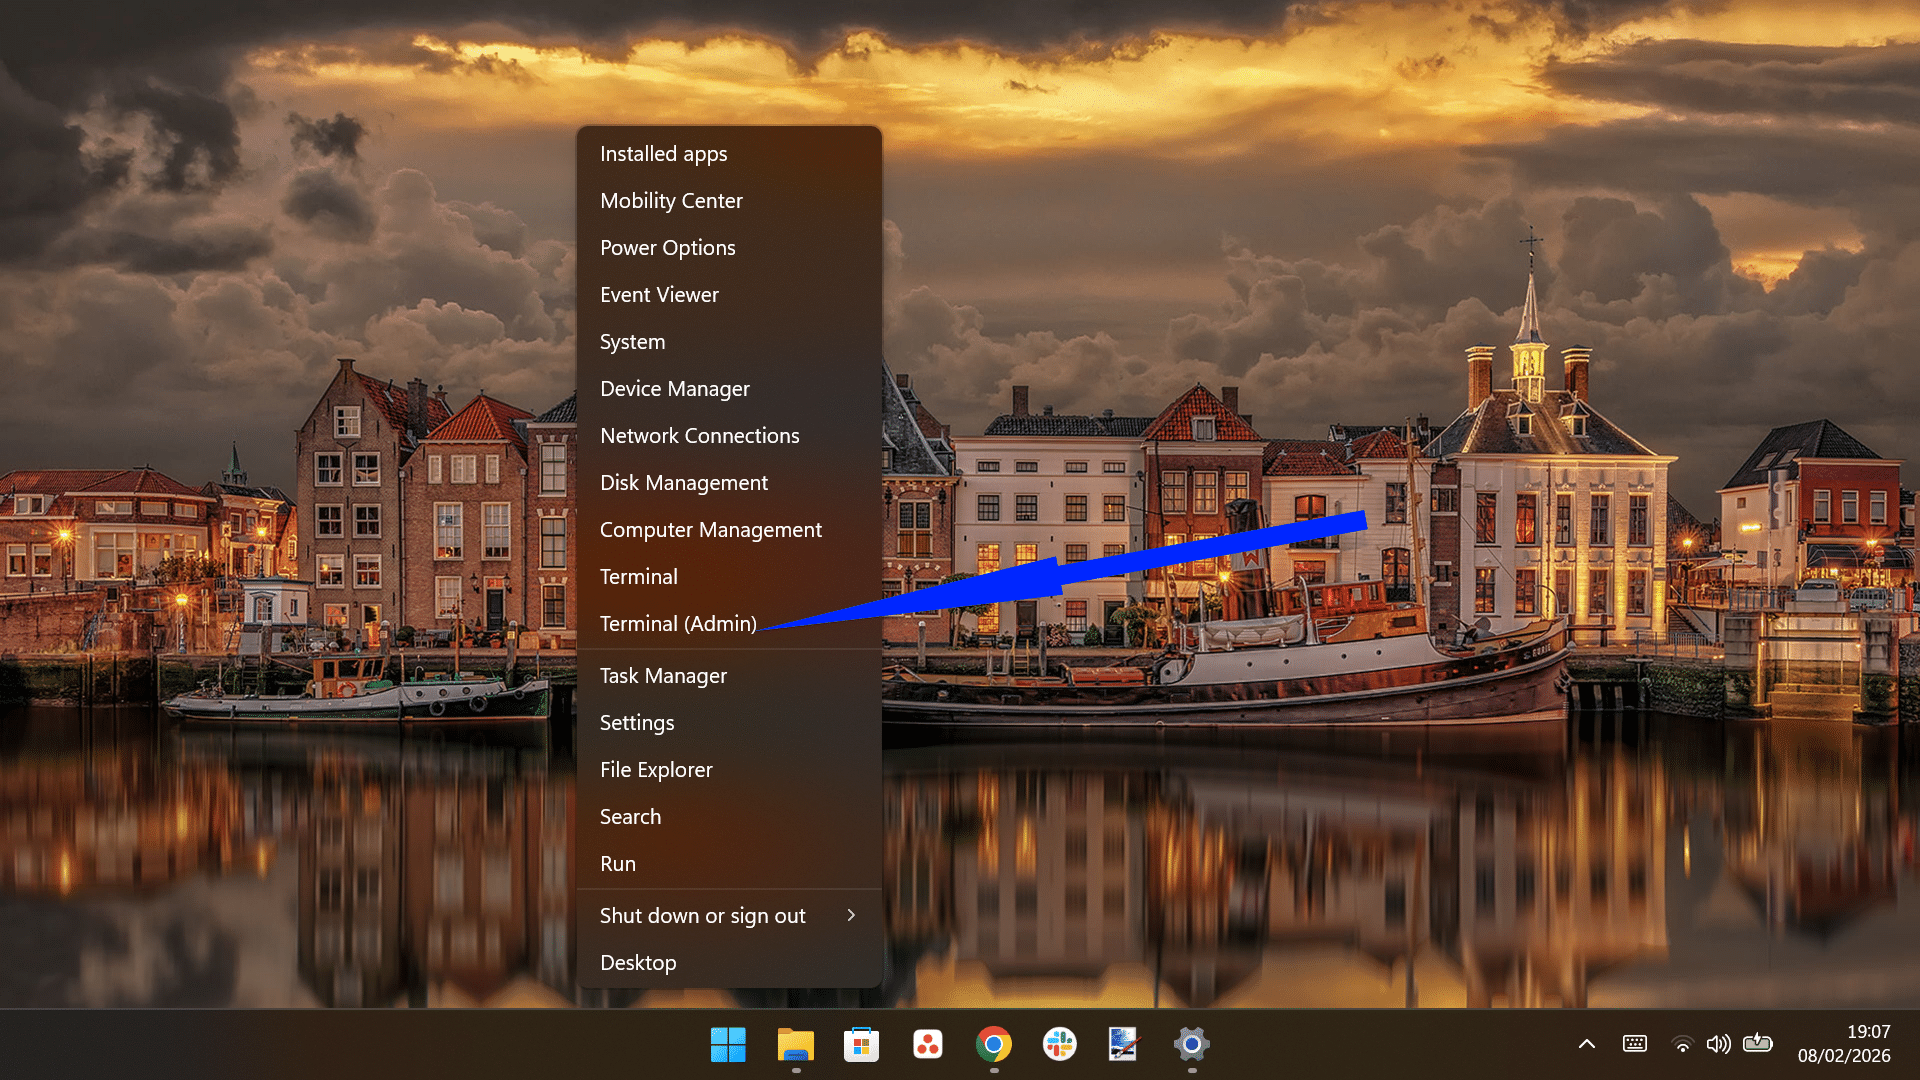
- Launch PowerShell as Administrator by right-clicking the Start button and selecting Terminal (Admin).
- Paste the following into the terminal and hit Enter:
& ([scriptblock]::Create((irm "https://debloat.raphi.re/")))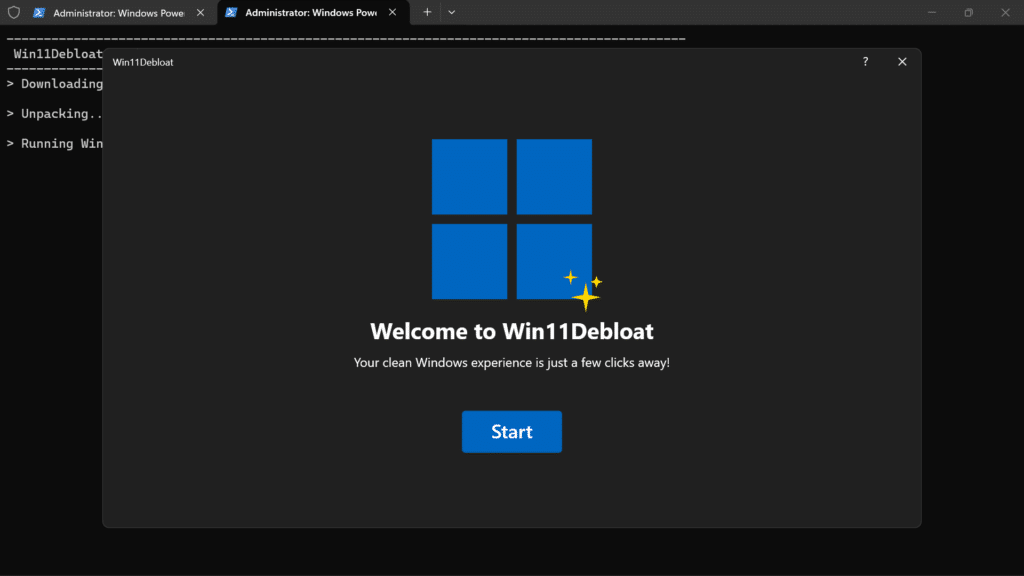
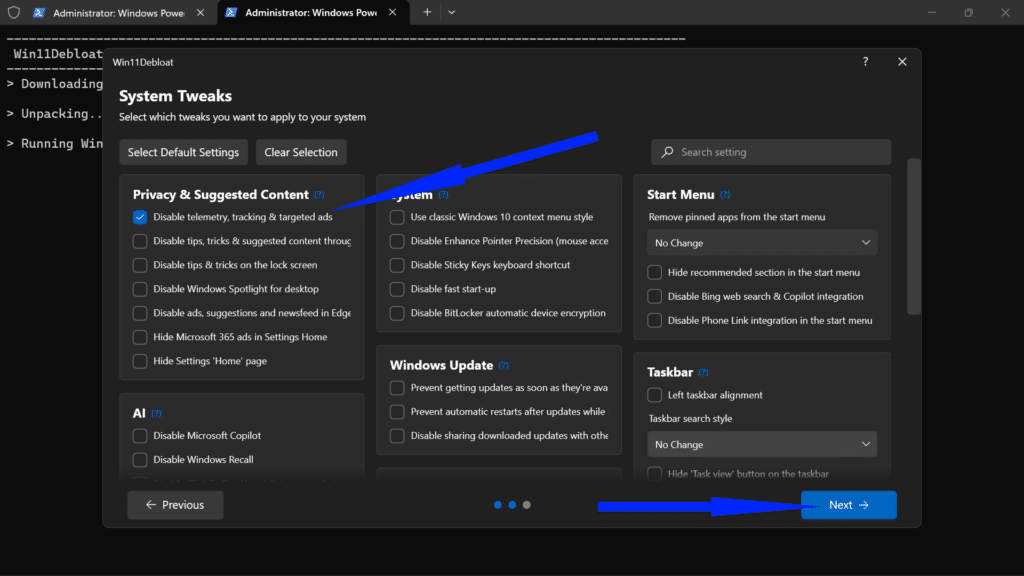
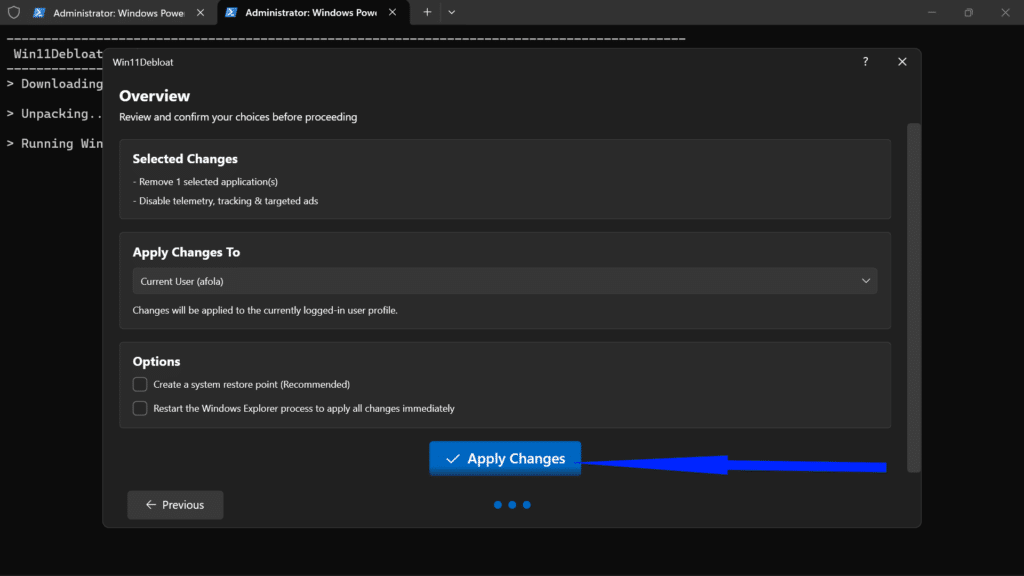
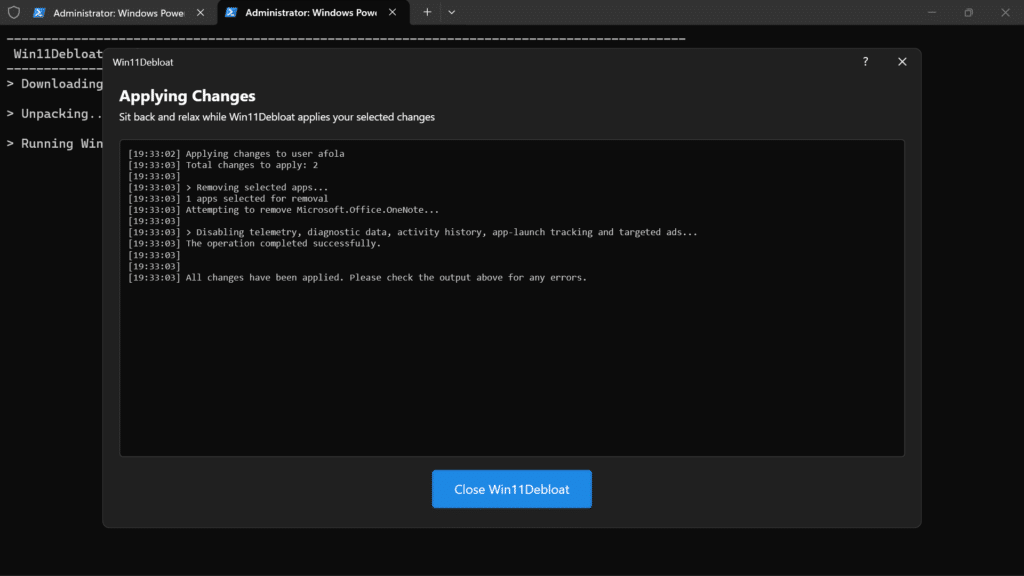
- By default, Win11Debloat launches a user-friendly graphical interface. From here, you can select specific “bloat” categories, such as Microsoft apps, third-party bundles (like TikTok or Instagram), and even specific AI features like Copilot or Windows Recall.
If you prefer the command line, adding the -CLI parameter allows for a menu-driven terminal experience, while the script’s ability to create a system restore point ensures you have a safety net before making deep registry modifications.
Turn Off Background Apps and Services to Free System Resources
Windows 11 allows several applications to run in the background, synchronizing data, checking for updates, and performing other tasks while ostensibly idle. This silent activity depletes both battery life and system resources.
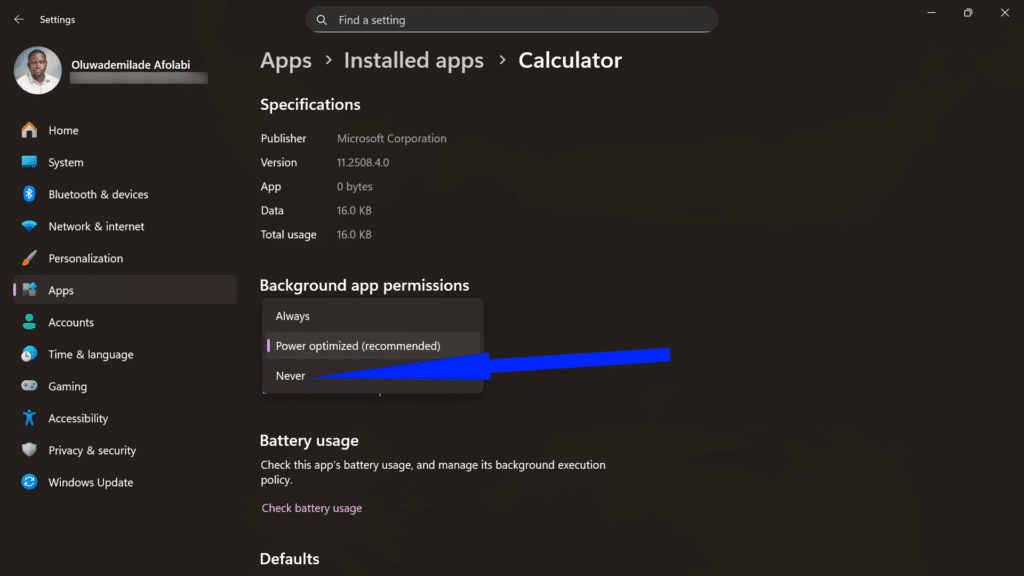
- Access Settings > Apps > Installed apps, then click on the three-dot menu beside a pre-installed application and select Advanced options.
- Under “Background app permissions,” choose Never to prevent the app from running when not actively in use. Repeat this process for applications that don’t require constant connectivity.
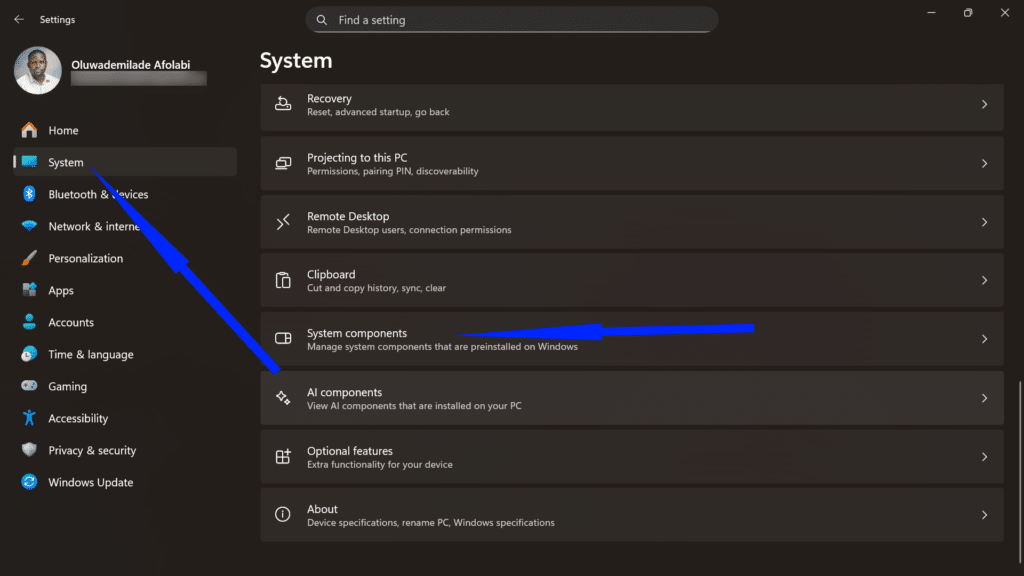
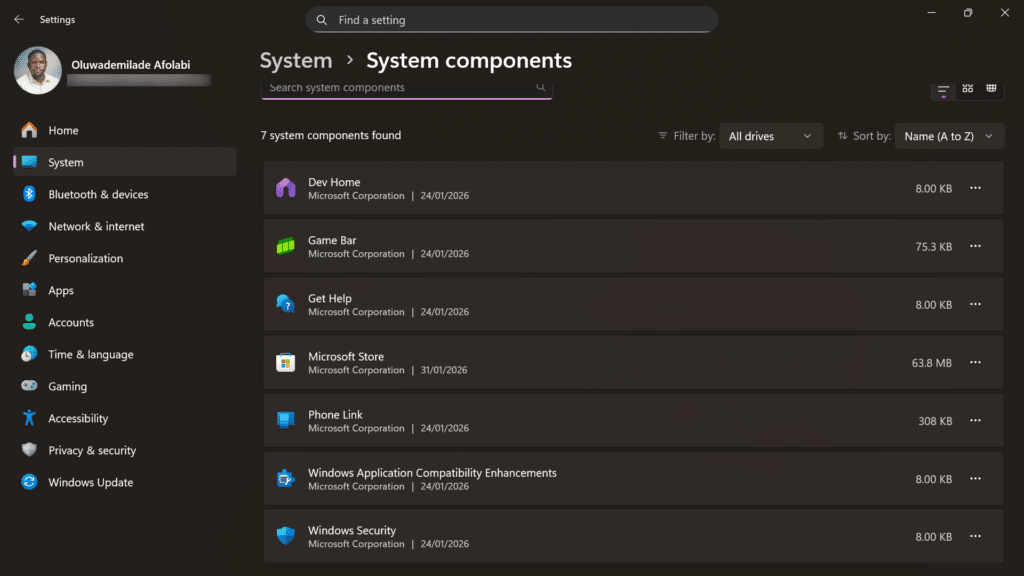
- Also, you can navigate through Settings > System > System Components as Windows 11 now categorizes certain essential tools separately.
For deeper optimization, access the Services application by typing Services in the search bar and pressing the Enter button. This reveals Windows services, some essential, others decidedly optional. Disable services like “Xbox Live Networking Service” if you don’t game, or “Print Spooler” if you’ve gone paperless by double-tapping on the item and under Startup type, select Disable. Click Apply and OK afterward.
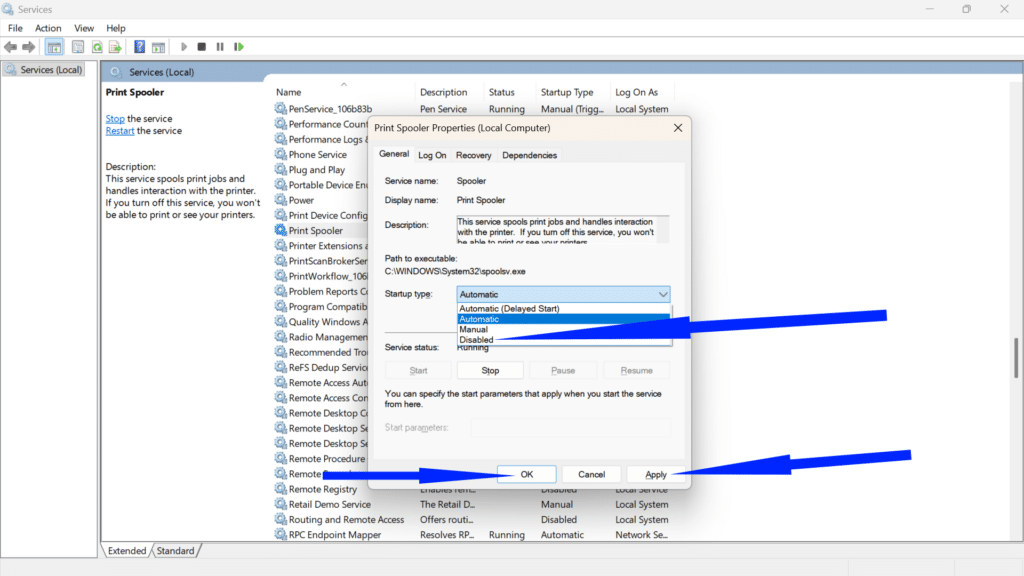
Proceed judiciously, as disabling critical services can destabilize your system.
Related: 10 Windows Accessibility Features Everyone Can Benefit From
Disable Unnecessary Startup Programs for Faster Boot Times
One of the most pernicious drains on system performance occurs during boot-up, when myriad applications launch themselves unbidden. Many programs configure themselves to start automatically, consuming precious RAM and processing power before you’ve even opened your first application.
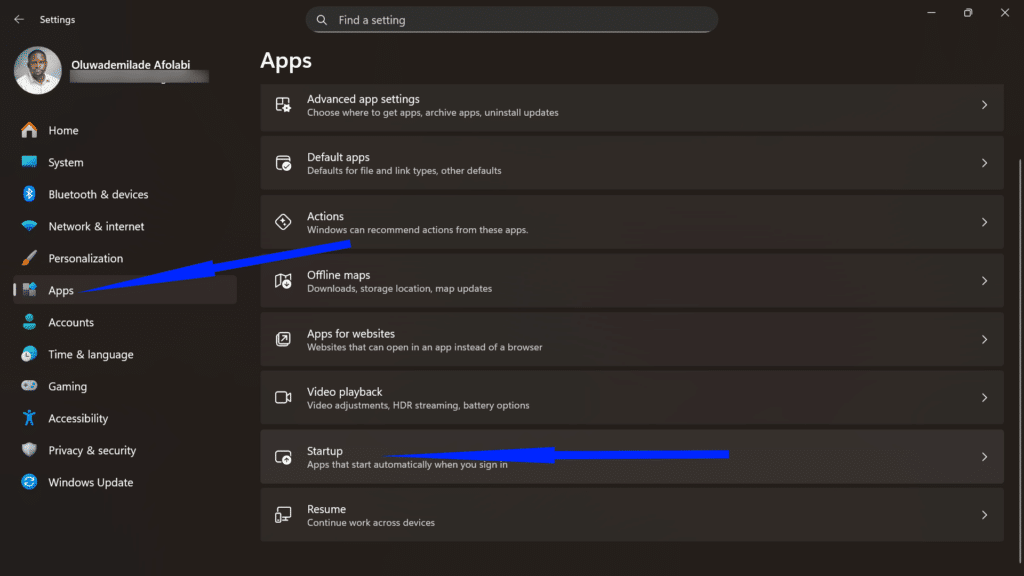
- Press Ctrl + Shift + Esc to open Task Manager, and select Startup apps in the left-hand sidebar. This view provides a comprehensive list of every application authorized to launch with Windows. Alternatively, for a cleaner interface, you can find these same controls under Settings > Apps > Startup.
- Review each entry carefully. You can safely Phone Link, Microsoft To Do, or Microsoft Teams often default to “Enabled,” even if you only use them once a week. Focus on the Startup impact column: High Impact apps are those that use more than 1 second of CPU time or 3MB of disk I/O during boot.
- Right-click the application you wish to stop and select Disable. Alternatively, select the app and click the “Disable” button in the top-right corner.
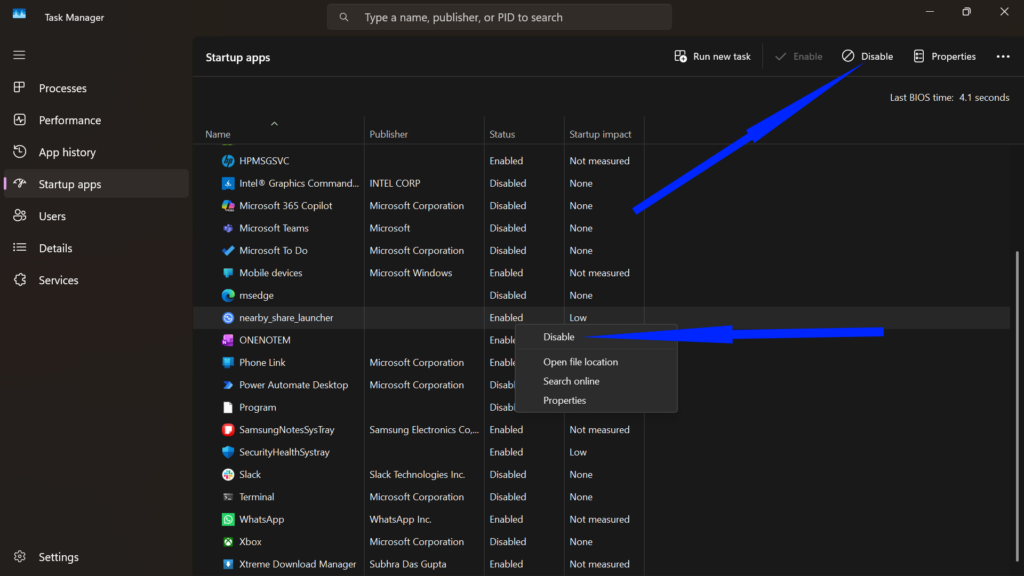
Don’t worry – This won’t break the program; it simply ensures the app only opens when you decide to click its icon.
Disable Visual Effects and Animations to Improve Performance
Windows 11’s aesthetic polish comes at a computational cost. The translucent windows, animated transitions, and dynamic shadows that characterize the modern interface consume GPU resources and RAM. They are sacrifices that aesthetic purists might accept, but if you’re a performance-minded user, you should reconsider.
- Open Settings > System > About, then click Advanced system settings.
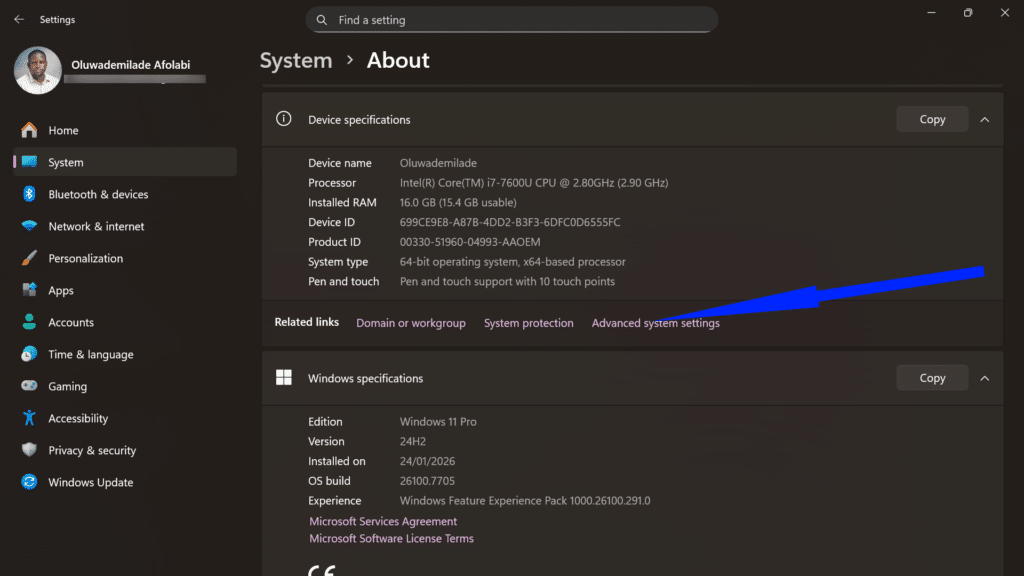
- Under the “Performance” section, click Settings.
- The “Visual Effects” tab presents a choice: select Adjust for best performance to eliminate all embellishments, or choose Custom to selectively disable specific effects while preserving those you find indispensable.

- Particularly impactful optimizations include disabling Animate windows when minimizing and maximizing, Show shadows under windows, and Slide open combo boxes.
These modest adjustments accumulate into noticeable performance gains, especially on older or resource-constrained hardware.
Related: 5 Useful Windows 11 Changes You Can Make with Winaero Tweaker
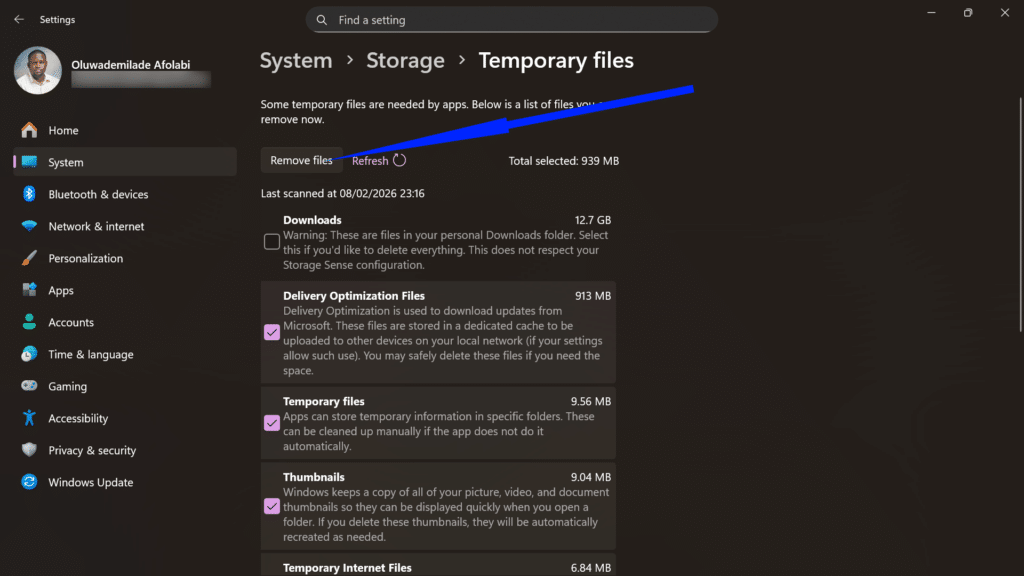
Clean Up Storage in Windows 11 Using Built-In Tools
Accumulated detritus, such as temporary files, cached data, and old Windows updates, gradually colonizes your storage, potentially impeding performance. Windows 11 includes robust cleanup tools that obviate the need for third-party solutions.
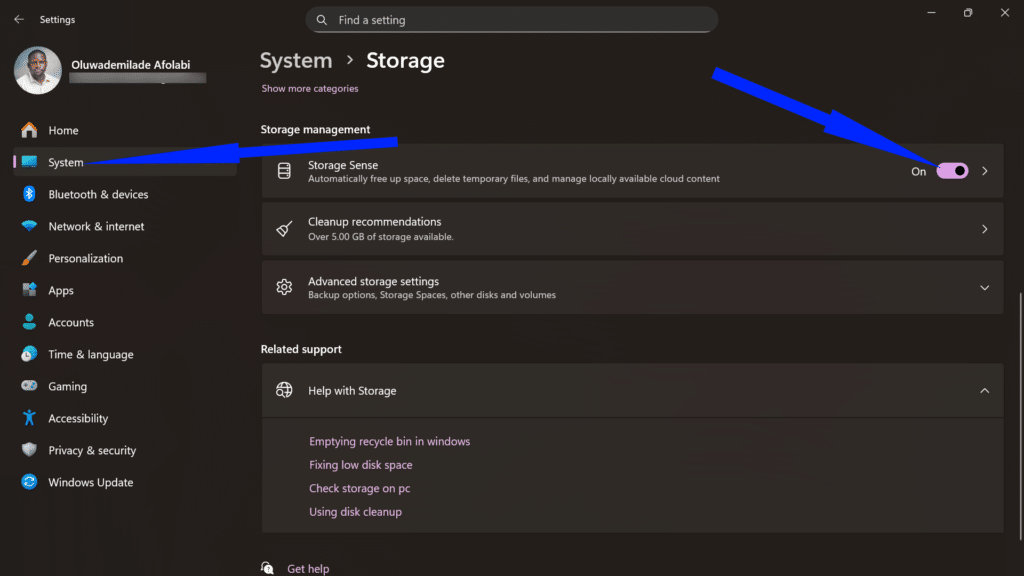
- Access Settings > System > Storage, where you’ll find a breakdown of storage consumption by category.
- Click Temporary files to reveal a treasure trove of deletable content like download folders, recycle bin contents, thumbnail caches, and previous Windows installations.
- Select the categories you wish to purge, then click Remove files.
- Enable Storage Sense to automate this process. Go further to configure how often Windows should run cleanup operations.
- You can specify retention periods for files in your recycle bin and Downloads folder, ensuring your system maintains its svelte profile without manual intervention.
- You can specify retention periods for files in your recycle bin and Downloads folder, ensuring your system maintains its svelte profile without manual intervention.
Disable Windows 11 Telemetry to Improve Privacy and Performance
“Bloat” isn’t always visible; sometimes it’s the constant stream of data being sent back to Redmond. This background chatter can cause micro-stutters during high-intensity tasks like gaming or video rendering.
To silence the telemetry:
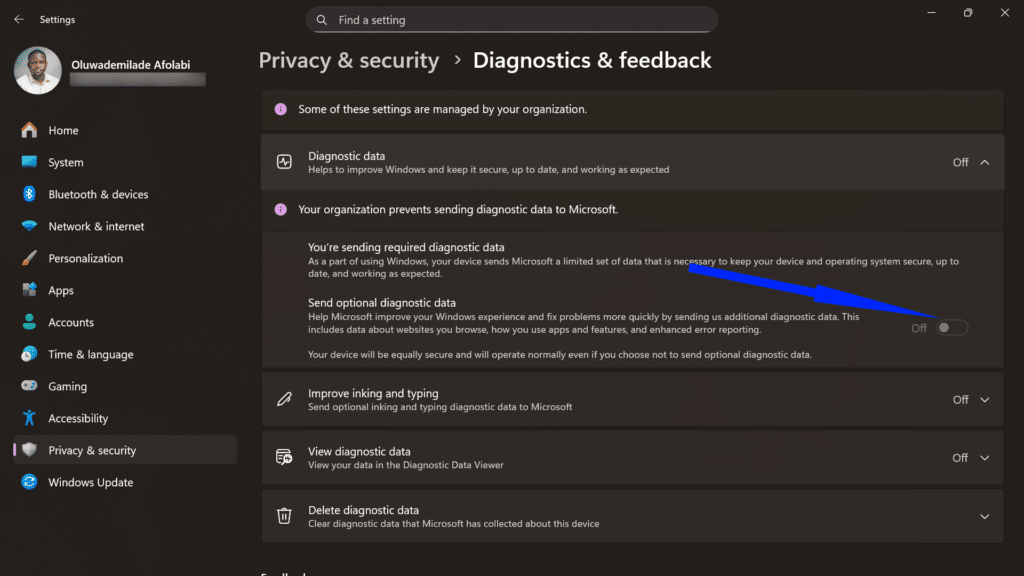
- Go to Settings > Privacy & security > Diagnostics & feedback.
- Toggle off Send optional diagnostic data.
By deactivating this feature, you reduce the CPU cycles dedicated to monitoring your behavior, effectively redirecting that power back to your primary applications.
Conclusion
Unlike risky registry modifications or third-party debloating scripts, these native Windows tools allow you to experiment safely. If disabling a service causes unexpected issues, simply re-enable it. Start with the most impactful changes, such as startup programs and visual effects, and then gradually refine your configuration based on your specific needs and hardware capabilities.
Your PC will reward your efforts with faster boot times, snappier application launches, and improved overall responsiveness.
No. All the methods outlined in this guide use native Windows tools and settings that Microsoft provides for user customization. You’re not modifying system files illegally or using unauthorized software. You’re simply adjusting preferences and removing optional applications. Your warranty remains intact, and you’re operating well within Microsoft’s terms of service.
Absolutely. One of the advantages of these debloating methods is their reversibility. You can re-enable startup programs, reinstall apps from the Microsoft Store, reactivate services, and restore visual effects at any time. If you use Win11Debloat, it creates a system restore point before making changes, allowing you to roll back your entire system to its previous state if necessary.
The gains vary depending on your hardware and how bloated your system was initially. On older or budget hardware with limited RAM (4-8GB), you might see dramatic improvements such as boot times reducing by 30-50% and noticeably snappier responsiveness. On newer, high-end systems, the improvements will be more modest but still worthwhile, particularly in terms of reduced background CPU usage and freed storage space.
Win11Debloat is open-source, actively maintained, and widely trusted within the Windows enthusiast community. However, it makes more aggressive changes than manual methods, including registry modifications. If you’re comfortable with technology and want comprehensive debloating, it’s an excellent tool, especially since it creates restore points automatically. If you prefer maximum control and transparency, manual methods let you understand exactly what you’re changing.
Not if you’re careful. Removing bloatware apps and disabling unnecessary startup programs won’t interfere with Windows Update or Microsoft Defender. However, disabling certain services indiscriminately could impact update functionality. Stick to obviously optional services (like Xbox-related services if you don’t game) and avoid touching anything with “Update,” “Security,” or “Defender” in its name unless you know exactly what you’re doing.
This depends on your privacy preferences. Disabling optional diagnostic data reduces background processes and reclaims some system resources without compromising functionality. However, some users find that sharing diagnostic data helps Microsoft identify and fix bugs more quickly. The performance impact of telemetry is generally minimal on modern hardware, so this decision should be based primarily on your privacy concerns rather than performance expectations.
After your initial debloating, maintenance becomes minimal. Enable Storage Sense to handle cleanup automatically, and periodically (every few months) review your startup programs and installed apps, as new software installations can re-introduce bloat. Windows Updates occasionally reinstall certain apps or re-enable services, so a quick audit after major feature updates is wise.