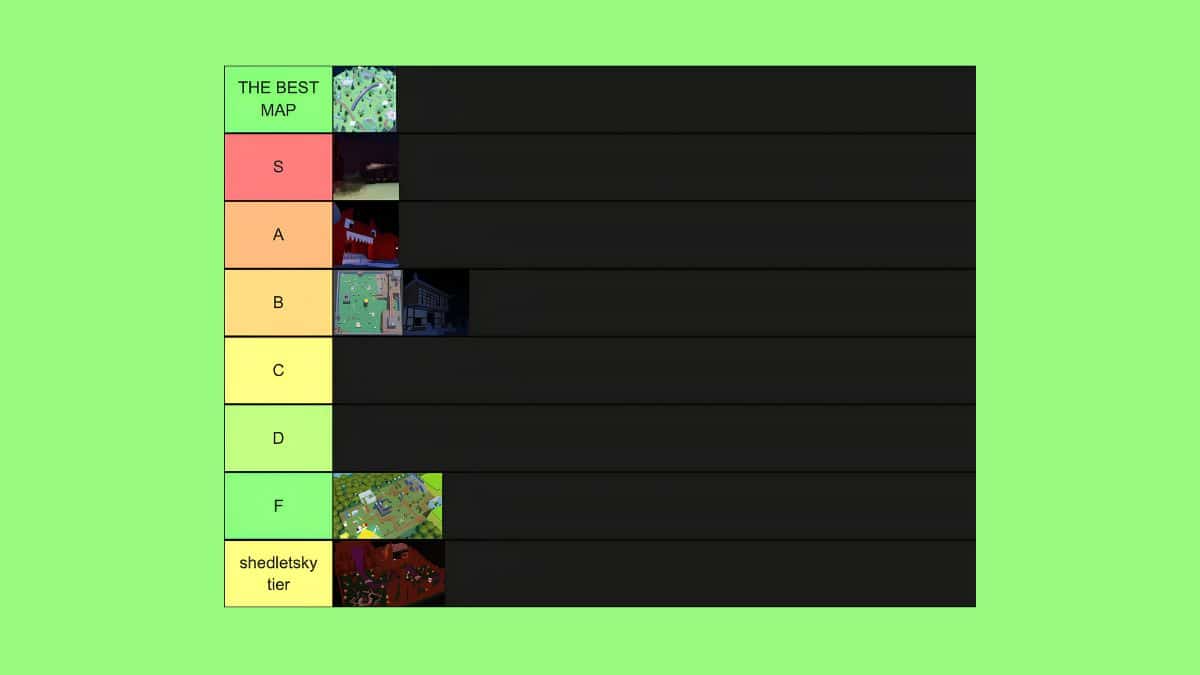
Forsaken has grown well beyond its original handful of arenas; the roster sits at 17 core maps in public matchmaking, not counting cosmetic variants or the VIP-only tournament layout. Where you land determines almost everything about how a round plays out, from how far survivors can run before a killer catches a sightline to whether a hazard tile turns into a free kill. If you have already sorted out who to pick with the Forsaken killer and survivor tier list, the map you spawn into is really the other half of the equation.
A strong killer pick on a cramped, dead-end-heavy map plays completely differently than the same killer on an open field with generators scattered across the horizon. Survivors feel this too. A four-person squad that thrives on tight kitchen loops can fall apart the moment they are dropped somewhere with no cover for fifty studs in any direction. That variance is part of what keeps Forsaken interesting round to round, but it also means some maps are simply better designed than others.
Below is every core Forsaken map ranked from best to worst, with the reasoning behind each placement.
How We Ranked Every Forsaken Map
There is no official developer balance sheet for Forsaken maps, and the community itself is split on plenty of these placements, so treat this as an informed read rather than gospel. The ranking weighs four things: how fair the map plays for both killers and survivors, how much the hazard tiles actually add to decision-making rather than just being scenery, how the size holds up against the standard five-generator objective, and how much identity the map has, since a handful of these have earned their own cosmetic variants, a reliable sign the community keeps coming back to them.
One map is left off this list entirely. SFOTH is a VIP-server-only layout built for tournaments, and it ships with zero generators, so it does not represent a standard match and does not belong in a ranking built around normal play.
S Tier: The Best Maps in Forsaken
1. Yorick’s Resting Place
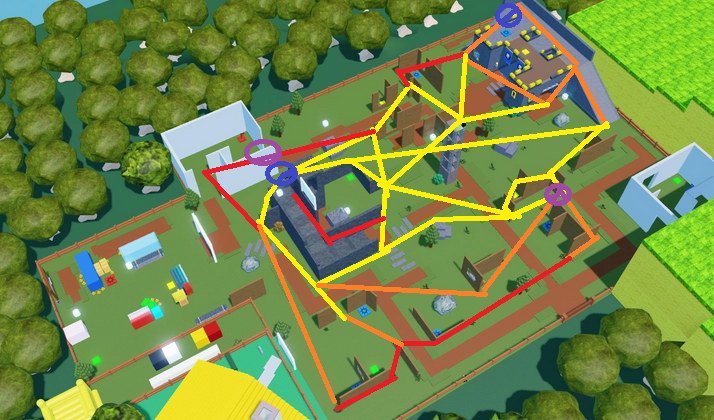
- Size: Medium, forest and cliffside layout with a graveyard and temple
- Hazard: Poison rivers that apply damage-over-time debuffs to anyone who crosses
- Why it’s S tier: The poison river forces real decisions instead of just existing as a visual gimmick. Survivors have to weigh whether crossing is worth the risk, and killers can use it to cut off a chase without needing to be fast enough to catch up on foot. The graveyard and temple dressing also gives it more personality than most of the roster, and there are no widespread complaints about it favoring one side too heavily.
2. Planet Voss
- Size: Small to medium, flat alien terrain with scattered fortresses and crashed spaceships
- Hazard: None direct, but the compact footprint keeps chases short and tense
- Why it’s S tier: Planet Voss earns its spot on identity alone, the alien setting is unlike anything else in the game, but it backs that up with solid design. The small size means matches move quickly for both roles, and the density of items keeps survivors incentivized to actually explore instead of camping one generator. It has also picked up an Aurora winter variant, which tends to happen only to maps the developers know players already like.
3. Bloodfell Manor
- Size: Large, Victorian mansion with a yard, library, kitchen, and multiple staircases
- Hazard: None reported
- Why it’s S tier: Bloodfell Manor is the closest thing Forsaken has to a genuinely balanced push-and-pull map. The multi-room layout gives survivors real evasion options, but the staircases work both ways, letting a killer cut off an escape route just as easily as a survivor uses one to break a sightline. Add in the Nosferatu-adjacent atmosphere and this is one of the few maps where neither side feels like it is fighting the layout itself.
A Tier: Strong, Well-Rounded Maps
4. Familiar Ruins
- Size: Medium, built around a main structure, a hill, and a lava lake
- Hazard: Lava cracks that apply burning damage, punishing enough to be lethal if ignored
- Why it’s A tier: This is a Flood Escape 2 crossover map, and the collaboration shows. The lava hazard is one of the few in the game that can genuinely end a survivor’s run if they misjudge it, which raises the stakes in a way most maps do not attempt. It also has a Classic variant that swaps the lava for a poisoned water hazard, giving it more replay variety than most of the roster. It sits just below S tier mainly because the collab-driven layout is smaller and less flexible than the top three.
5. Ultimate Assassin Grounds
- Size: Large, dojo-and-lake arena with cave systems and an obstacle course
- Hazard: Lake and waterfall water that applies slowness debuffs
- Why it’s A tier: The cave systems give survivors legitimate places to break line of sight, and the water slowness hazard means crossing the lake is a genuine gamble rather than a shortcut. A Sakura-themed variant has also been added, another sign this is one of the more beloved layouts. The one knock against it is size. The map is large enough that early-game tension can dip before the first chase actually starts.
6. Pirate Bay
- Size: Medium, shoreline structures with a two-story house and boats
- Hazard: Water puddles that apply bleeding effects
- Why it’s A tier: Pirate Bay’s bleed-stacking water hazard is one of the more distinct mechanics in the game, since it punishes careless movement rather than just being a slow tile. The multi-level structures give both sides options, though the generator spread is a little tighter than other maps its size, which can shorten matches more than some players want.
7. Glass Houses
- Size: Large, forested map with glass-topped mountains and a red bridge
- Hazard: None, but the open, transparent structures remove most stealth options
- Why it’s A tier: Glass Houses is unapologetically killer-sided by design. The open terrain and transparent buildings mean survivors can be spotted from across the map, which is exactly the point. It is not a balanced map, but it is a deliberately different one, and the Wasteland variant with destroyed structures shows the developers are still iterating on it rather than leaving it untouched.
B Tier: Solid But Situational
8. Brandon6875935’s Place
- Size: Large, open terrain with a castle, cave slope, and wooden walls
- Hazard: None reported
- Why it’s B tier: One of the originals, and the tall structures give survivors real looping options around the castle. The problem is that the open terrain rewards whichever side has better positioning more than it rewards skill, which can make matches feel less consistent than the maps ranked above it. It also has yet to receive a cosmetic variant, unusual for a map this old.
9. C00L Carnival
- Size: Small, packed with attractions, a Ferris wheel, and game booths
- Hazard: None direct, but the density keeps terror-radius overlap constant
- Why it’s B tier: The compact, colorful layout makes for relentless chases since there is rarely a stretch of the map where a killer’s terror radius isn’t in play. Some players love that intensity, others find it claustrophobic, which is exactly the kind of split that keeps a map out of the top tiers. The Bluu palette-swap variant is a nice touch but doesn’t change the underlying pacing.
10. Underground War
- Size: Large, two-layer map with a surface half and an underground level
- Hazard: None direct, though the vertical layers muffle audio cues between floors
- Why it’s B tier: Underground War has the most distinct structure in the game and a Memories variant to prove how popular it is, but it also has a real balance problem. Survivors get far more escape routes and generator options on the surface, while killers are stuck with underground-only entrances that most survivors simply avoid using against them. It’s a fun map to look at and a frustrating one to play as a killer, which is why it lands in the middle rather than near the top.
11. Horror Hotel
- Size: Small, indoor corridors with multiple rooms and few dead ends visible from outside
- Hazard: None reported
- Why it’s B tier: The maze-like interior is genuinely tense to navigate, but the same dead ends that let survivors hide can just as easily trap them. It plays more like a coin flip than a skill test, which keeps it out of A tier despite the atmosphere doing a lot of heavy lifting.
C Tier: Below Average
12. The Tempest
- Size: Large, open temple ruins with pillars, a central statue, and towers
- Hazard: None reported
- Why it’s C tier: The open, exposed layout means survivors are easy to spot from long range, and there is little in the way of hazard or elevation to give either side a strategic edge. It looks striking, but the gameplay underneath is thinner than most of the roster.
13. Work at a Pizza Place
- Size: Large, a burned-out restaurant with a dump and supplier area
- Hazard: None reported
- Why it’s C tier: The multiple building exits are meant to give survivors options, but in practice the sheer size makes the map disorienting more often than it makes it strategic. Kitchen loops help, but they are not enough to carry a layout this sprawling.
14. Natural Disaster Island
- Size: Large, a volcanic eruption setting built as a Natural Disaster Survival crossover
- Hazard: None reported beyond the volcanic theme itself
- Why it’s C tier: The crossover concept is a fun idea on paper, but the indoor pockets that are supposed to break sightlines don’t add up to much strategic depth compared to what maps like Familiar Ruins or Ultimate Assassin Grounds do with their own collaborations.
D Tier: The Weakest Maps in Forsaken
15. Beach House Paradise
- Size: Large, resort setting with a fountain, hotel, and shops
- Hazard: A fountain that applies a slowness debuff
- Why it’s D tier: The resort theme is appealing, but the open layout leaves survivors with almost no cover once a chase starts. Loops are scarce across the map, and the single fountain hazard isn’t enough to compensate for how exposed the rest of the layout is.
16. Cake Factory
- Size: Medium, an indoor factory with cramped machinery rooms
- Hazard: None reported, though the tight layout creates its own pressure
- Why it’s D tier: The management and lounge areas give survivors some repair pockets to work with, but the map has a well-documented performance problem, with players consistently reporting severe lag on this layout specifically. No amount of clever loop design makes up for a map that struggles to run smoothly.
17. Classic Battlegrounds
- Size: Small, a two-segment map with a cave, sewers, and a temple
- Hazard: Killer-only teleportation portals
- Why it’s D tier: The teleportation portals sound interesting on paper, but in a map this small they tend to feel like an ambush tool rather than a strategic option, since survivors have almost no way to play around them. Combined with the tight, sewer-heavy layout, it ends up feeling less like a designed arena and more like a leftover from an earlier version of the game.
Quick Reference Maps Tier Table
| Tier | Maps |
|---|---|
| S | Yorick’s Resting Place, Planet Voss, Bloodfell Manor |
| A | Familiar Ruins, Ultimate Assassin Grounds, Pirate Bay, Glass Houses |
| B | Brandon6875935’s Place, C00L Carnival, Underground War, Horror Hotel |
| C | The Tempest, Work at a Pizza Place, Natural Disaster Island |
| D | Beach House Paradise, Cake Factory, Classic Battlegrounds |
Wrapping Up
Forsaken’s map roster has grown steadily, and with the Azure update teased for later in 2026 alongside talk of a Military Base and other unreleased layouts, this ranking will not stay static for long. New maps tend to launch strong on novelty alone before the community works out where they actually balance, so it is worth revisiting a list like this every few major patches rather than treating it as fixed.
Crossroads is widely considered the best map. It is the community favorite by a large margin, the most balanced map for both killers and survivors, and the map most used in tournament play. Its three distinct loop zones reward skill on both sides.
Crossroads again. It has clear sightlines, a simple and familiar classic-Roblox layout, and balanced gameplay, making it the least intimidating map for new players learning either role.
Natural Disaster is the community’s least favorite, with randomized hazards that make matches feel chaotic and luck-dependent. It heavily favors survivors and can produce wildly different outcomes from the same skill level, which is why it ranks lowest here.
Not directly in standard matchmaking. Maps are selected through a weighted random system, with newer maps slightly more likely for their first two weeks. The reliable way to play a specific map is to set up a private server with friends.
Happy Home and Hospital favor killers, thanks to tight corridors and indoor spaces ideal for patrolling and teleport abilities. On these maps, survivors should focus on generator efficiency rather than extended chases.
Sword Fight Arena and Natural Disaster favor survivors. The open arena gives survivors distance and sightlines, while Natural Disaster’s chaos and size make it nearly impossible for killers to patrol effectively.
The lowest-variance maps between skilled players are Crossroads, Forest, and Sword Fight Arena, which reward consistent execution. The highest-variance maps, Asylum, Hospital, and Natural Disaster, have a higher skill ceiling but less predictable outcomes.
Map knowledge is the least glamorous and highest-return skill in Forsaken. The top-tier maps like Crossroads and Asylum reward players who put in the time to learn their loops and escape routes, while the bottom-tier maps come down more to luck than mastery. Learn which side each map favors, match your character to the layout when you can, and you will win rounds that map-blind players lose before they even start running.