There is something reassuring about having a Windows installer sitting on a USB drive, ready to go. It feels like having a spare tire. You hope you never need it, but when things go sideways, you are very glad it is there. The Windows 11 Media Creation Tool is Microsoft’s official way to make that happen, and it is quite straightforward once you know where to click.
Here is how to wield this tool to create bootable media or secure a standalone ISO file.
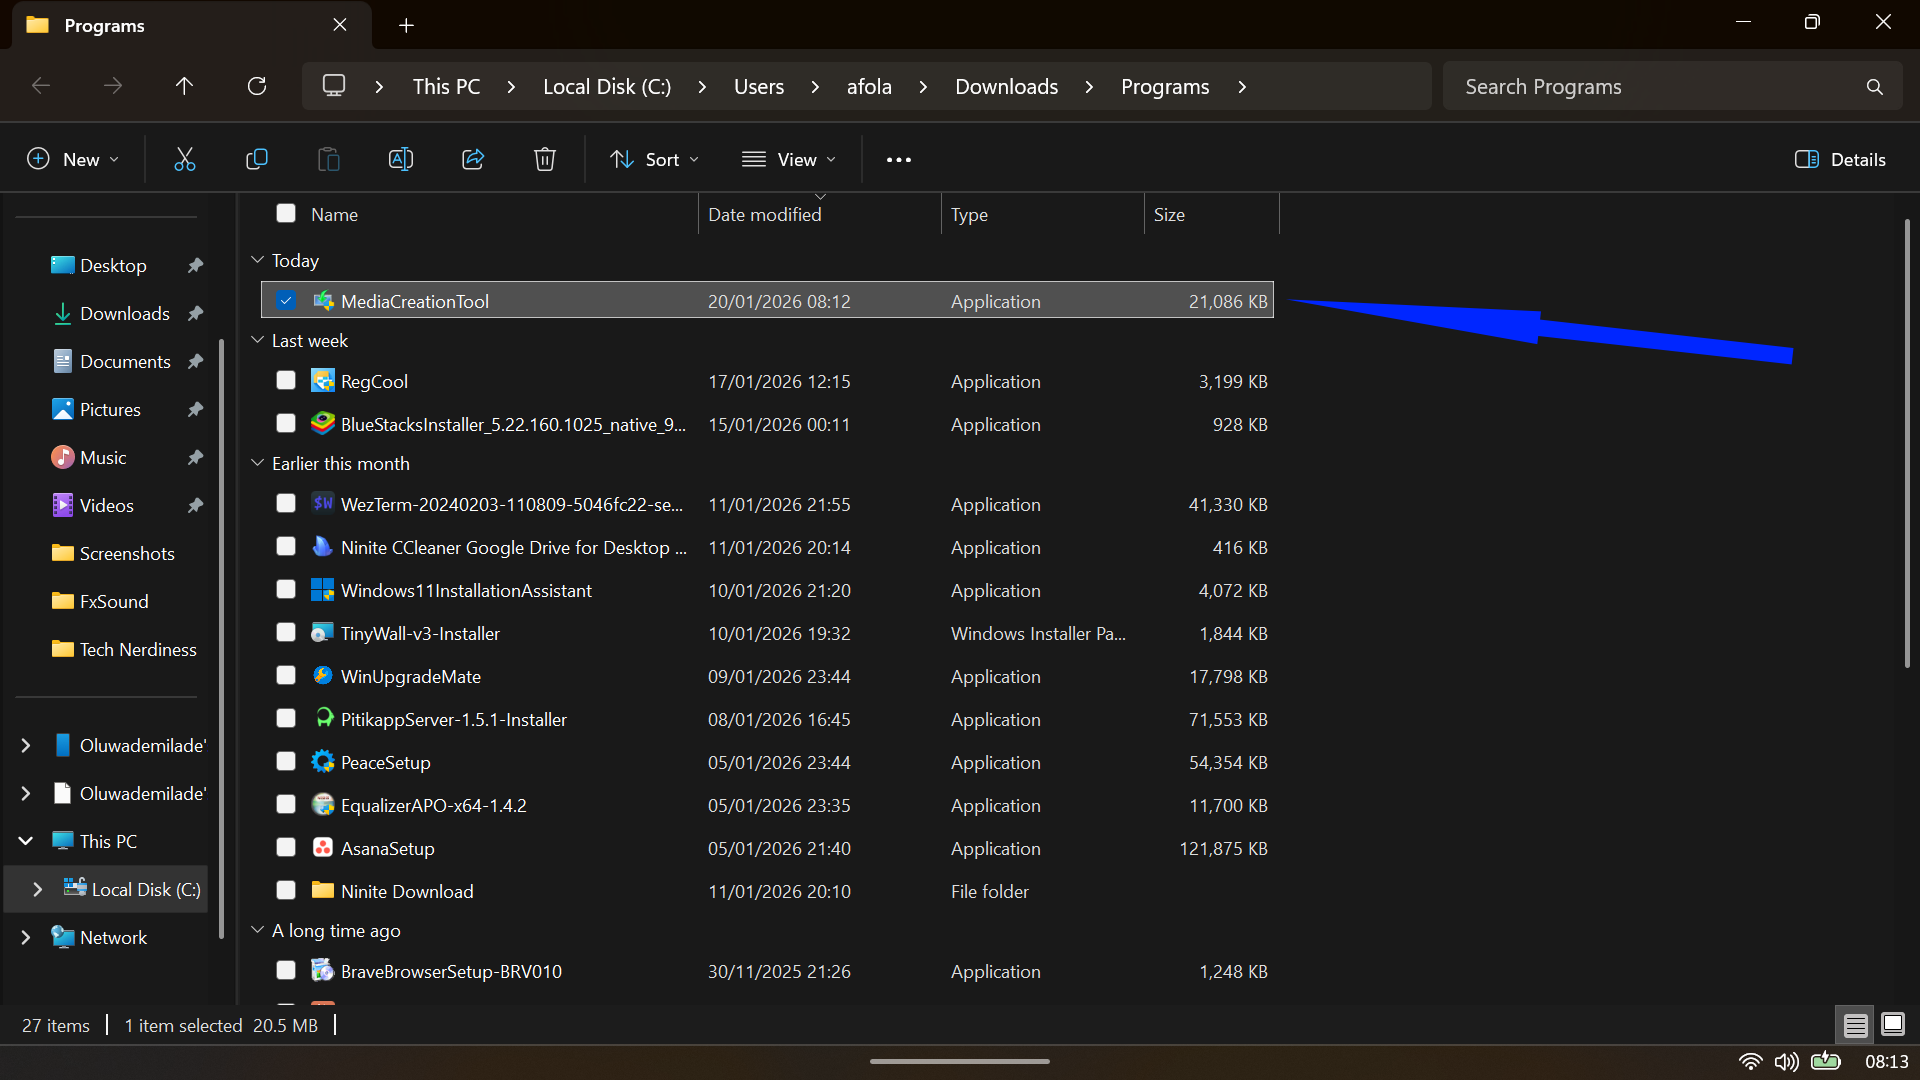
Download and Prepare the Windows 11 Media Creation Tool
Before embarking on your installation journey, you’ll need to acquire Microsoft’s Media Creation Tool and verify your system’s readiness.
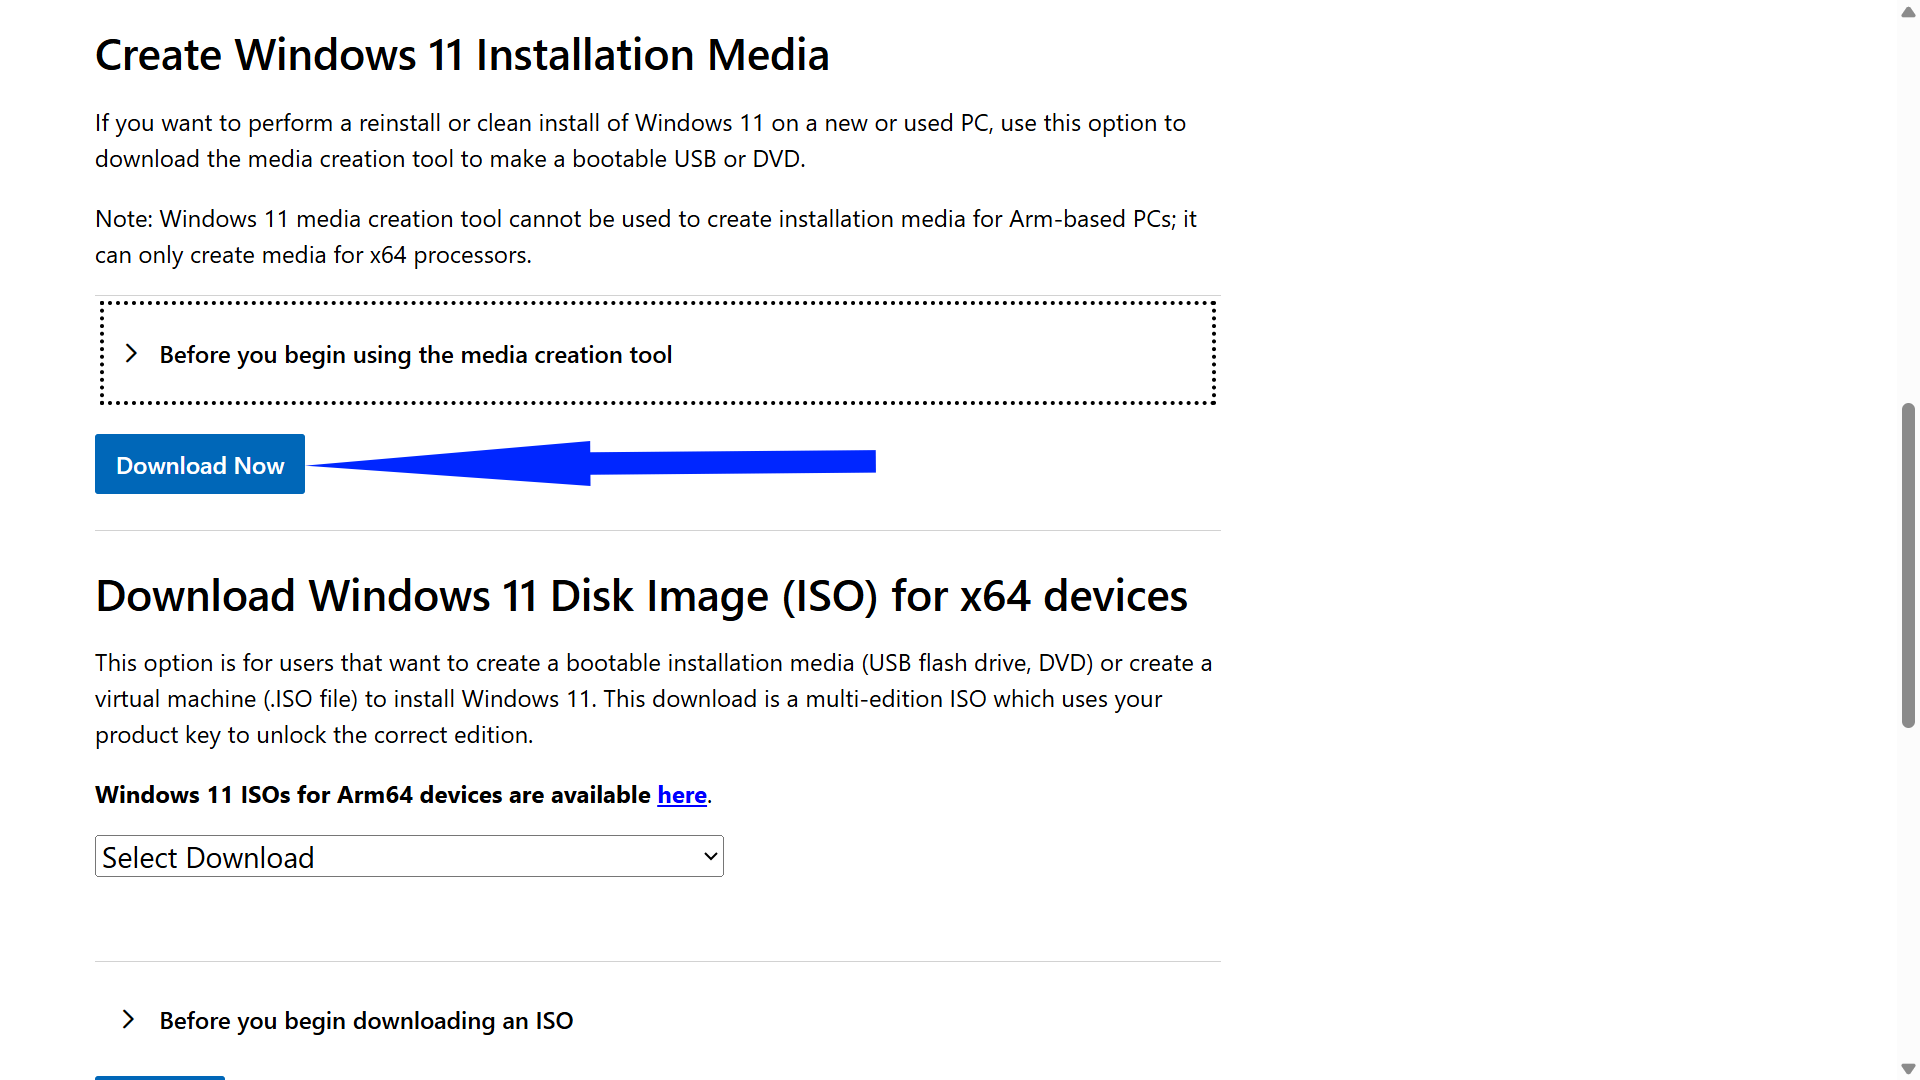
- Navigate to Microsoft’s official Windows 11 download page.
- Locate the “Create Windows 11 Installation Media” section.
- Click the Download Now button to retrieve the mediacreationtool.exe file—a compact executable that belies its considerable utility.
The prerequisites are straightforward but non-negotiable. Your working computer needs Windows 10 or 11, administrator privileges, and a stable internet connection capable of downloading several gigabytes of data. Storage-wise, ensure at least 8GB of free space on your system drive to accommodate temporary installation files.
Here’s where preparation becomes paramount: if you’re creating USB installation media, you’ll need a flash drive with at least 8GB of capacity. Consider this a scorched-earth operation—any existing files will be obliterated during the process. If you’re a DVD enthusiast, a blank disc and a functional DVD burner suffice, though this route demands compatible hardware on both the creation and installation machines.
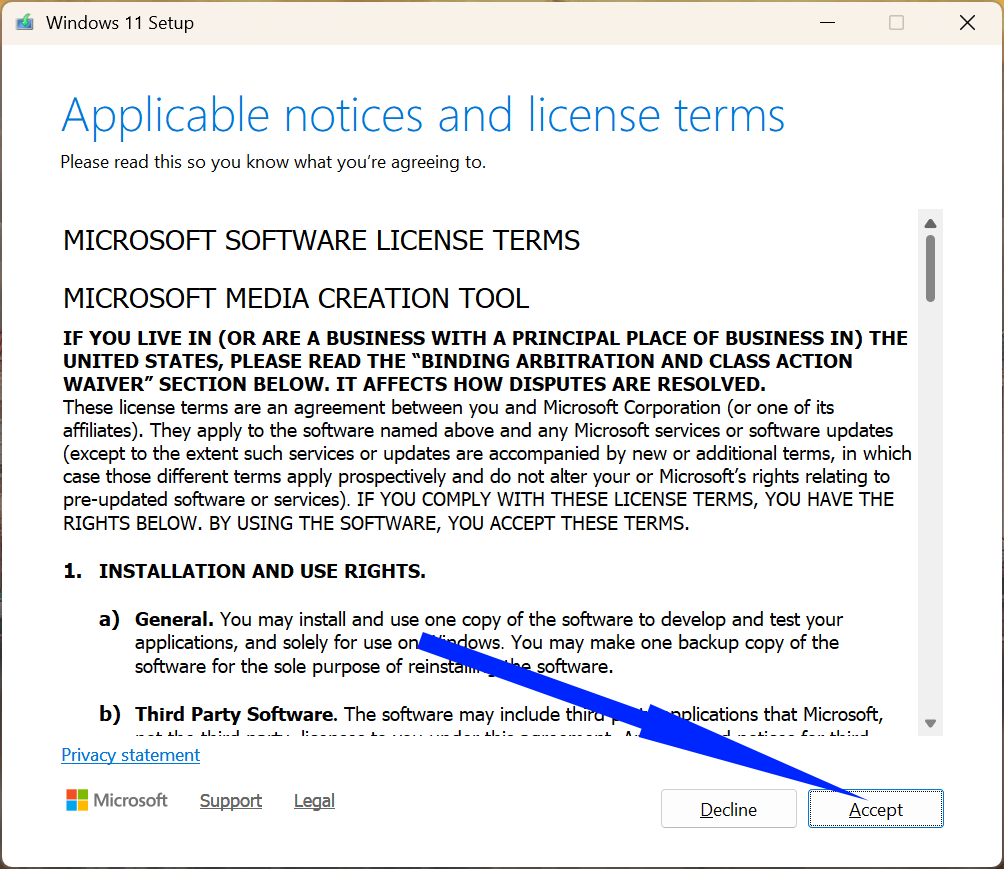
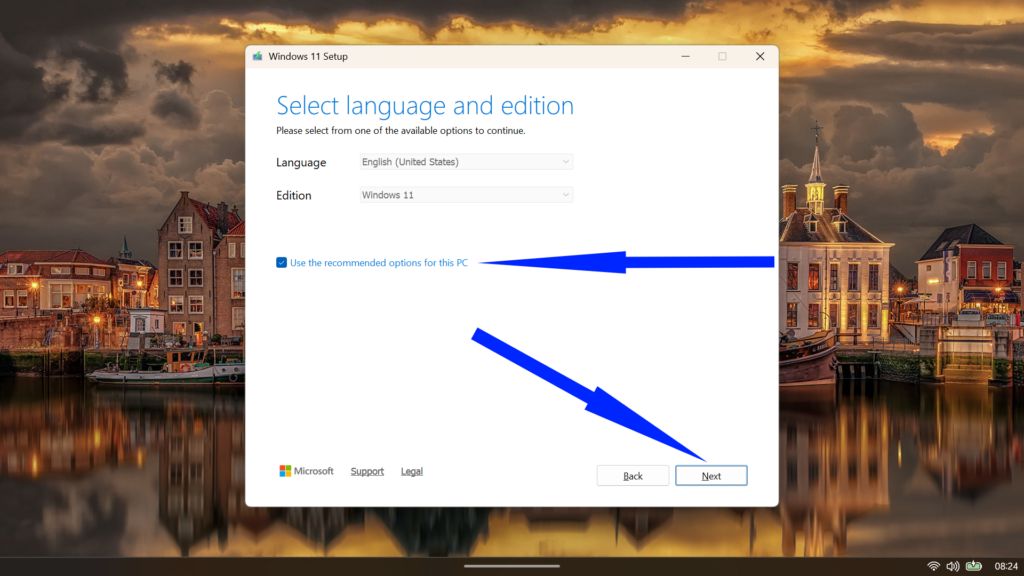
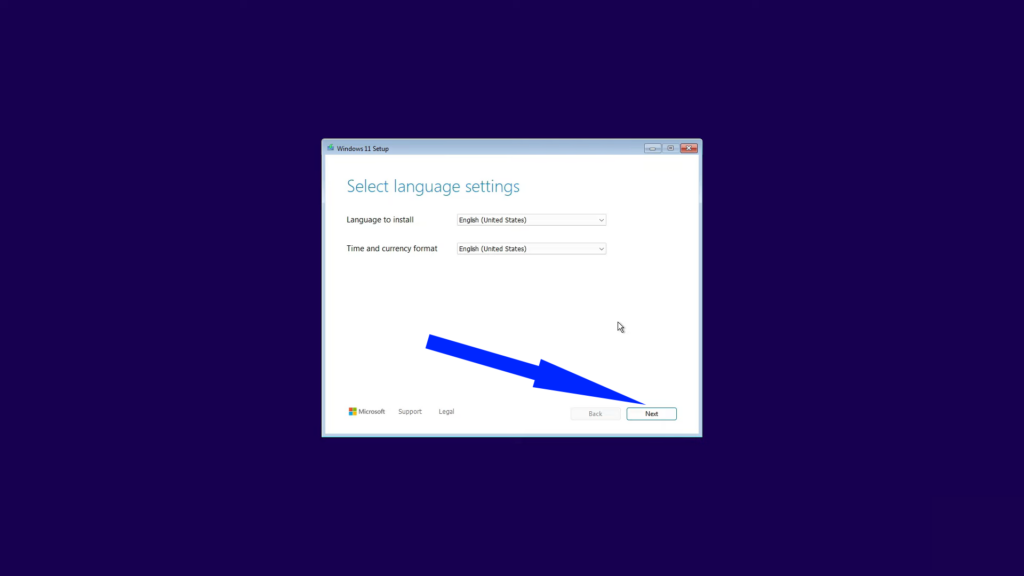
Double-click the downloaded file to launch the tool. After accepting Microsoft’s license terms, the interface presents language and edition options.
You can simply accept the recommended settings, which automatically detect your current configuration. However, if you’re preparing media for a different device, uncheck “Use the recommended options for this PC” to customize language, edition, and architecture settings.
Create a Bootable USB Drive with the Media Creation Tool
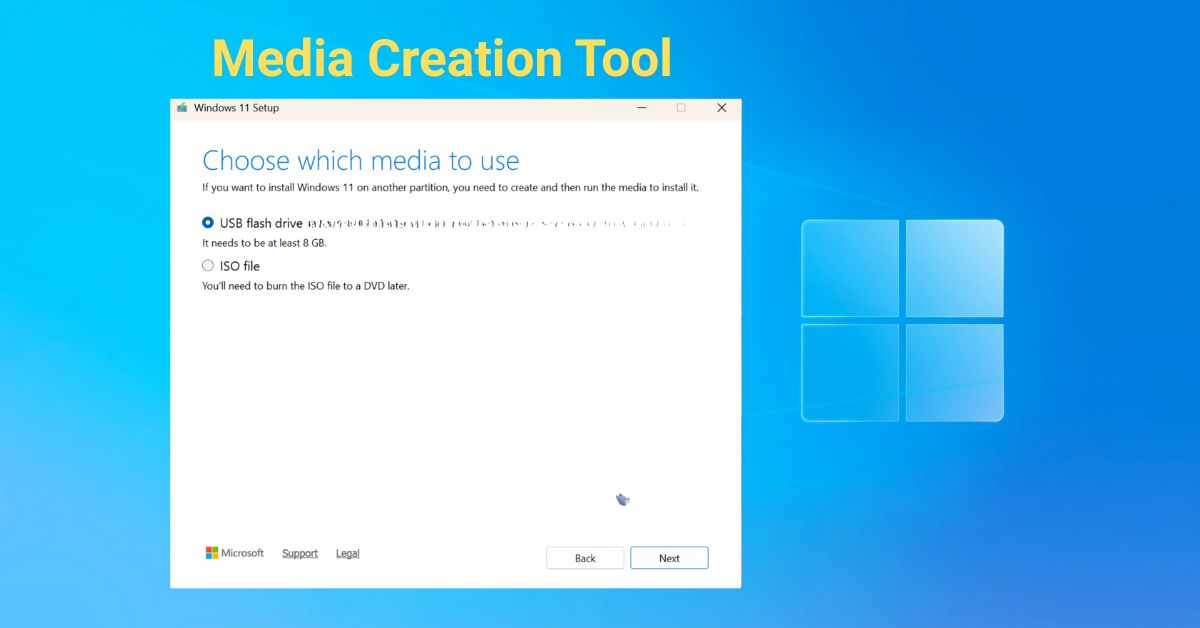
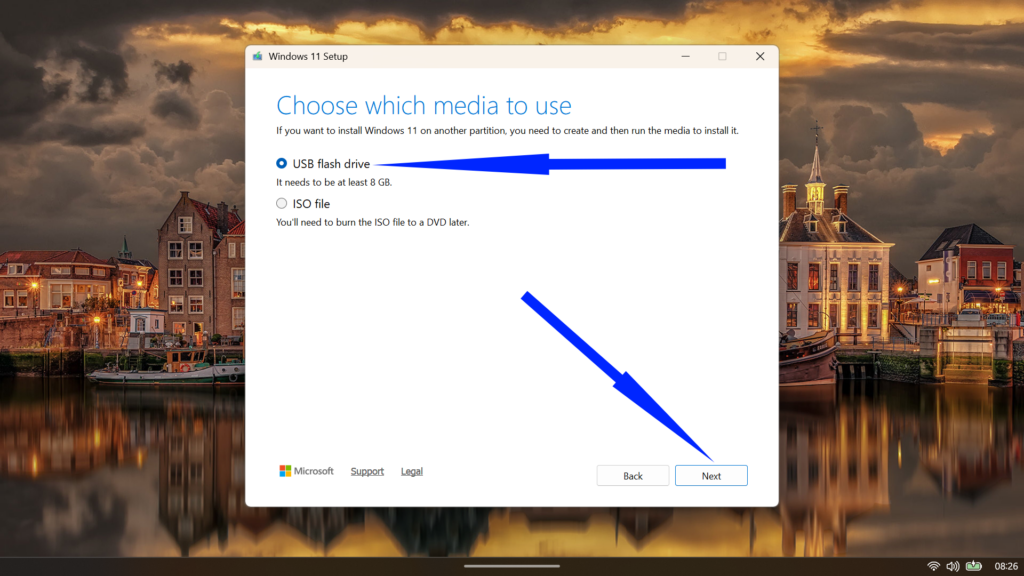
The USB creation pathway represents the most popular route for Windows 11 installation media. After navigating through the initial setup screens, the tool presents a crucial fork: USB flash drive or ISO file.
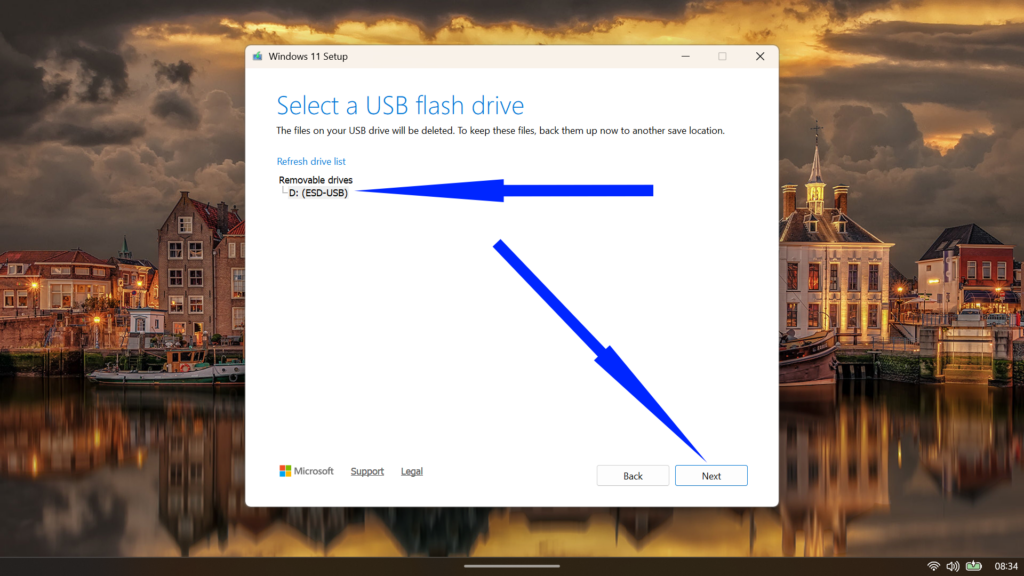
- Select the USB flash drive option and click Next.
- Connect your USB drive if you haven’t already. The tool scans connected removable devices and displays them in a list.
- Exercise caution here, as selecting the wrong drive could erase valuable data. Verify you’ve identified the correct device, particularly if multiple flash drives are connected.
- Click Next to initiate the download and creation process.
The Media Creation Tool now performs the dual duty of downloading the latest Windows 11 build directly from Microsoft’s servers and simultaneously formatting your USB drive. This amalgamated approach means you’re always working with the most current version—currently Windows 11 version 25H2 as of the time of writing, with its constellation of performance refinements and feature enhancements.
Patience becomes a virtue during this phase. Download duration fluctuates wildly based on internet velocity, while the actual USB creation process depends on your drive’s write speed. Expect anywhere from 30 minutes to over an hour for completion. The tool provides transparent progress indicators, so you’ll know whether to grab coffee or settle in for a longer wait.
Once finished, the tool displays a completion message. Click Finish to exit. Your USB drive now contains fully functional Windows 11 installation media, ready to resurrect crashed systems or deliver clean installations.
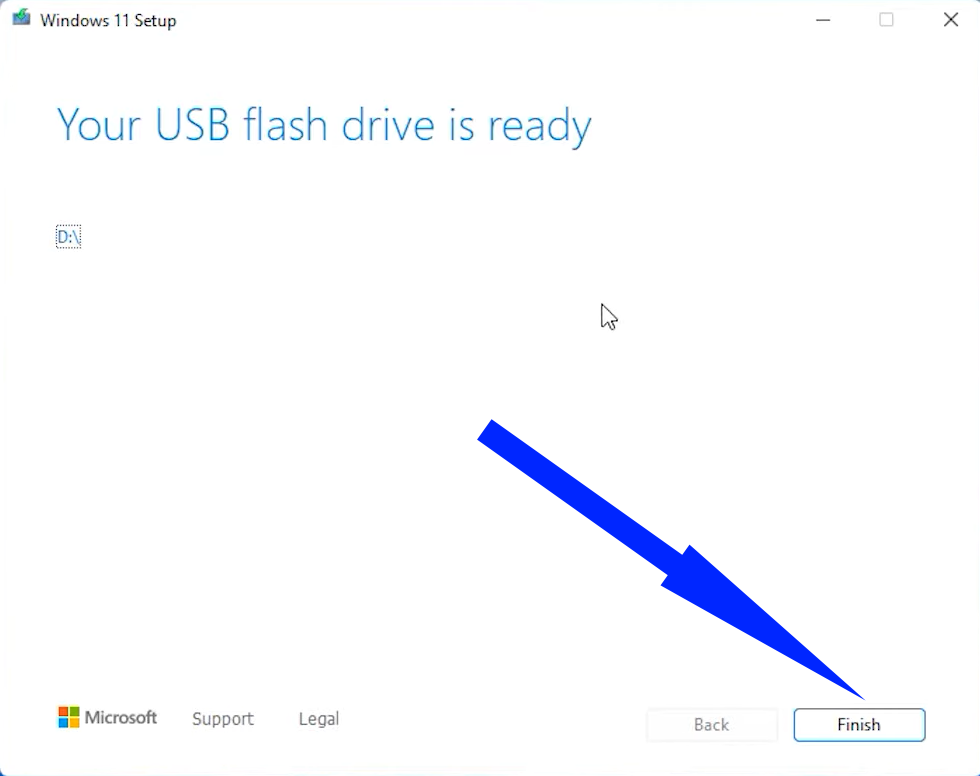
Store it carefully, because this unassuming flash drive represents your emergency escape hatch from future Windows calamities.
How to Download a Windows 11 Disk Image (ISO)
If you like keeping your options open, the ISO download is the way to go. It gives you a single, all-in-one archive of Windows that you can stash away for later. Whether you plan to mount it virtually, burn it to a dual-layer DVD, or use a tool like Rufus to build a bootable drive down the line, the ISO keeps everything neat and ready when you need it.
This approach works well if you spend time in virtual machines. Dropping an ISO into something like VMware or VirtualBox makes spinning up a fresh Windows 11 instance feel almost effortless.
- Launch the Media Creation Tool and accept the license terms as detailed in the previous section.
- Confirm your language and edition settings, then click Next.
- On the media selection screen, choose ISO file instead of USB flash drive. Click Next.

- You will immediately be prompted to choose a destination path to save the file. Select a location with ample space (such as your Downloads folder or an external drive) and give the file a recognizable name, such as
Windows11_25H2.iso.
- Click Save. The tool will begin downloading the Windows 11 image.
Because the tool performs a verification phase after the download to ensure the file hasn’t been corrupted, this method might take slightly longer than a simple browser download. However, the result is a guaranteed valid image ready for archival or deployment.
How to Use the Media Creation Tool for a Clean Install of Windows 11
With your bootable media prepared, executing a clean Windows 11 installation requires strategic preparation and careful navigation through the setup process. A clean install obliterates everything on your target drive—a nuclear option that eliminates accumulated digital detritus while delivering pristine system performance.
Before proceeding, backup becomes paramount. Transfer essential documents, photos, and application settings to external storage or cloud services. List installed programs you’ll need to reinstall, and export browser bookmarks.
- Insert your bootable USB drive or DVD, then restart your computer. As the system powers on, press the designated key—typically F12, F2, ESC, or DEL —depending on your motherboard manufacturer.
- This timing-sensitive maneuver requires quick reflexes; watch for on-screen prompts during the initial boot sequence.
- Select your USB drive or DVD from the boot device list to launch the Windows 11 installer.
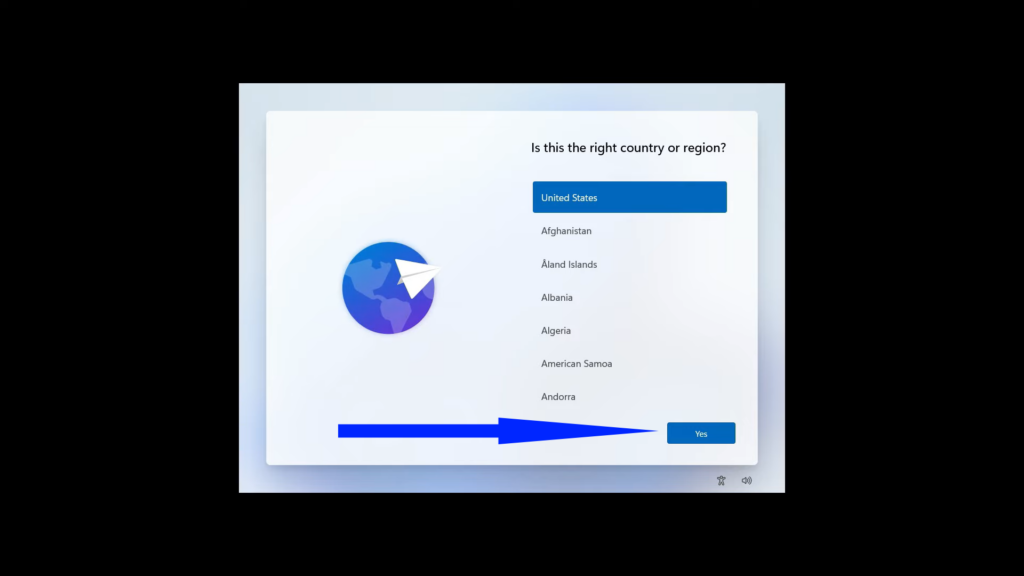
- The setup environment begins with regional selection. Select your country or region from the dropdown menu, then click Yes.
- Next, the installer presents language and time format preferences. Select your preferred language for installation and the time/currency format, then click Next.
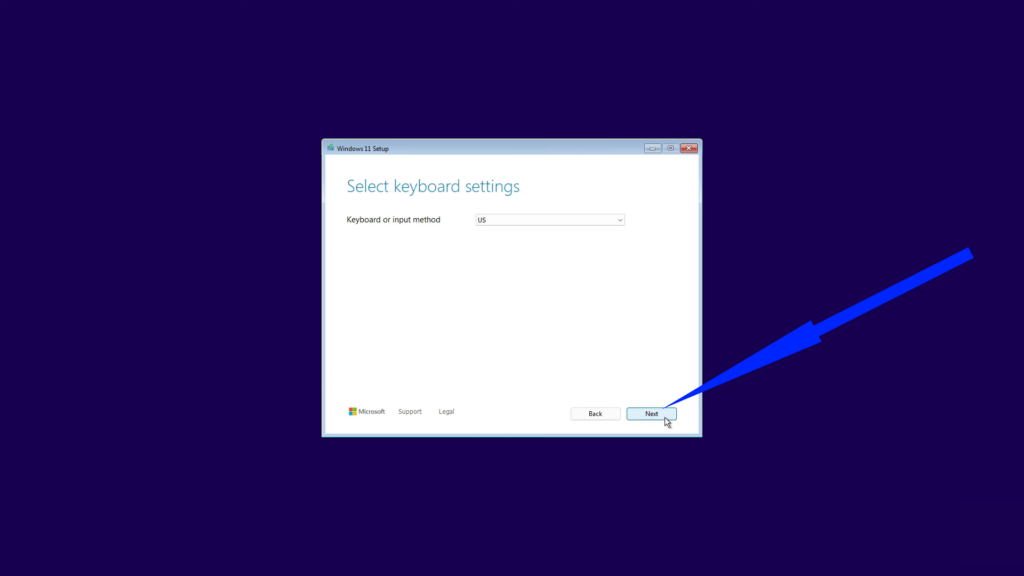
- Configure your keyboard or input method on the following screen. Choose the appropriate keyboard layout for your region. Most users will select “US” or their local variant. Click Next to proceed.
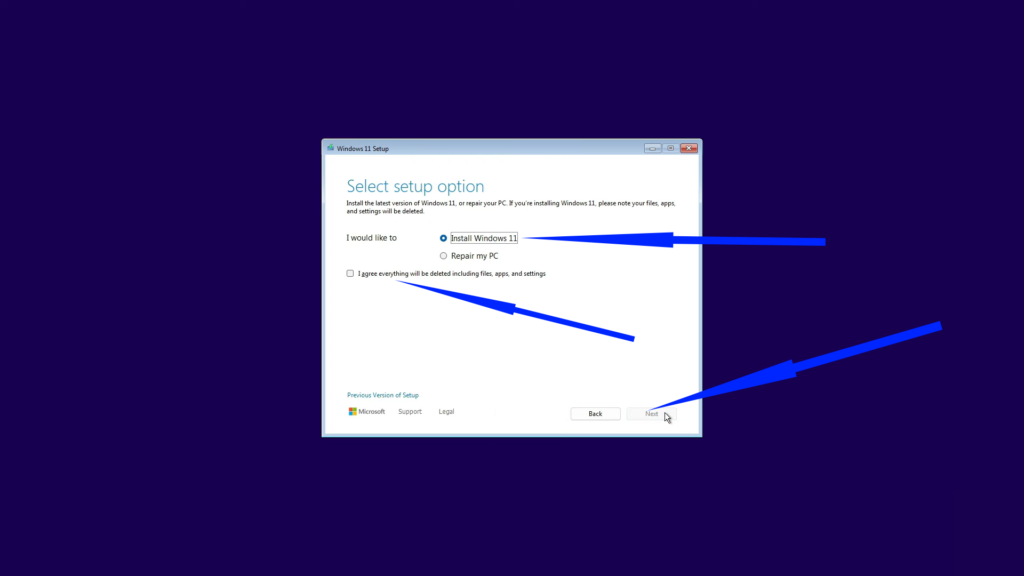
- The installer now presents a critical junction: Install Windows 11 or Repair my PC. Ensure Install Windows 11 is selected, then check the acknowledgment box confirming you understand that all files, apps, and settings will be deleted. Click Next to advance.
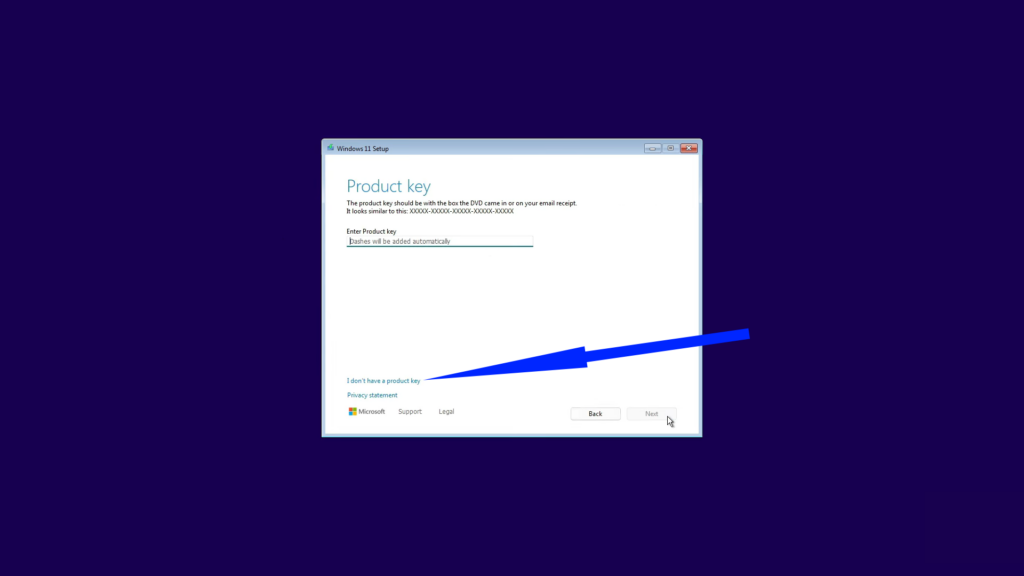
- At the product key screen, you have options depending on your situation. If reinstalling Windows 11 on a previously activated device, select I don’t have a product key—Windows will reactivate automatically once connected to the internet. For new installations requiring activation, enter your 25-character product key now.
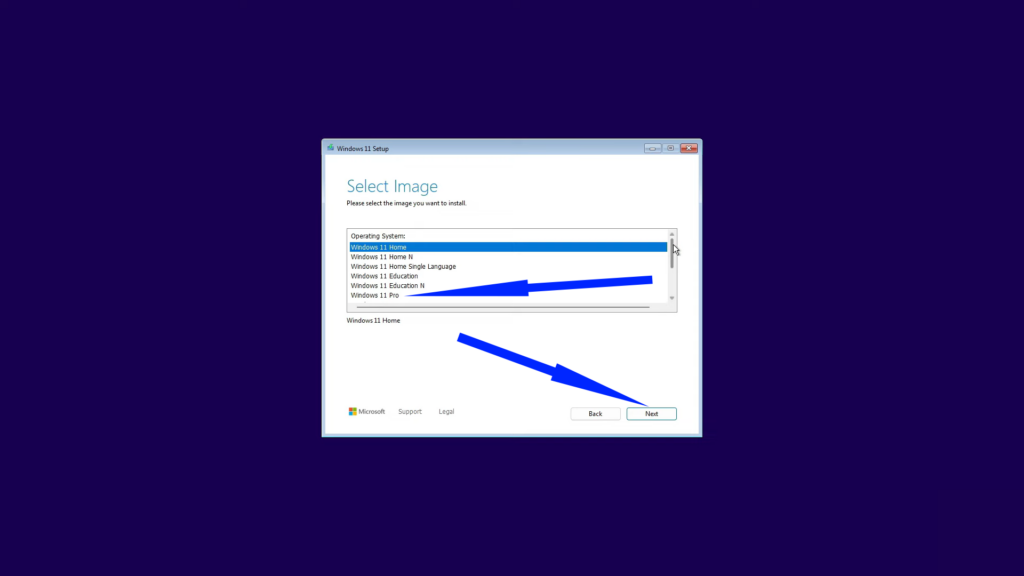
- Choose your Windows 11 edition from the list. The dropdown menu displays available versions, including Windows 11 Home, Pro, Education, and others. Select the edition matching your license, then click Next.
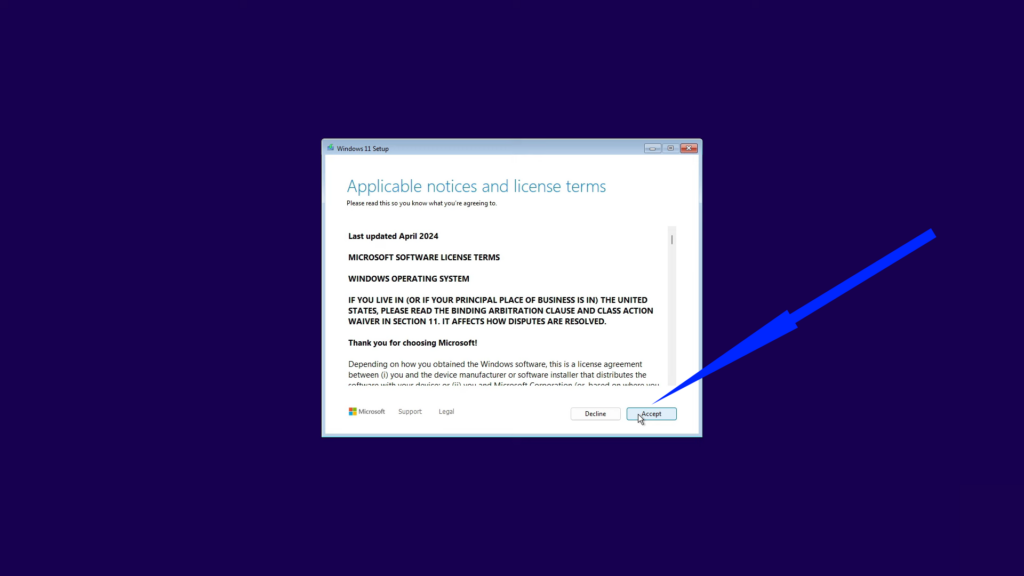
- Review and accept Microsoft’s license terms by clicking Accept. This displays the comprehensive software license agreement governing Windows 11 usage.
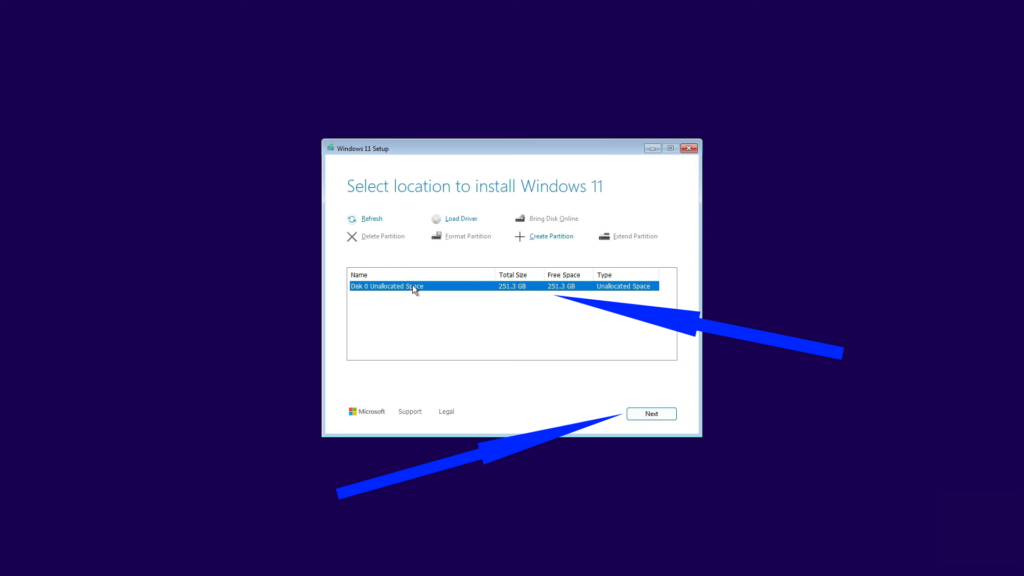
- The partition management screen appears, titled “Select location to install Windows 11.” This represents the crucible of clean installation. For the most comprehensive fresh start, select each existing partition individually and click Delete until only “Disk 0 Unallocated Space” remains.
- This scorched-earth approach ensures no remnants of your previous installation survive. Select the unallocated space and click Next—Windows automatically creates the necessary system partitions during installation.
- This scorched-earth approach ensures no remnants of your previous installation survive. Select the unallocated space and click Next—Windows automatically creates the necessary system partitions during installation.
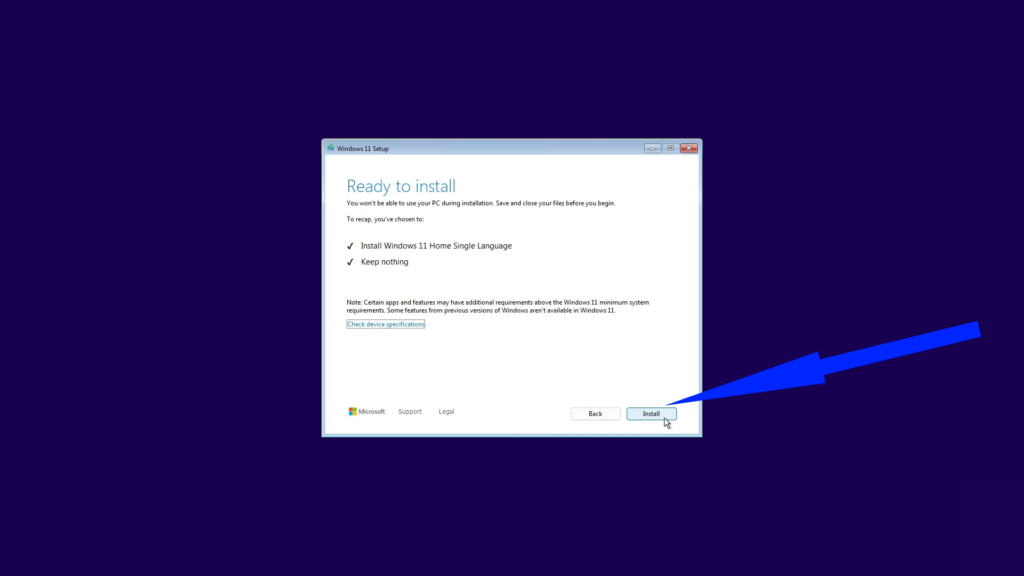
- A final confirmation screen summarizes your choices, showing the edition you’ll install and confirming that nothing will be kept from the previous installation. Verify everything appears correct, then click Install to commence the process.
Windows 11 installation now proceeds autonomously. The system displays progress indicators as it copies files, installs features, and configures hardware.
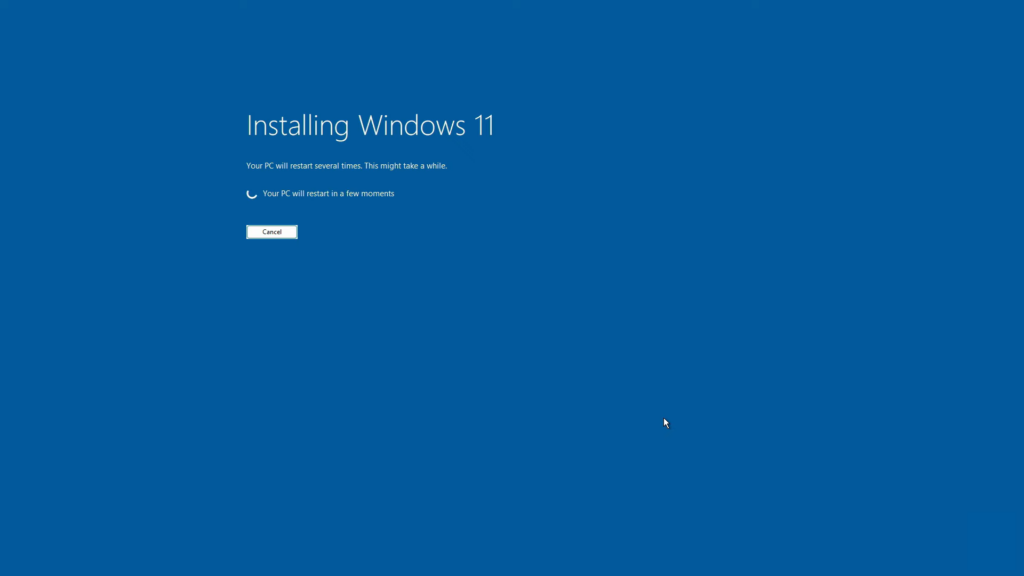
Your computer will restart multiple times; however, please resist any temptation to intervene or press keys. After 20-40 minutes (depending on hardware speed), the installation completes and Windows 11’s out-of-box experience begins, requesting network configuration and initial personalization settings.
Conclusion
It may not win any design awards, but the Media Creation Tool earns its place through sheer usefulness. For anyone who wants real control over how Windows gets installed, it’s still the gold standard.