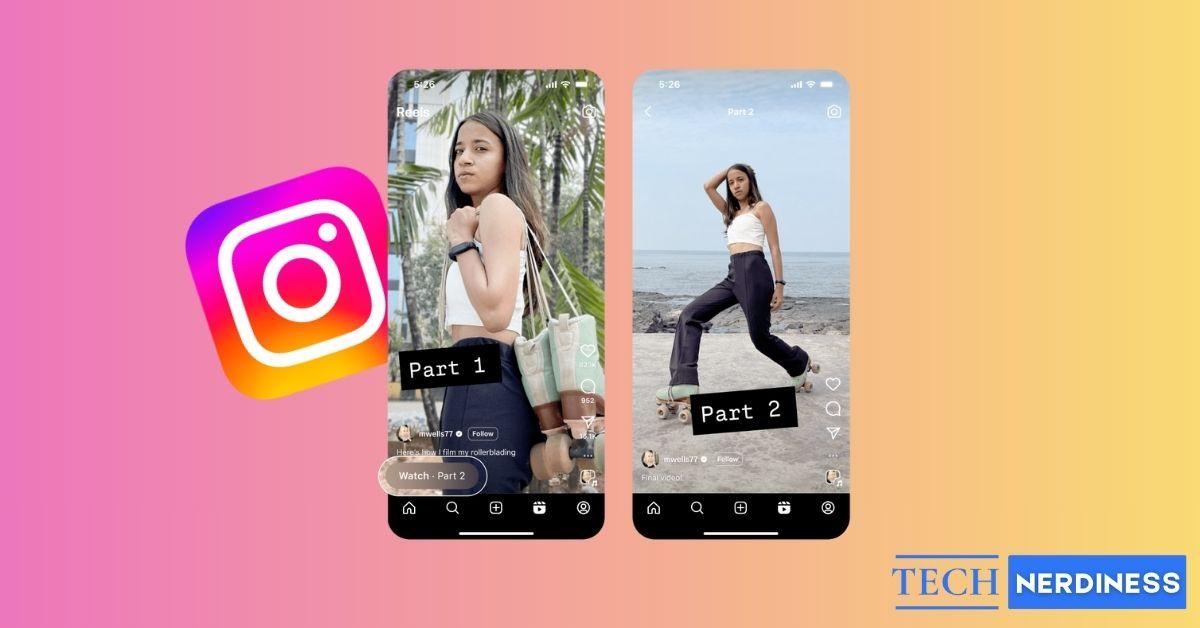
- Instagram’s Linked Reels: Lets creators connect one Reel to another, creating smooth, bingeable series.
- Benefits for Creators: Enhances storytelling, revives older Reels, supports tutorials, helps new viewers catch up, and gives profiles a polished look.
- Creating New Linked Reels: When uploading, you can link a new Reel to a previous one by adding a title like “Part 1.”
- Editing & Updating Reels: Existing Reels can be linked, unlinked, or retitled later for improved flow and consistency.
- Best Practices & Use Cases: Provide context, maintain consistent style, tease upcoming parts, pin comments, and use Linked Reels for tutorials, stories, challenges, and Q&As.
Have you ever been stuck in the middle of a Reels series and wondered, Where’s the next part? This has been a common frustration for viewers — a creator mentions a second part, but with hundreds of videos on their profile, finding it feels nearly impossible.
To solve this, Instagram has introduced the Linked Reels feature, which allows creators to directly connect one Reel to another. Viewers can now continue watching a series with a single tap, without digging through profiles.
In this guide, I’ll explain what Linked Reels are, how to use them step by step, and the best practices to make your multi-part content more engaging.
Table of Contents
What Are Linked Reels on Instagram?
Instagram Linked Reels is a feature that lets you connect one Reel to another. While watching, viewers will see a small Linked button above your username. Tapping it takes them directly to the linked video — whether it’s the next part of a series or a related tutorial.
The feature works both ways:
- You can link a new Reel to an older one during upload.
- You can edit an existing Reel to connect it with another already published.
This ensures that your content flows naturally, giving audiences a seamless viewing experience.
In case you missed: How to View Who Views Your Instagram Profile
Benefits of Using Linked Reels
Here’s why Linked Reels can be a game-changer for creators:
- Stronger storytelling flow: Viewers move smoothly from one part of your series to the next without leaving the video.
- Revives older content: Linking a new Reel to an older one can bring fresh attention and views to previously uploaded videos.
- Perfect for multi-part tutorials: If your content is too long for one Reel, you can split it into parts and connect them.
- Helps new viewers catch up: Even if someone starts on part two, they can easily go back to part one.
- Creates a professional profile: Linked Reels make your content feel intentional and organized, leaving a strong impression on new followers.
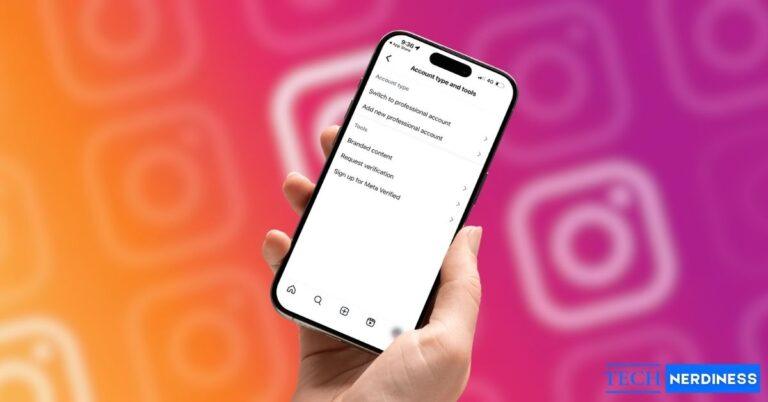
Pro Tip: If you’re serious about growing as a creator, start by switching to a Professional profile, here’s a simple guide on changing your Instagram account type.
How to Link a New Instagram Reel
Instagram makes Linked Reels easy to use. When uploading a new Reel, you can connect it to one you’ve posted before. The catch: you can only link one Reel at a time. So for a multi-part series, link each new Reel to the one right before it—Part 2 to Part 1, Part 3 to Part 2, and so on.
- Open the Instagram app and start creating a new Reel.
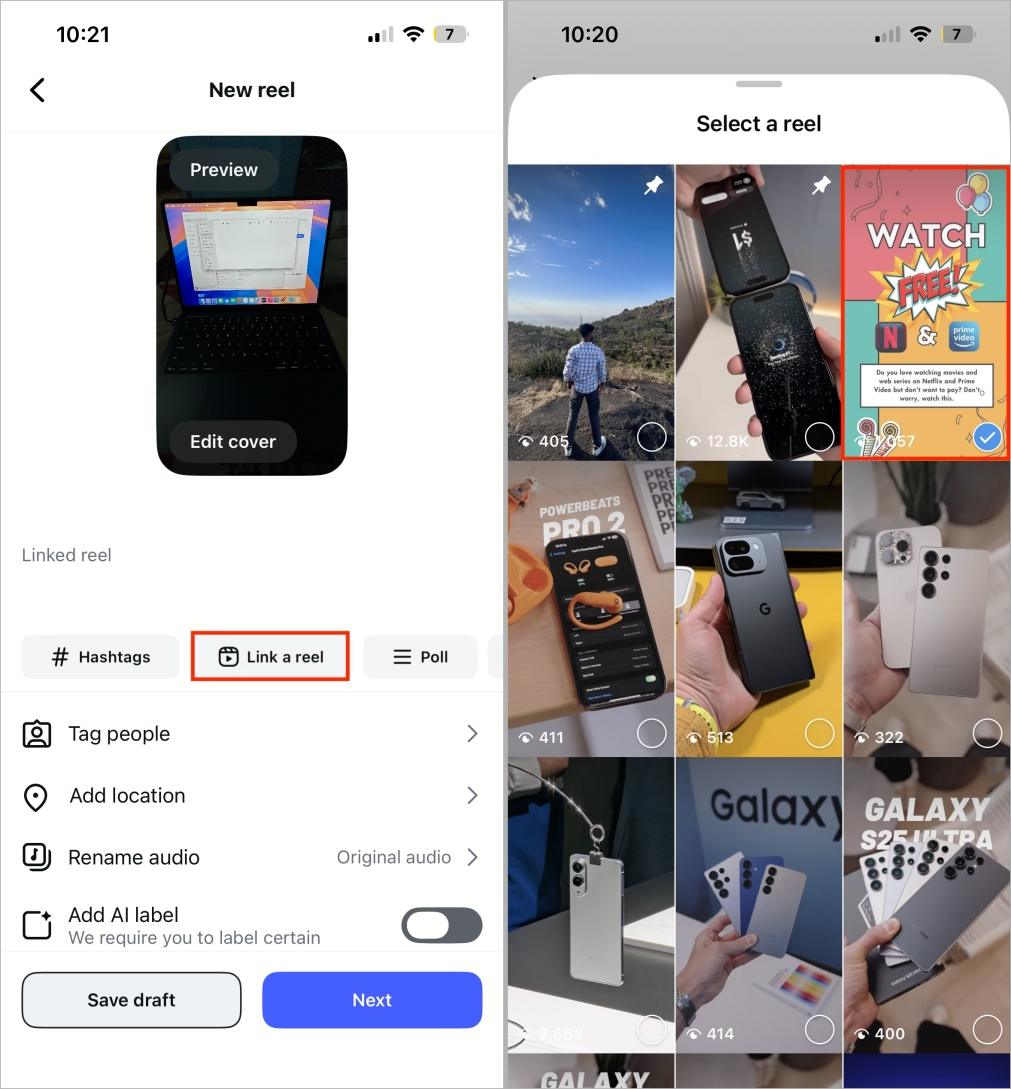
- While uploading, tap Link a Reel.
- Select the Reel you want to connect.

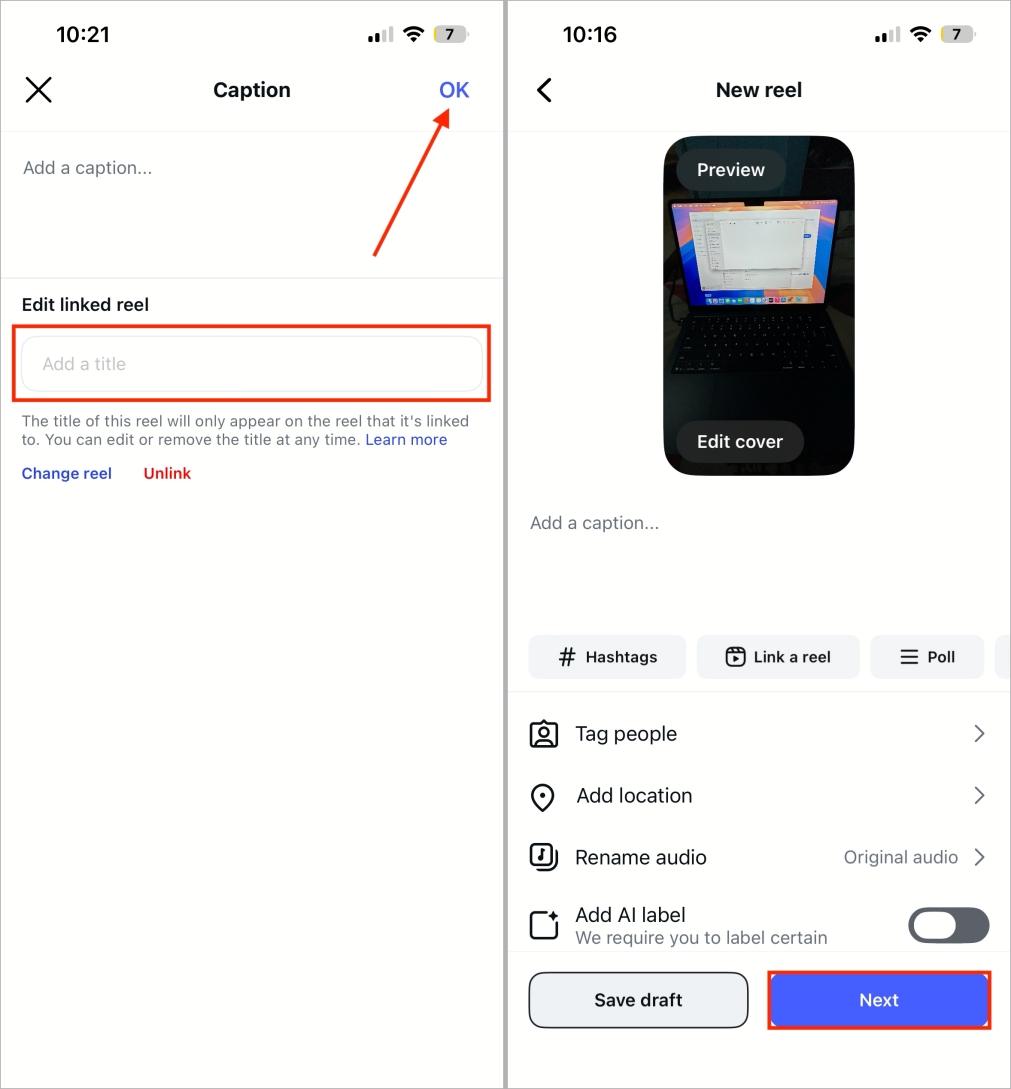
- Add a short title (e.g., Part 1, Next Reel). Titles are limited to 15 characters.
- If left blank, Instagram automatically labels it “Linked Reel.”
- Tap OK, then hit Next to publish.

Pro Tip: Always use a clear title like Watch Part 1 instead of leaving it blank to encourage more taps.
How to Link an Existing Instagram Reel
You can also link a Reel that’s already published:
- Open the Reel you want to edit.
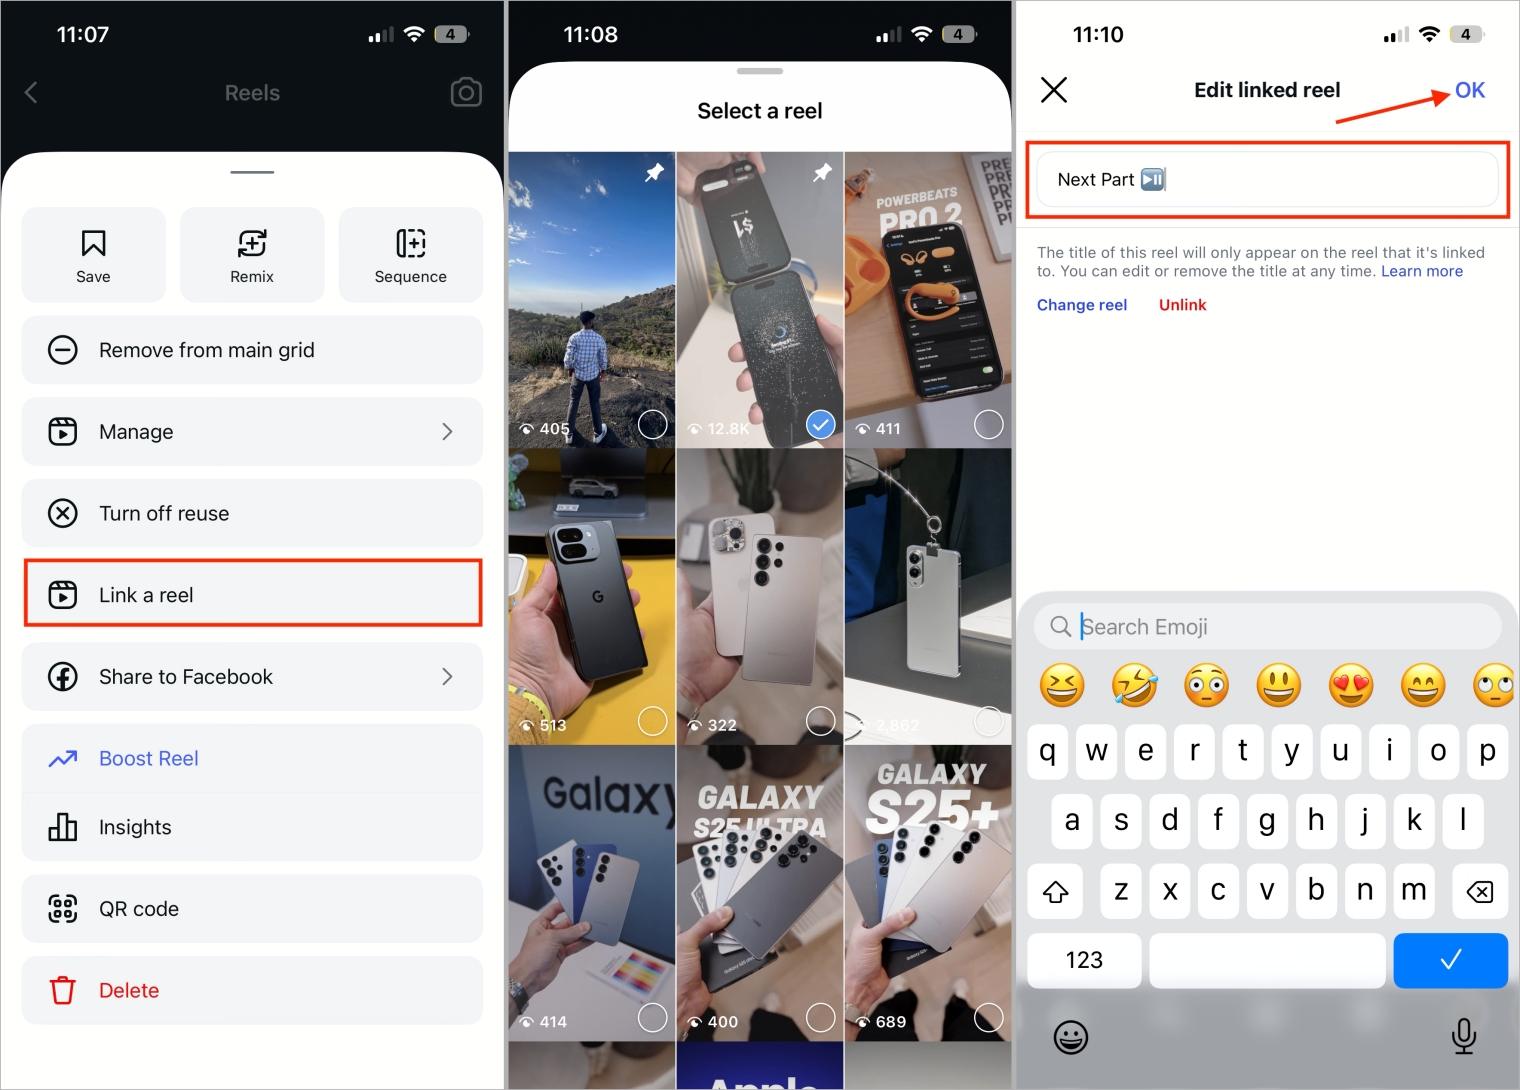
- Tap the three dots at the bottom.
- Select Link a Reel.
- Choose the Reel you want to connect and type a short title.
- Tap OK to confirm.

Note: Reels containing polls or prompts cannot be linked.
Also Read: Instagram’s Map Feature: What It Is and How to Turn It Off
How to Edit or Remove a Linked Reel
Sometimes mistakes happen — you might link the wrong Reel, use an unclear title, or later realize a different video fits better. You may also want to remove the link altogether if the series has ended. Whatever the reason, Instagram makes it simple: you can edit a linked Reel to update the title, switch the video, or remove the link in just a few steps.
Editing a Linked Reel
- Open the linked Reel.
- Tap the three dots.
- Select Edit linked reel.

- Update the title or choose Change reel to link a different video.
- Tap OK to save changes.
- Select the new Reel and tap OK to save your changes.

Pro Tip: Keep your titles consistent across parts (Part 1, Part 2, Part 3). This helps viewers follow along more easily.
Removing a Linked Reel
- Open the Reel with the link.
- Tap the three dots.
- Select Edit linked reel.
- Tap Unlink and confirm.

Once removed, the Linked button disappears from that Reel.
Tips to Make Multi-Part Reels Engaging
Just linking Reels isn’t enough. To keep viewers watching through multiple parts:
- Give context at the start: Always remind viewers what happened in the earlier part. A simple line like “This is Part 2” helps a lot. Without it, new viewers may feel lost and swipe away.
- Use titles and captions: Don’t leave the title section blank. Add short and clear labels such as “Watch Part 1” or “Next Episode.” It gives viewers direction and makes your series easy to follow. Want to make your Reels even more engaging? Learn how to download Instagram Reel audio to repurpose sounds or reuse your favorite clips.
- Keep the style consistent: If Part 1 has a serious tone but Part 2 looks completely different, people lose connection. Try to keep the same format, tone, and even similar thumbnails so the series feels like one flow.
- Tease the next part: At the end of every Reel, drop a small line like “Stay tuned, Part 3 coming soon.” This creates curiosity and makes people look forward to your next upload. Or maybe viewers start following you for the next part of the series.
Pro Tip: Always pin a comment under your Reel with a note about the next part. Many viewers check the comments first, and this doubles the chance of them moving forward.
Best Use Cases for Linked Reels
When I first saw this feature, I wondered where it would work best. After testing it in different ways, I found a few clear cases where Linked Reels really shine.
- Tutorial Series: Tutorials often don’t fit in a single Reel. For example, Part 1 could cover installing fonts in Photoshop, while Part 2 shows how to use them. Linking Reels keeps the steps connected and easy for viewers to follow.
- Storytelling or Vlogs: For travel vlogs or personal stories, one Reel might cover your arrival and another your experiences. For example, Part 1 could show landing in Goa and exploring the beaches, while Part 2 highlights the nightlife. Linking them keeps the story seamless and engaging.
- Experiments and Challenges: These often need multiple updates, like a cooking experiment where Part 1 shows prep and Part 2 the taste test. Remember Ankit Baiyanpuria’s 75-day challenge? If Linked Reels had been around then, he could have connected each daily vlog, making it easier for viewers to follow along — and likely boosting engagement even more.
- Q&A Sessions: If you’re answering audience questions, one Reel can cover the first set and the next Reel the rest. Linking them keeps the session smooth and prevents cutting viewers off mid-conversation.
Final Thoughts
Linked Reels may seem like a small update, but they make storytelling on Instagram more seamless. Creators can boost engagement and growth by connecting content, while viewers enjoy following an entire series without digging through profiles. That’s everything you need to know about Instagram’s new Linked Reels feature. Thanks for reading!
FAQs
No. Instagram currently allows only one link per Reel.
Yes, but the linked Reel will only be visible to approved followers.
Not directly. However, by increasing watch time and engagement, they may improve your overall visibility.
Yes. Open the Reel, tap the three dots, select Edit linked reel, and choose Unlink.
Playlists and highlights organize content on your profile, while Linked Reels keep viewers inside the Reel itself, letting them move directly to the next part without leaving the video.
Make sure you’re using the latest version of Instagram, as the Linked Reels feature only works with your own content, may not yet be available in all regions due to gradual rollouts, and sometimes requires clearing the cache or reinstalling the app to appear.
You might also like:

