Windows 11 leans hard into the idea of being both a tablet and a traditional desktop, and the touch screen sits right at the center of that. For some people, it is a nice bonus. For others, it turns into a small daily annoyance. Maybe you are dealing with phantom taps that seem to come out of nowhere, trying to squeeze a little more life out of a fading battery, or just tired of wiping fingerprints off an otherwise clean display. In those moments, turning off touch screen can feel like an act of self-care.
The catch is that Microsoft does not make this as easy as flipping off Wi-Fi or Bluetooth. There is no obvious switch sitting in the Action Center. You have to dig a little. The good news is that there are a few solid ways to get it done.
How to Disable the Touch Screen via Device Manager
The quickest way to shut off touch input is through Device Manager. This approach prevents the touchscreen driver from loading, leaving your display responsive only to your mouse and keyboard. The effect is immediate and doesn’t require a restart, which makes it the go-to option for most people.
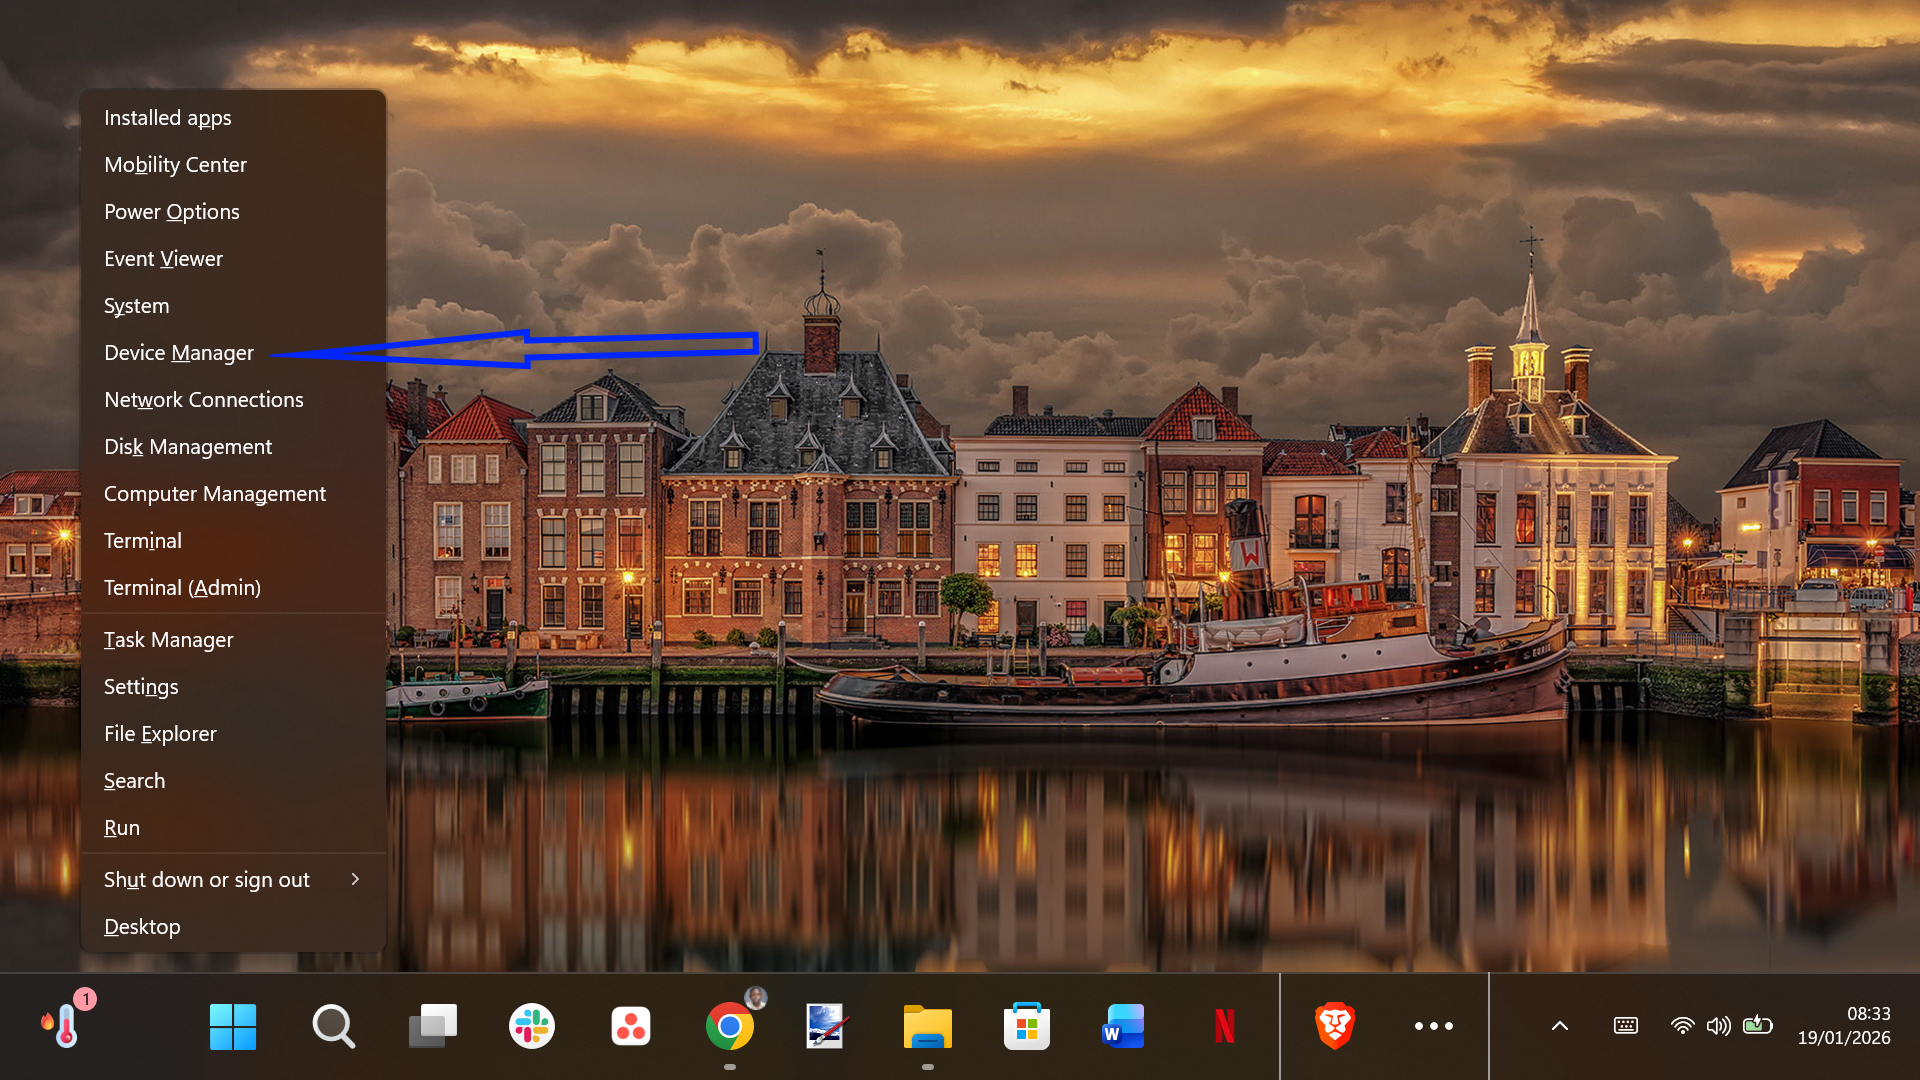
- Start by right-clicking the Start button, or press Win + X, and choose Device Manager from the menu.
- Once the window opens, scroll down to Human Interface Devices and click the arrow to expand the list.
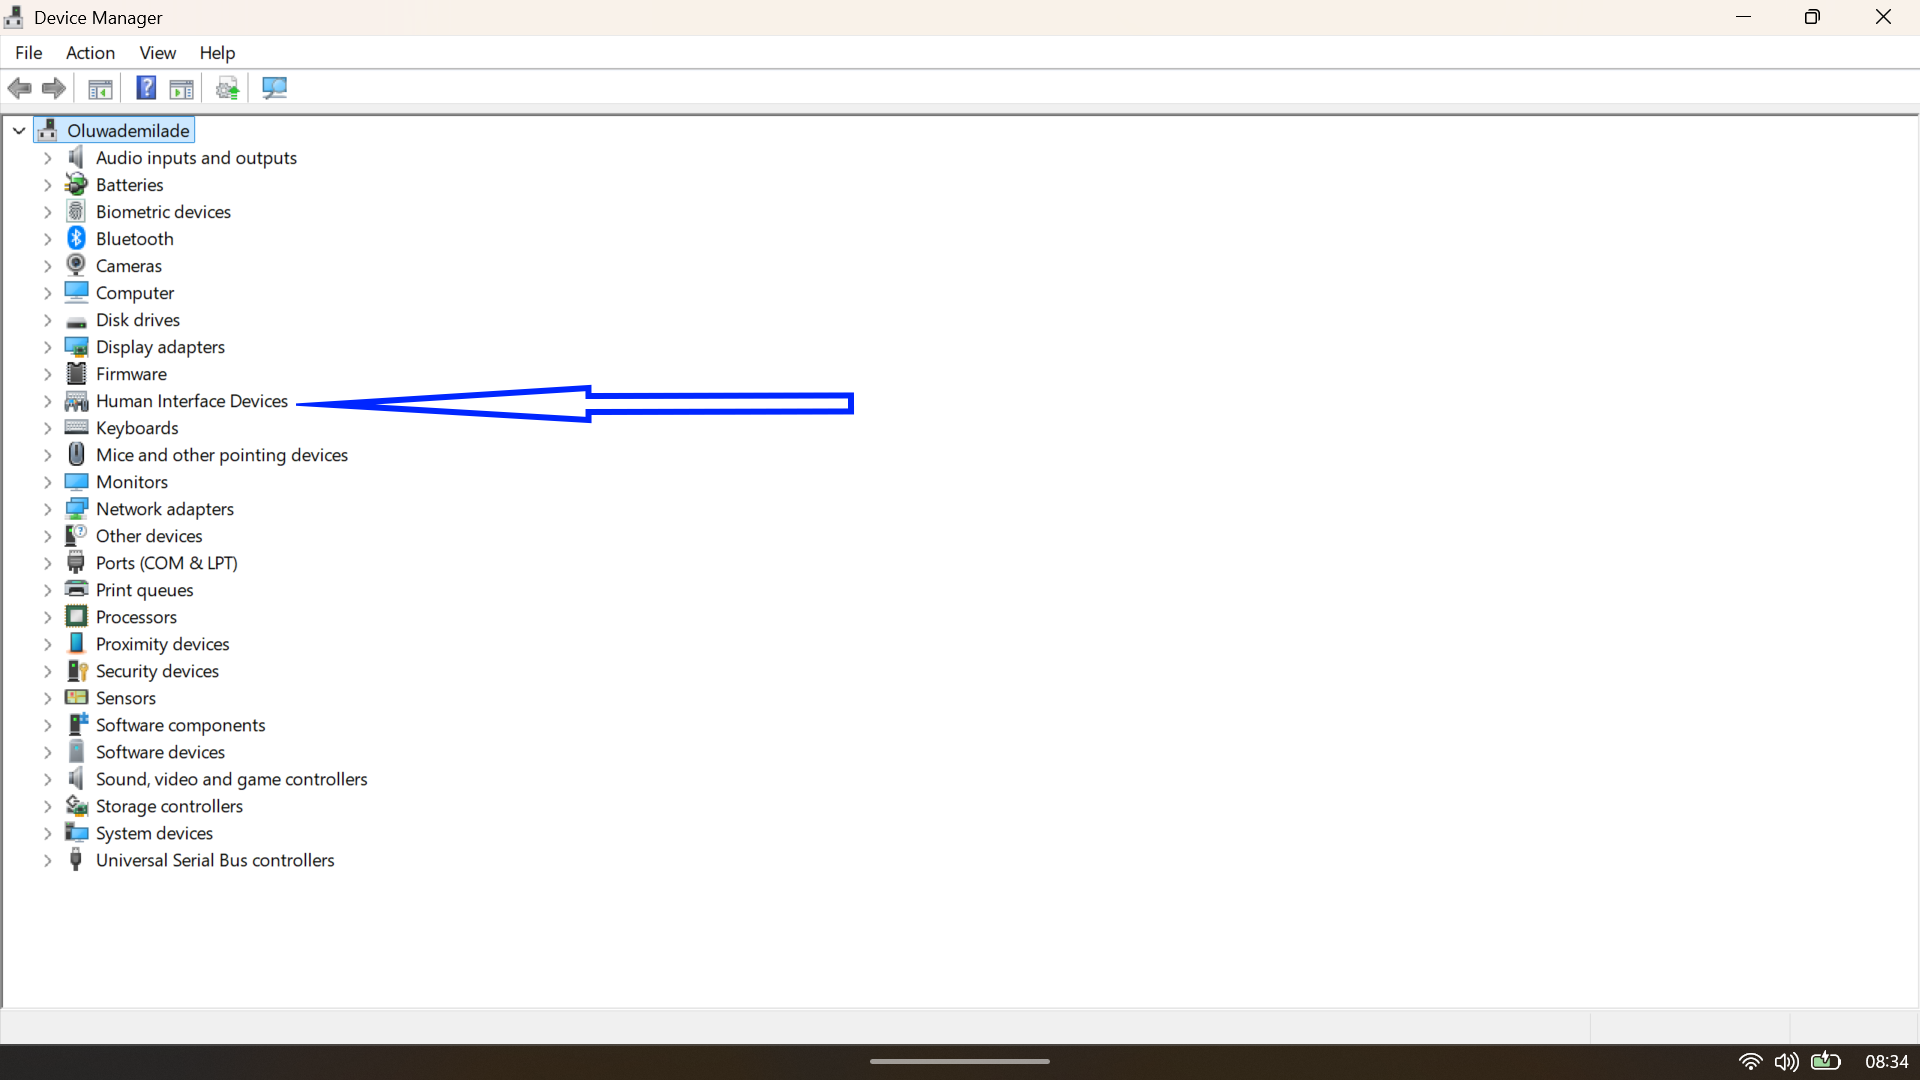
- Look for an entry labeled HID-compliant touch screen.
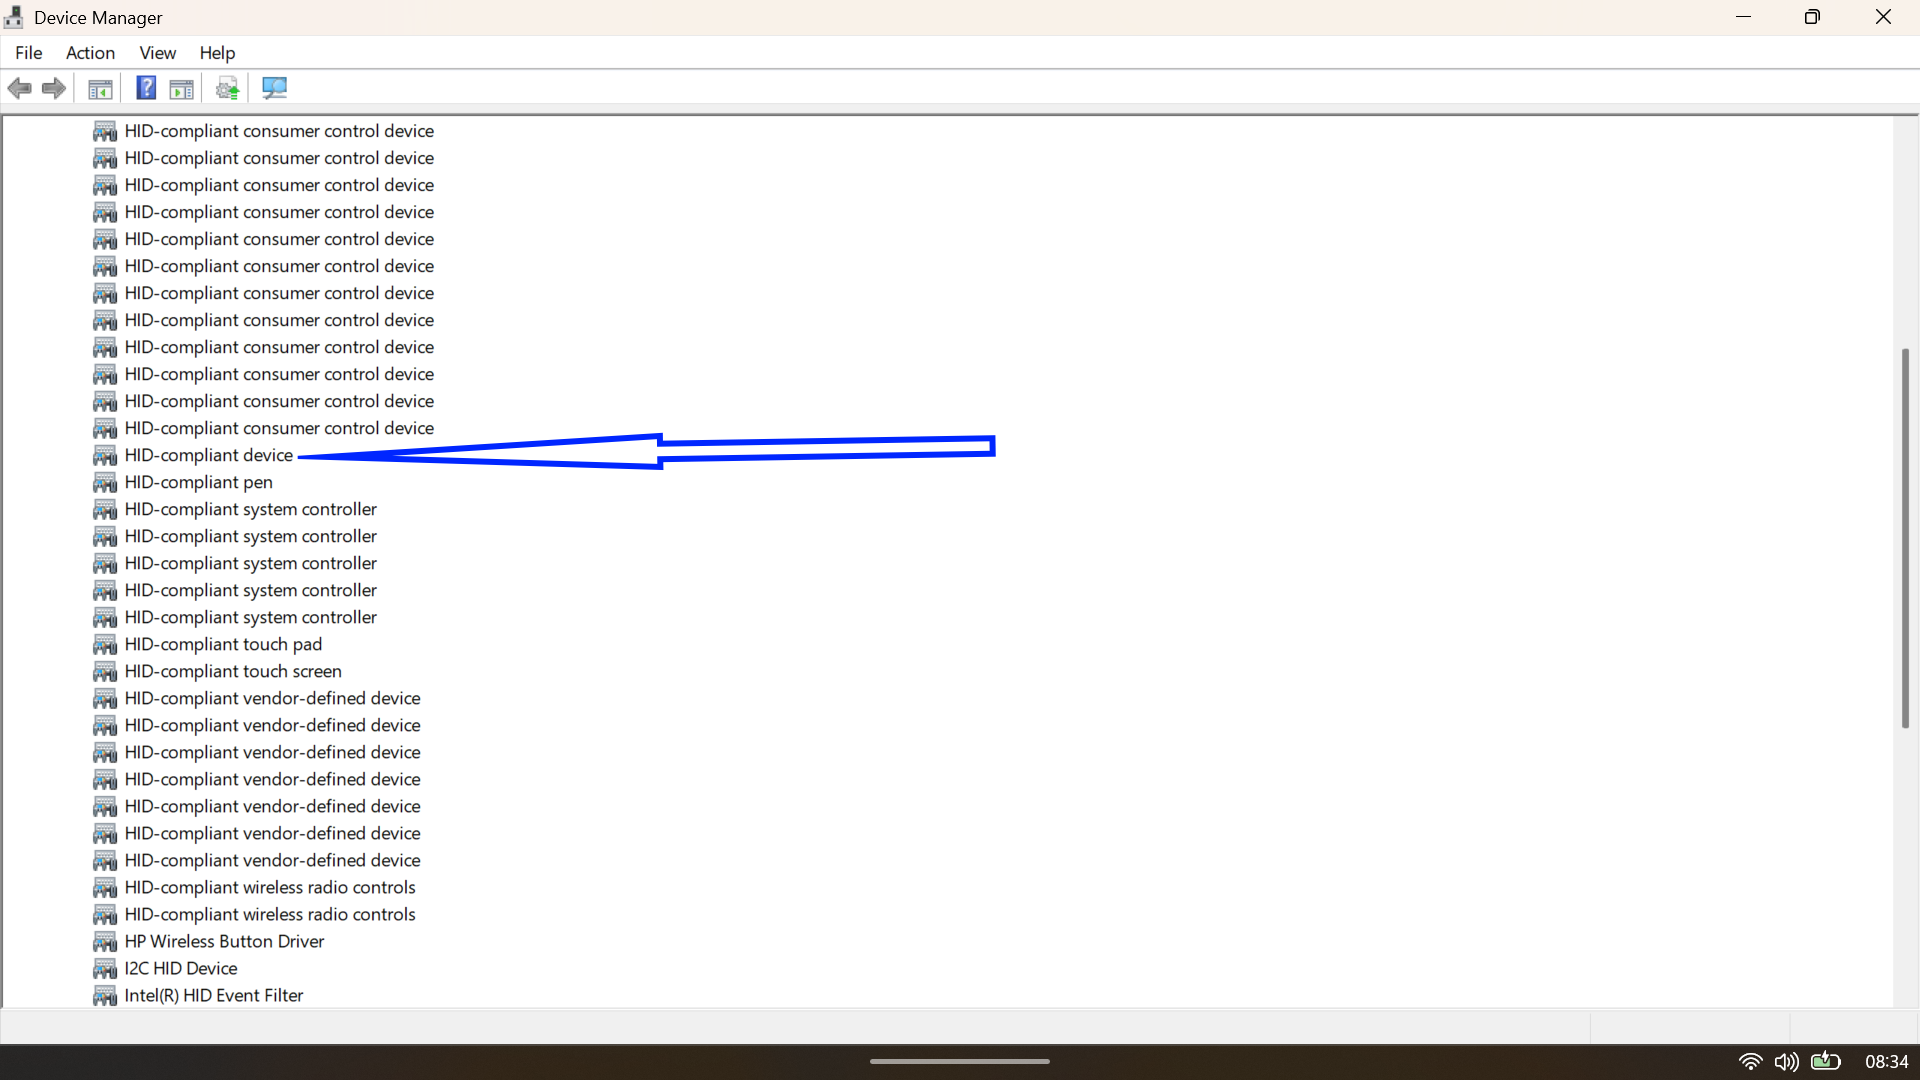
- If you see more than one item with this name, you may need to disable each one to fully turn off touch support.
- Right-click the HID-compliant touch screen entry and choose Disable device.
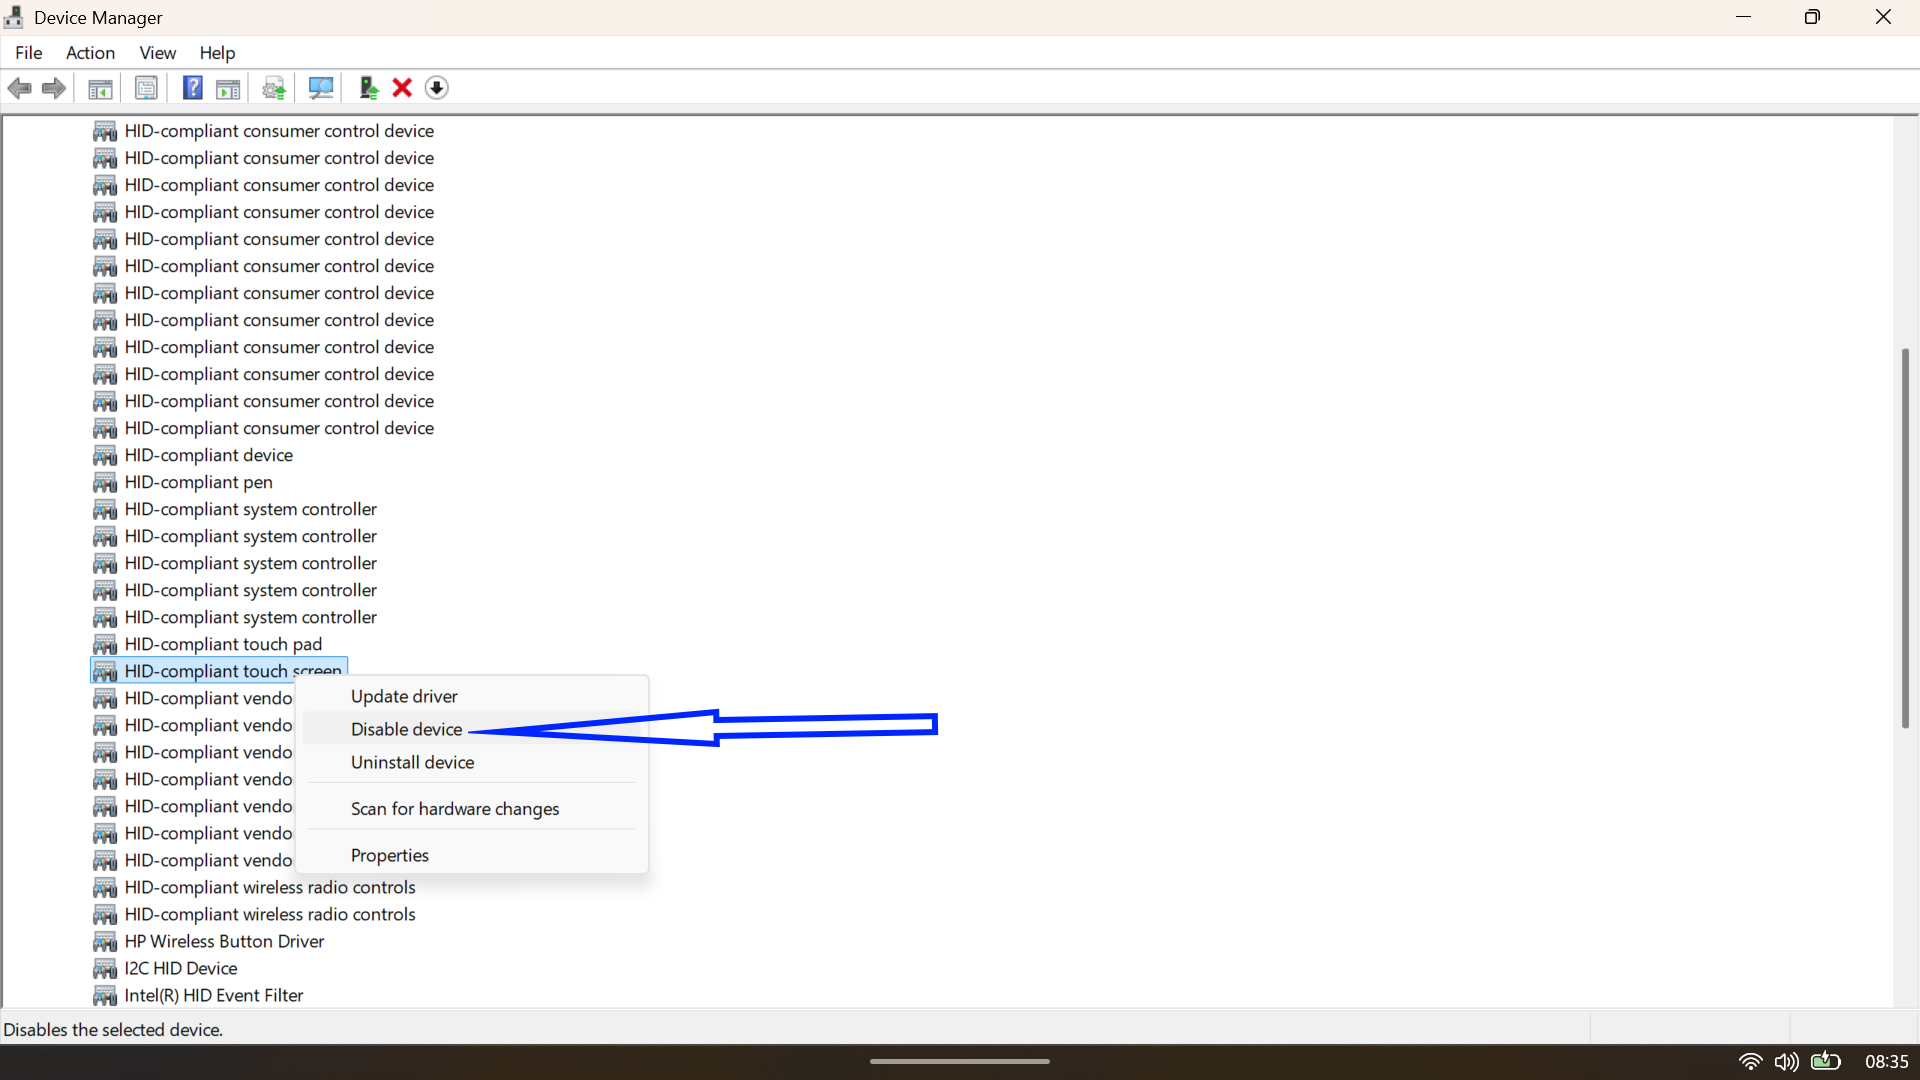
- A confirmation dialog will appear warning you that disabling this hardware will cause it to stop functioning. Click Yes to proceed.
The change takes effect immediately. Try tapping your screen; it should now act like a standard non-touch monitor. If you ever need to restore functionality, simply repeat these steps but select Enable device in step 4.
How to Permanently Turn Off Touch Input via the Registry Editor
If you find that Windows 11 re-enables the touch screen after a major system update or a reboot (a rare but annoying quirk), you can enforce the setting using the Registry Editor. This method is more “permanent” and is ideal if you want to ensure the feature stays dead until you explicitly say otherwise.
Warning: Editing the Windows Registry carries minor risks. Be sure to follow these steps exactly or back up your registry before proceeding.
- Press Win + R to open the Run dialog.
- Type
regeditand press Enter. Click Yes if prompted by User Account Control.
- Navigate to the following path using the sidebar or by pasting it into the address bar at the top:
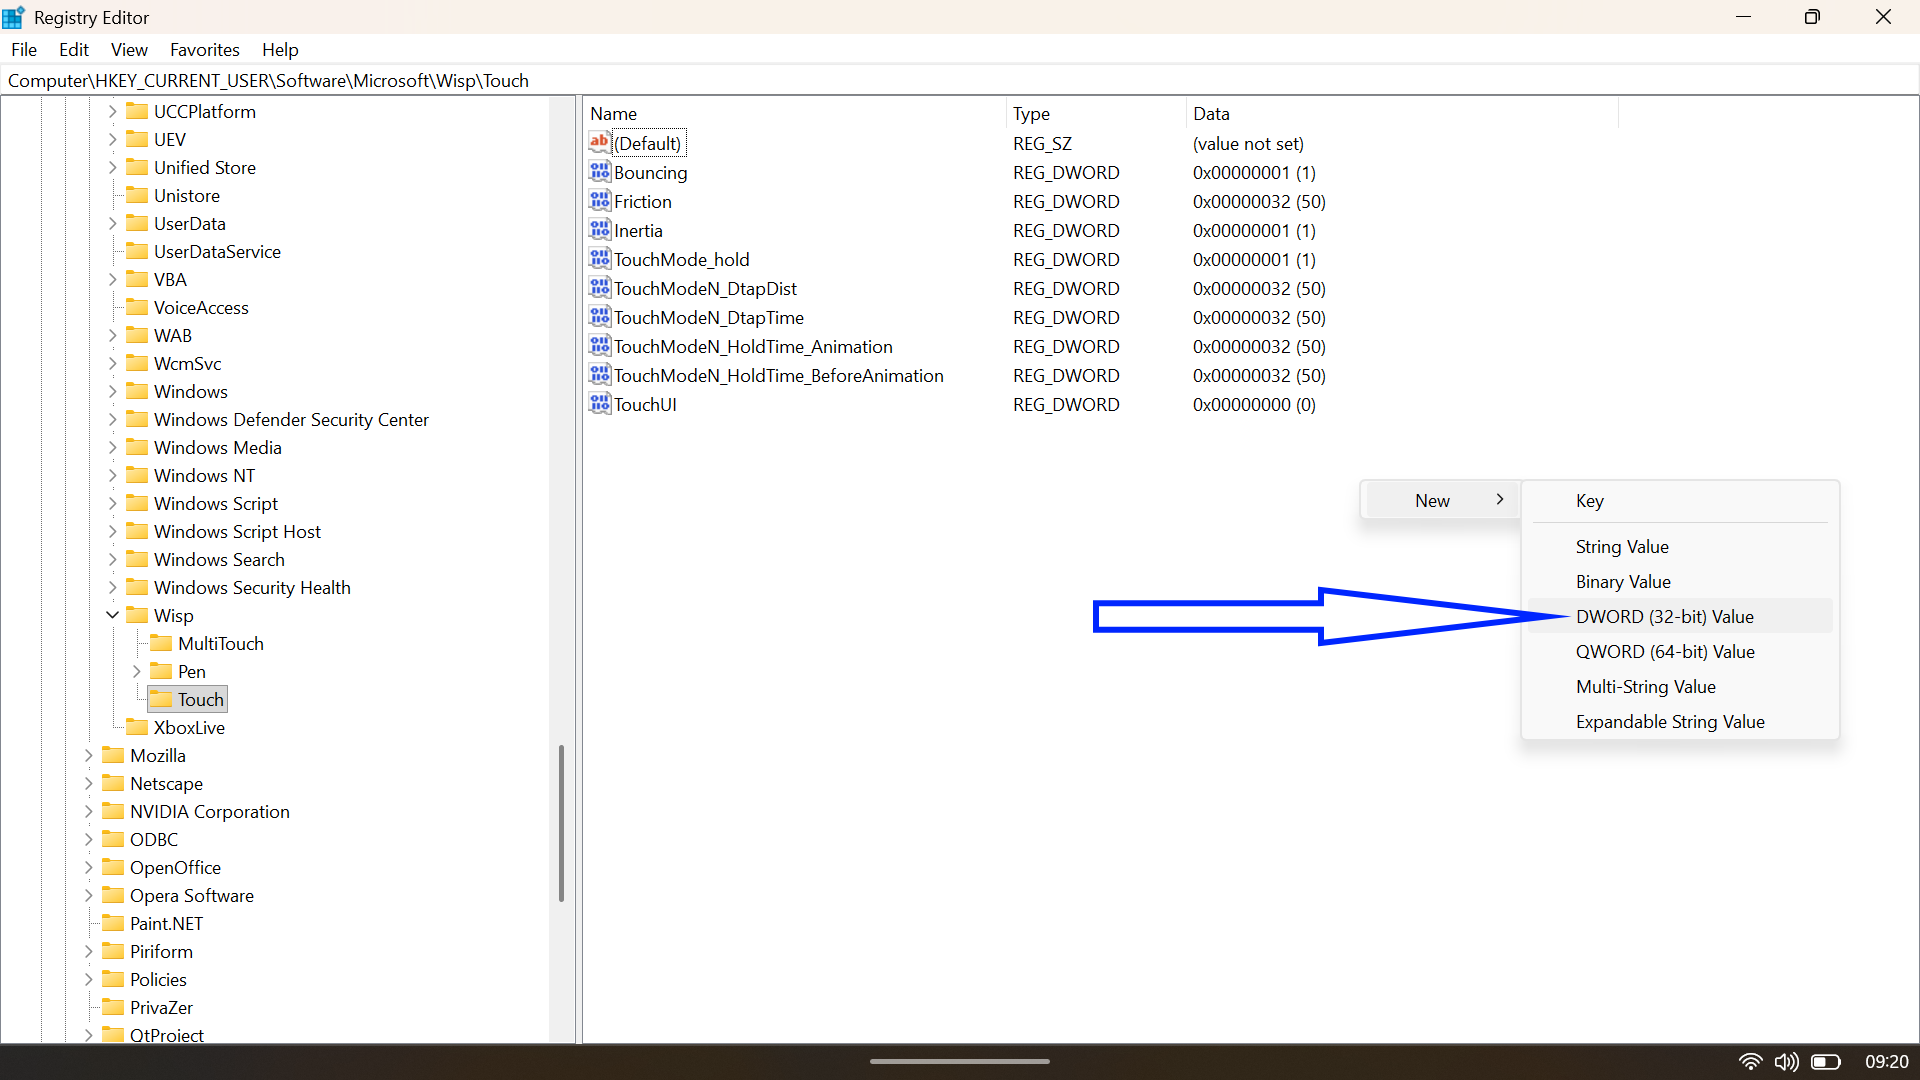
Computer\HKEY_CURRENT_USER\Software\Microsoft\Wisp\Touch
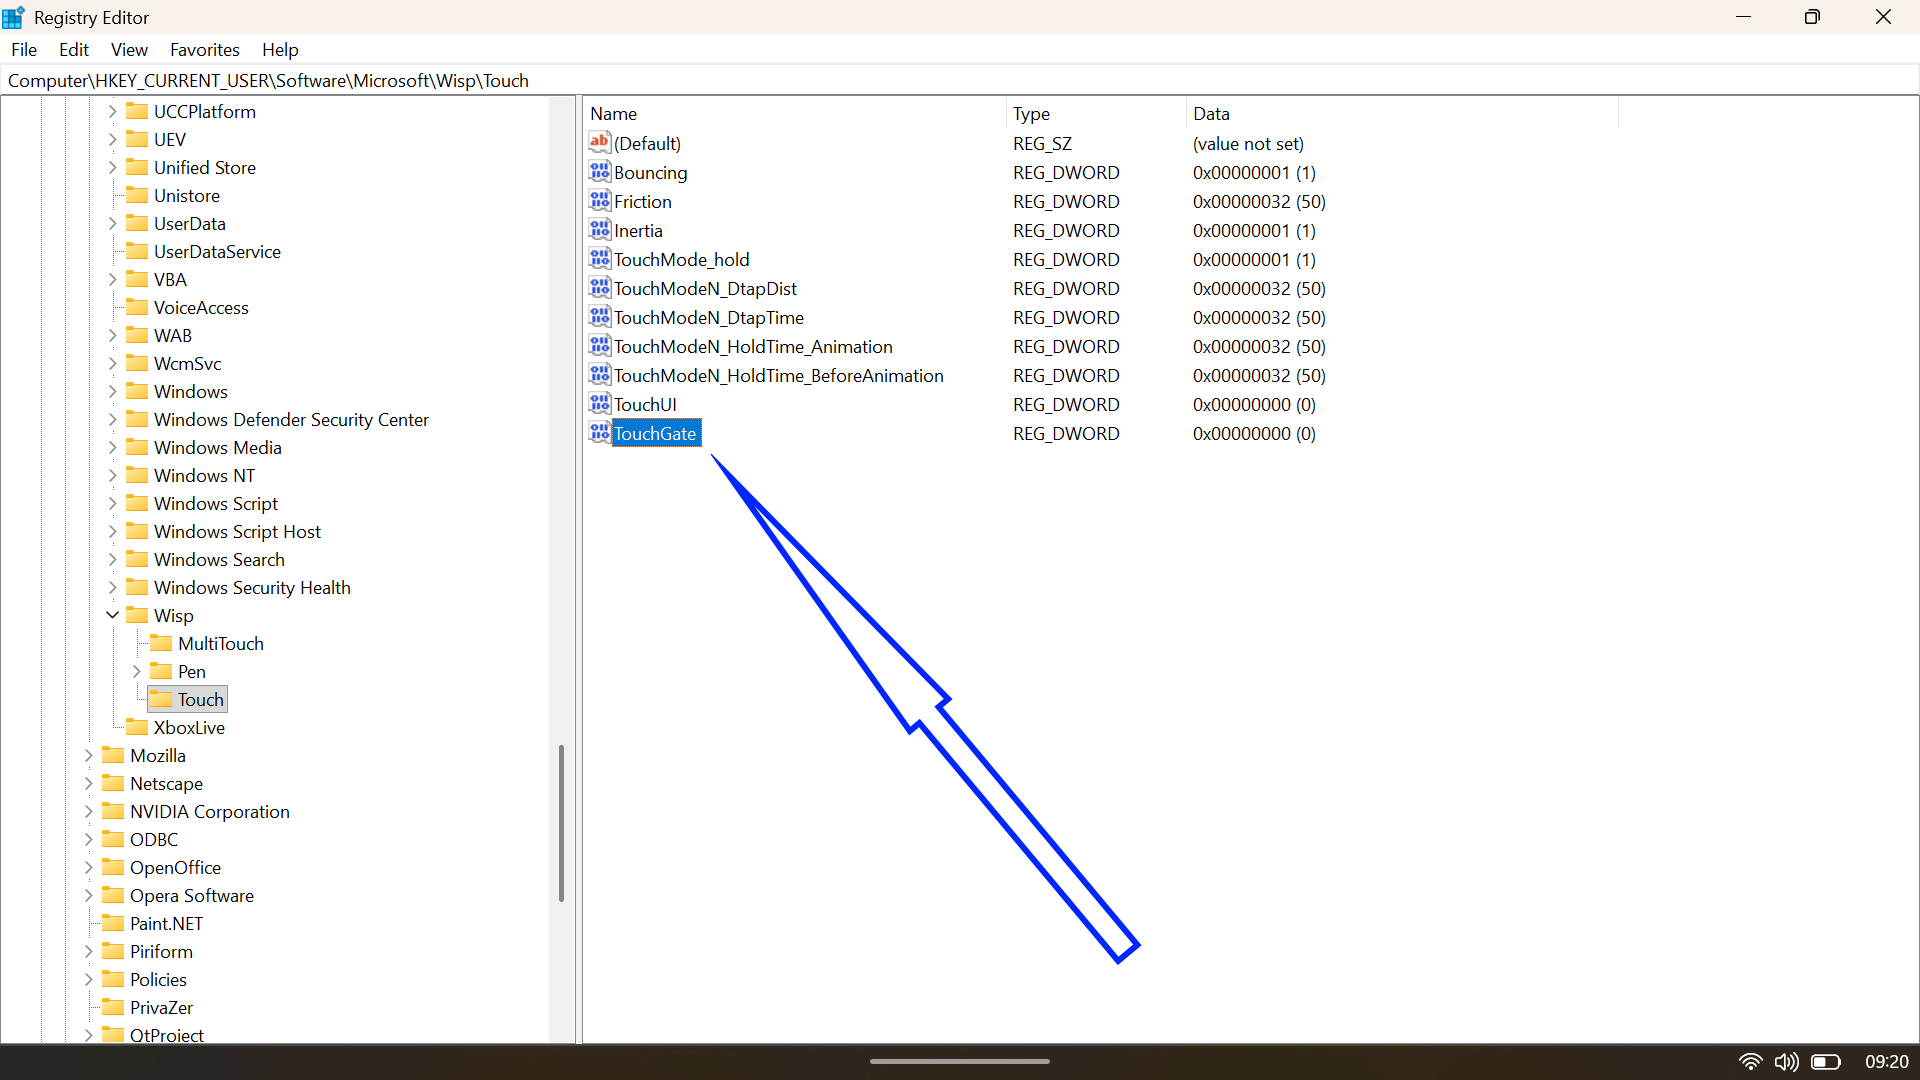
- In the right-hand pane, look for a value named TouchGate.
- If TouchGate does not exist, right-click on the empty space, select New > DWORD (32-bit) Value, and name it TouchGate.
- If TouchGate does not exist, right-click on the empty space, select New > DWORD (32-bit) Value, and name it TouchGate.
- Double-click TouchGate and ensure the Value data is set to 0.
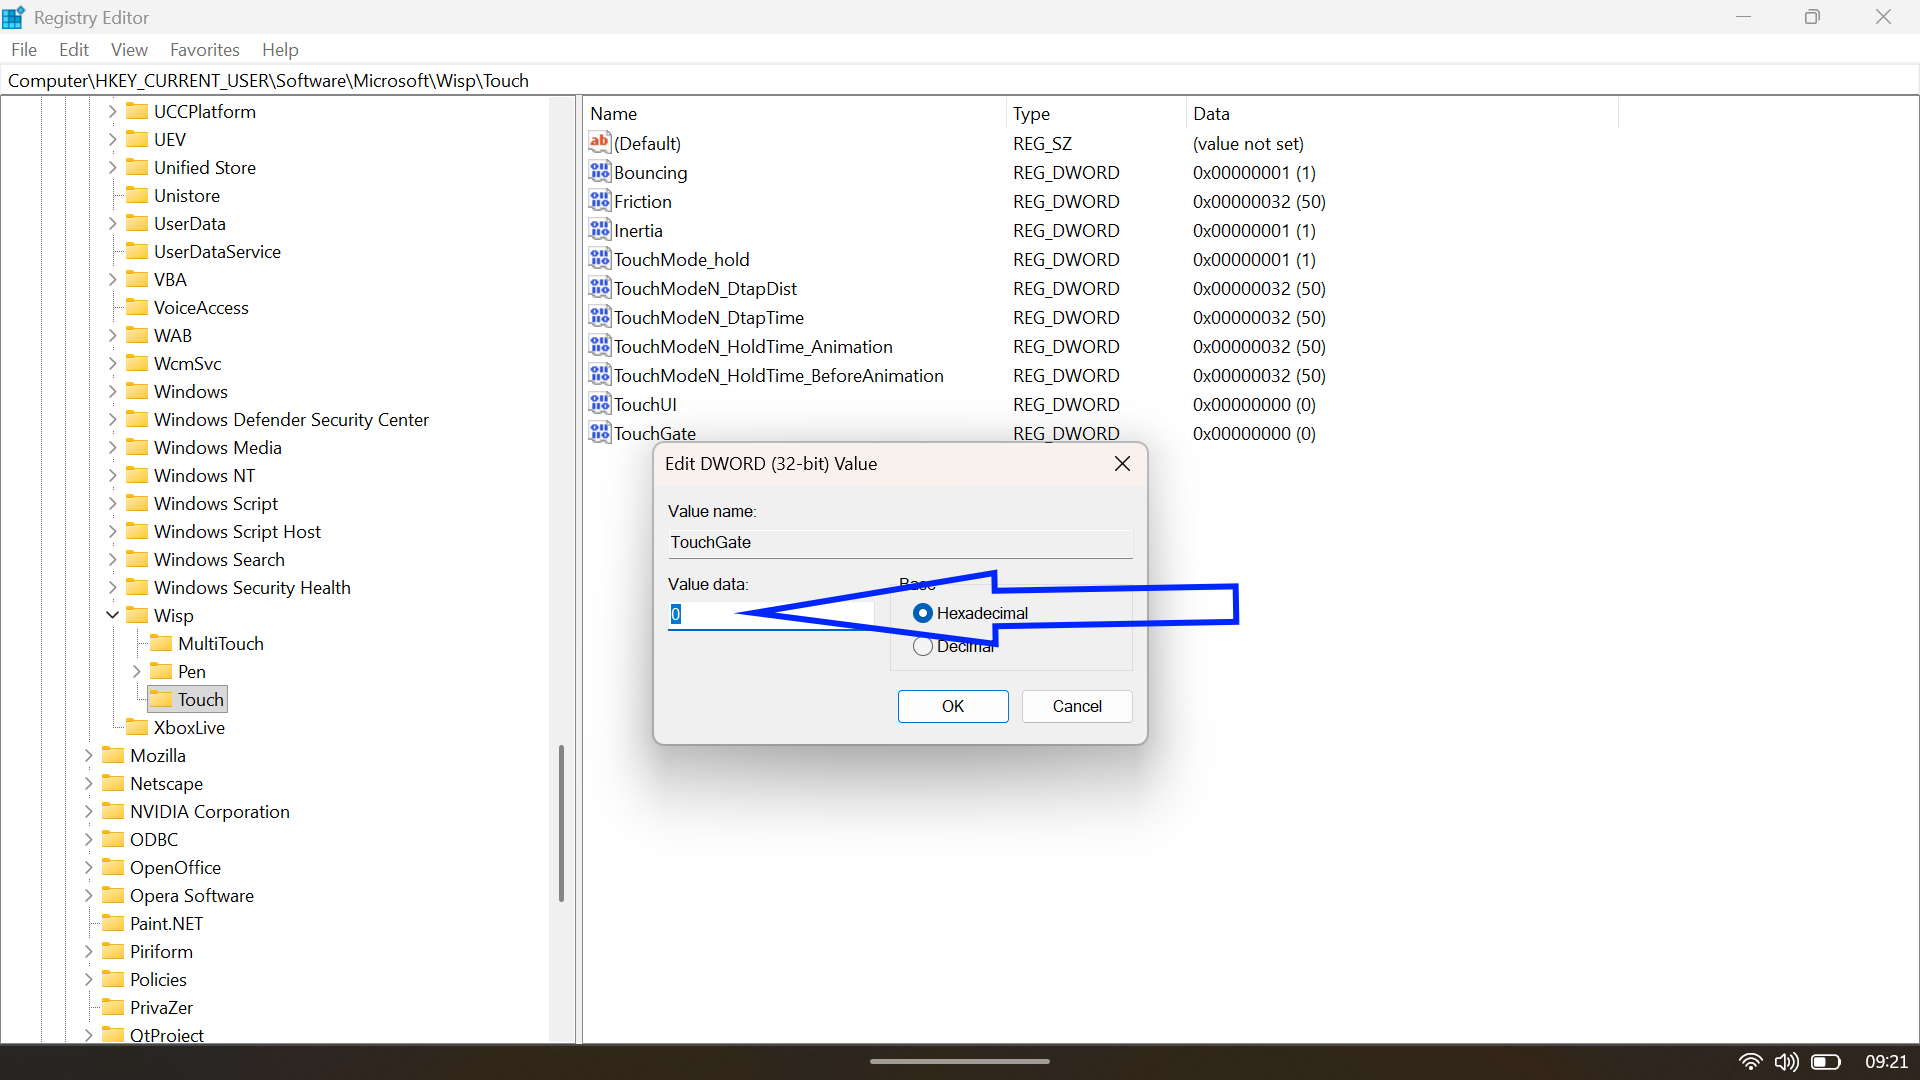
- Click OK and restart your computer.
To reverse this, navigate back to the same key and change the TouchGate value to 1
How to Turn Off Touch Screen Using PowerShell
If you are more comfortable living in the command line, or you are an IT admin who needs to flip this switch on a bunch of machines in one go, PowerShell is the fast lane. It does the same job as Device Manager, just without clicking through menus.
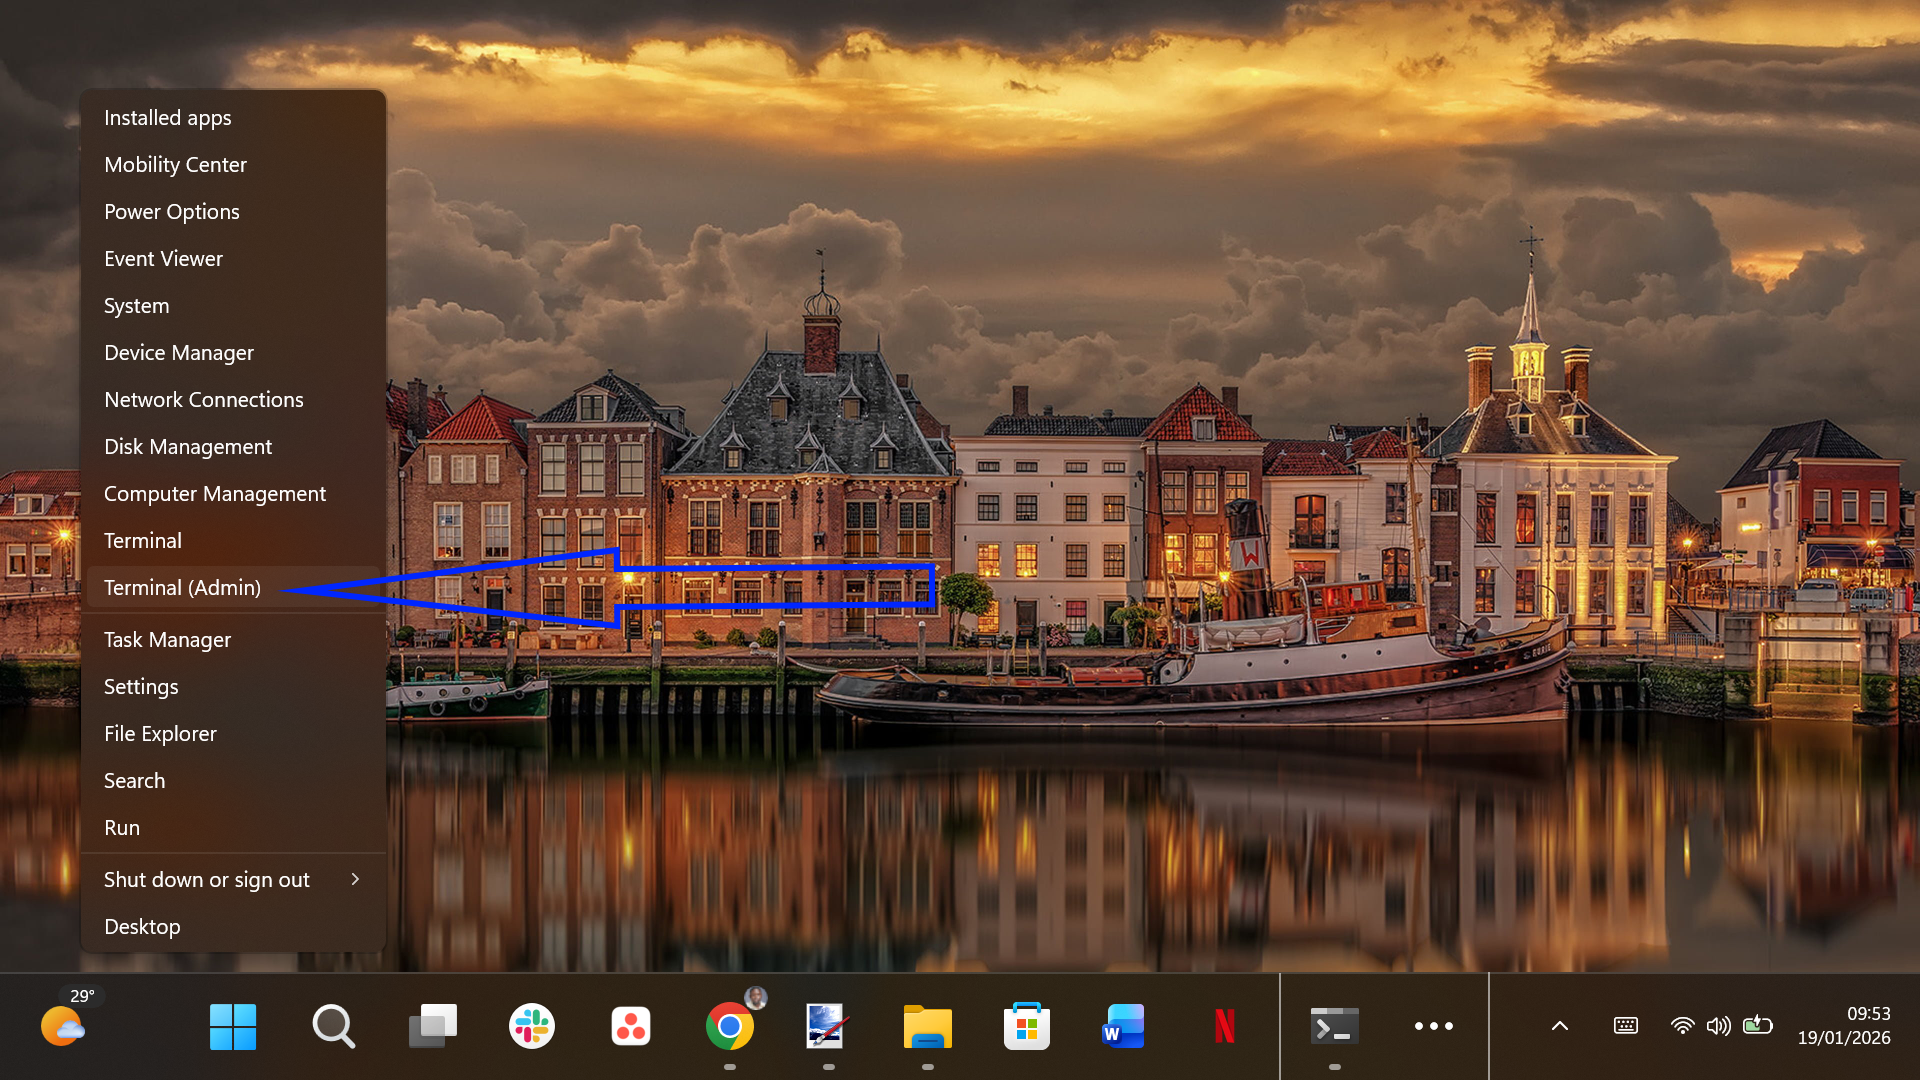
- Right-click the Start button and select Terminal (Admin).
- To verify the name of your touch device, type the following command and press Enter:
Get-PnpDevice | Where-Object { $_.FriendlyName -like '*touch screen*' }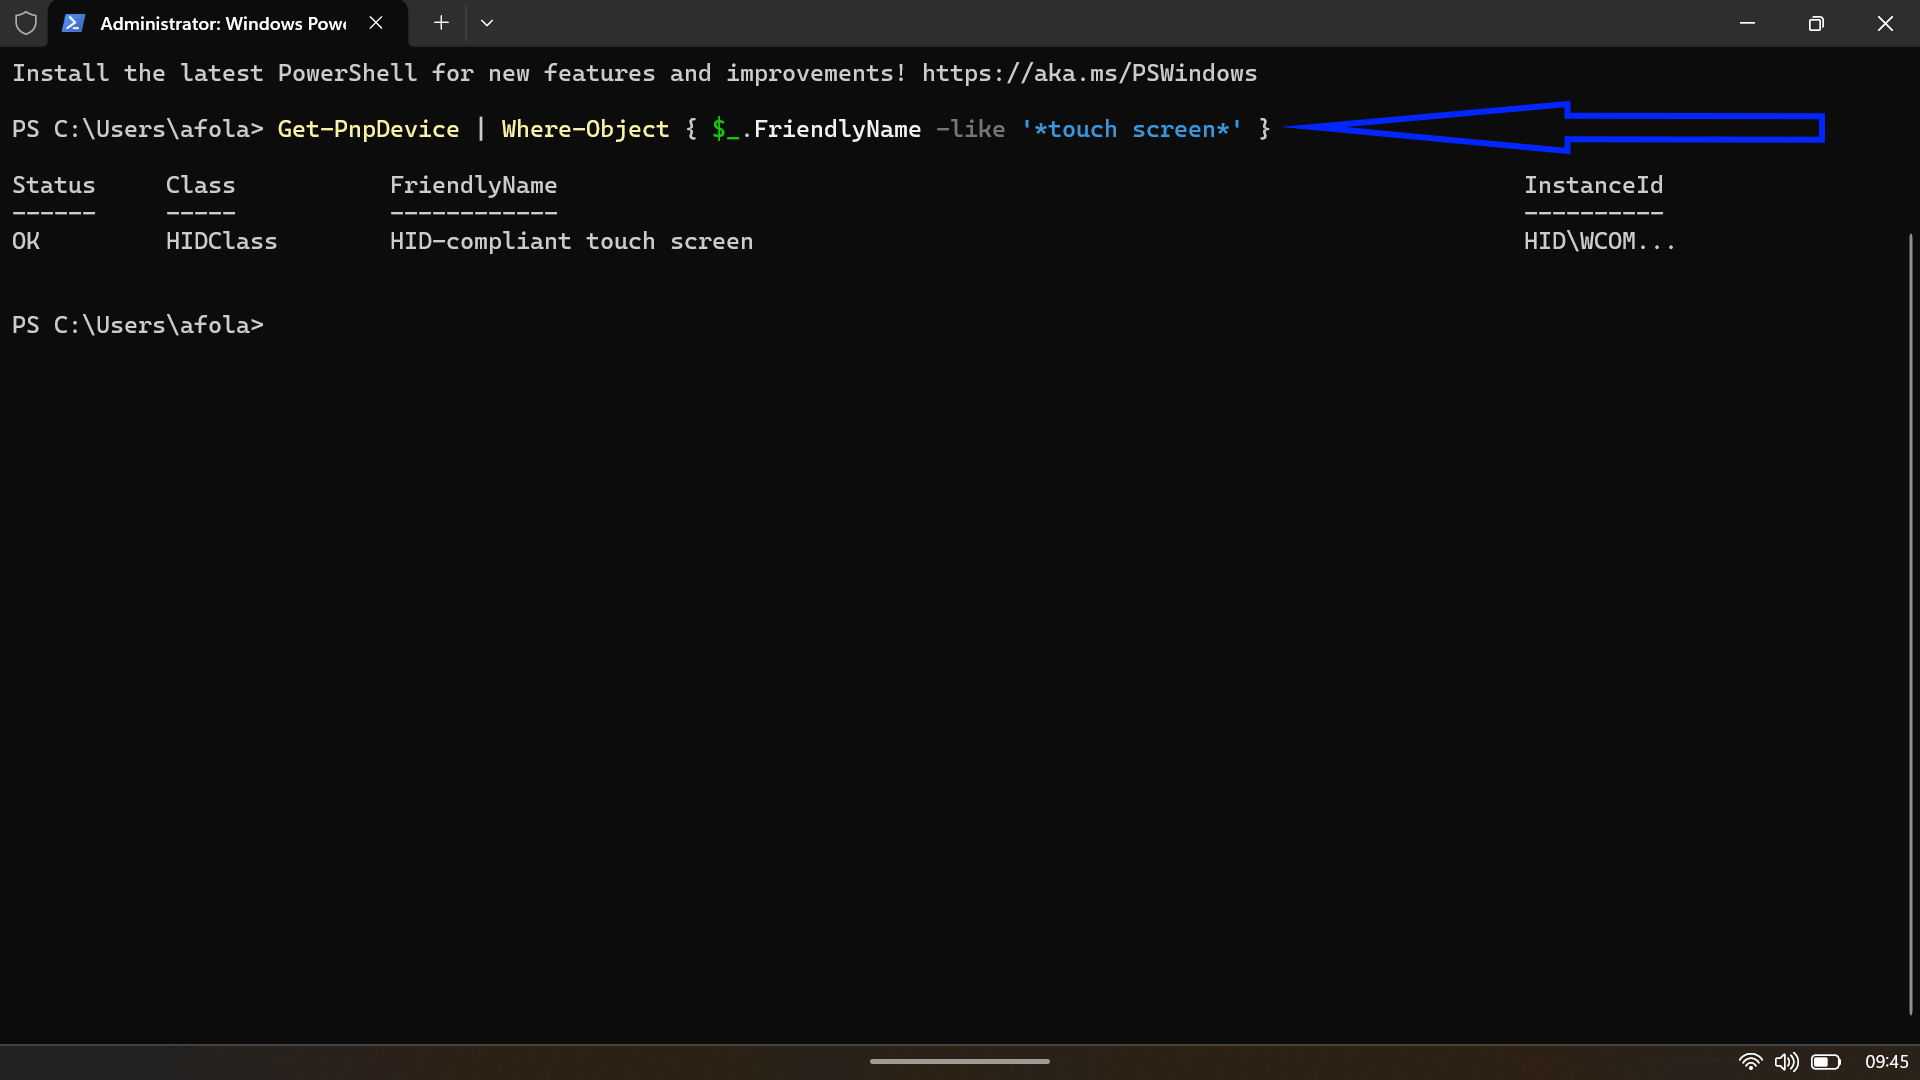
- Once you confirm the device is listed (usually showing a status of “OK”), run this command to disable it:
Get-PnpDevice | Where-Object { $_.FriendlyName -like '*touch screen*' } | Disable-PnpDevice -Confirm:$false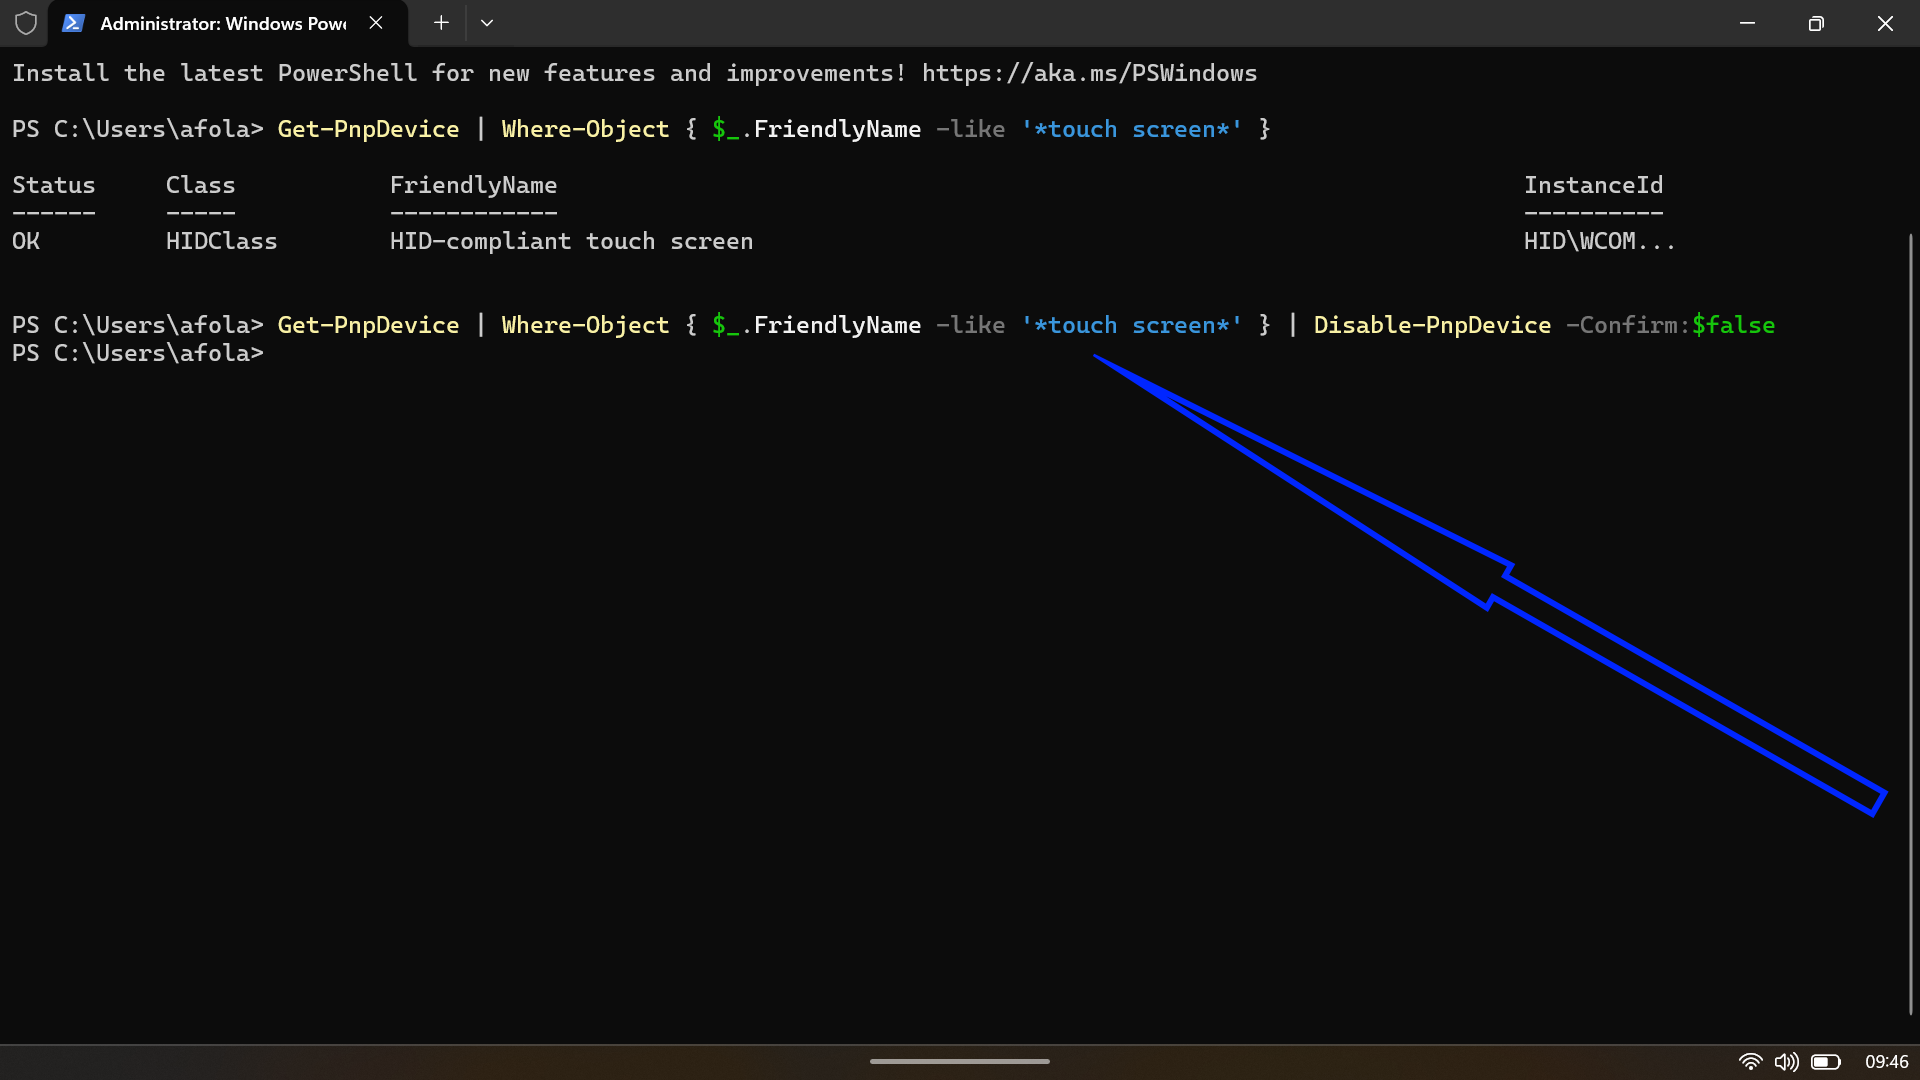
If the command executes without error, the touch screen is disabled. To re-enable it via PowerShell, simply swap Disable-PnpDevice with Enable-PnpDevice in the command above.
How to Disable Touch Screen Through Group Policy Editor (Windows 11 Pro)
If you are on Windows 11 Pro, Enterprise, or Education, you get one more tool in your kit: the Group Policy Editor. This is the more “enterprise-grade” side of Windows, where you can shape how the system and its hardware behave at a deeper level.
Note: Windows 11 Home edition doesn’t include Group Policy Editor by default, making this method exclusive to higher-tier Windows editions.
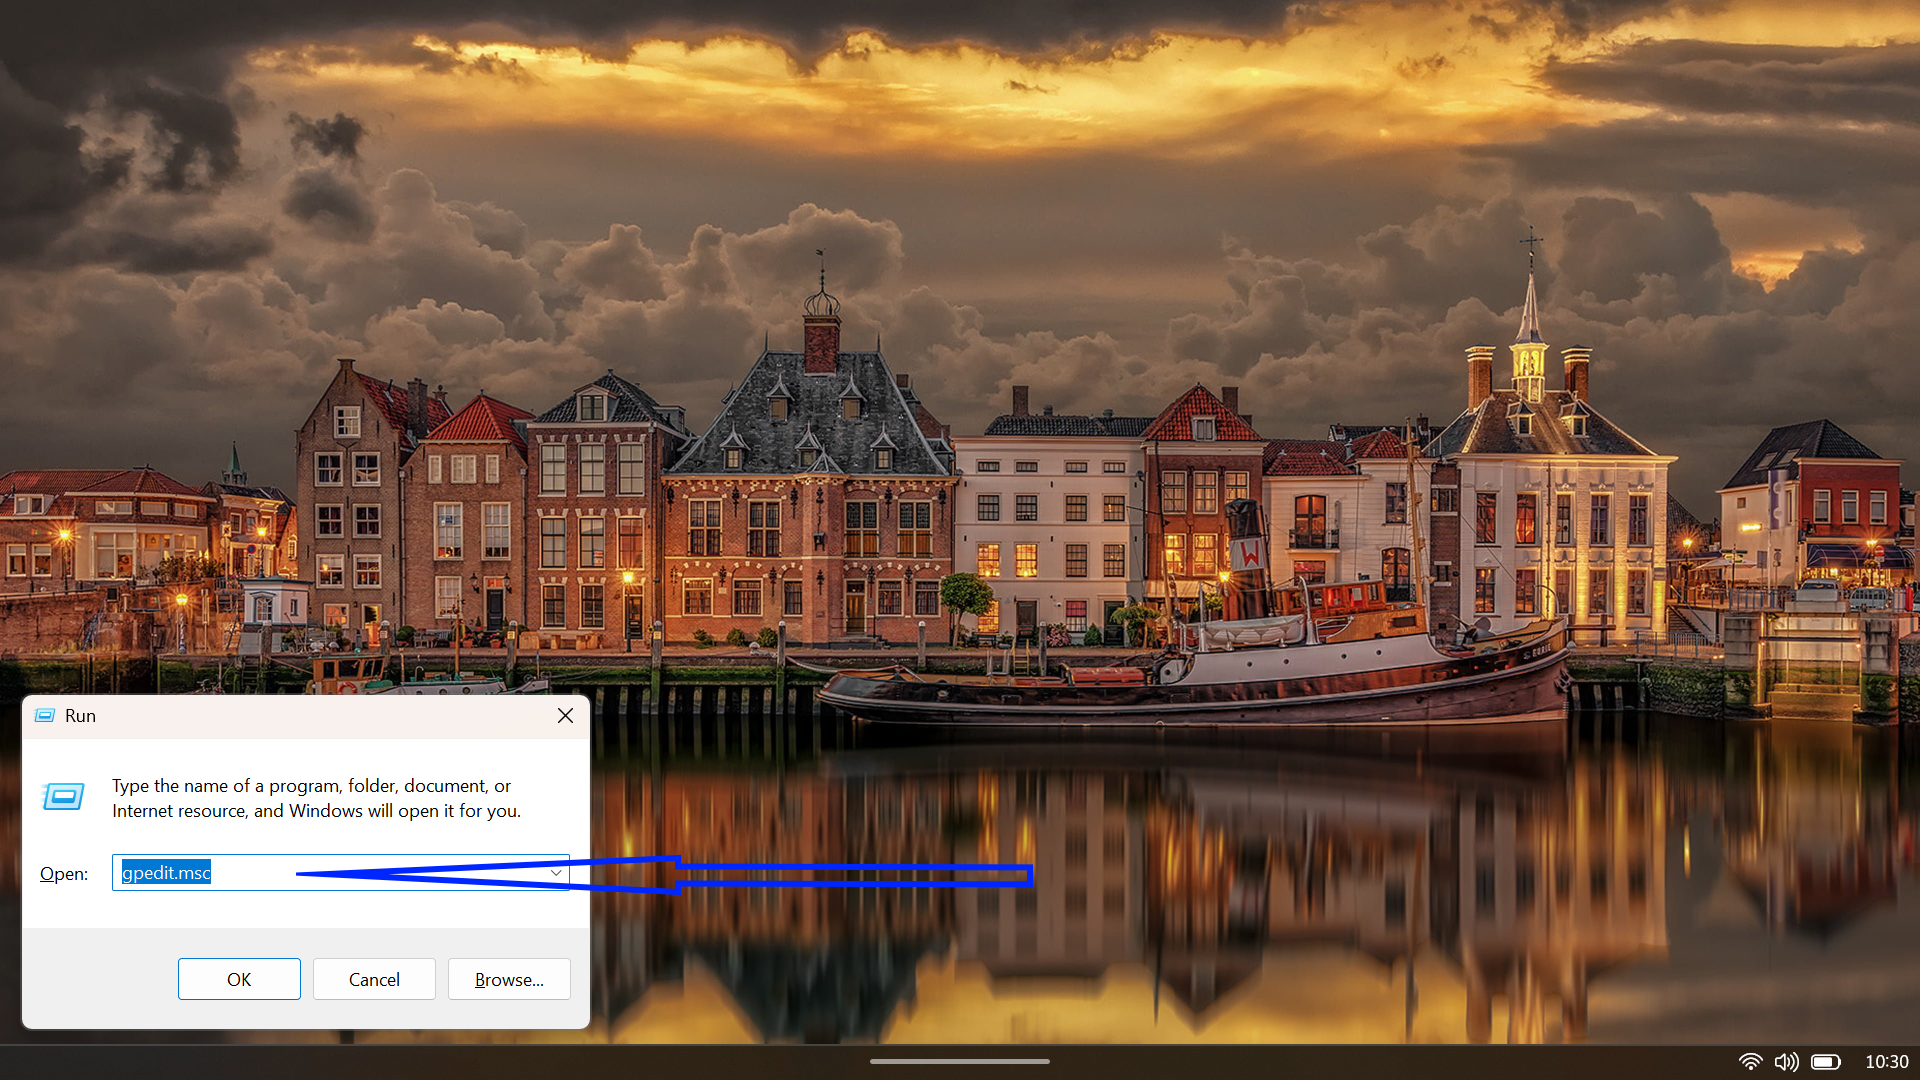
- Press Windows + R, type gpedit.msc, and press Enter to launch the Local Group Policy Editor.
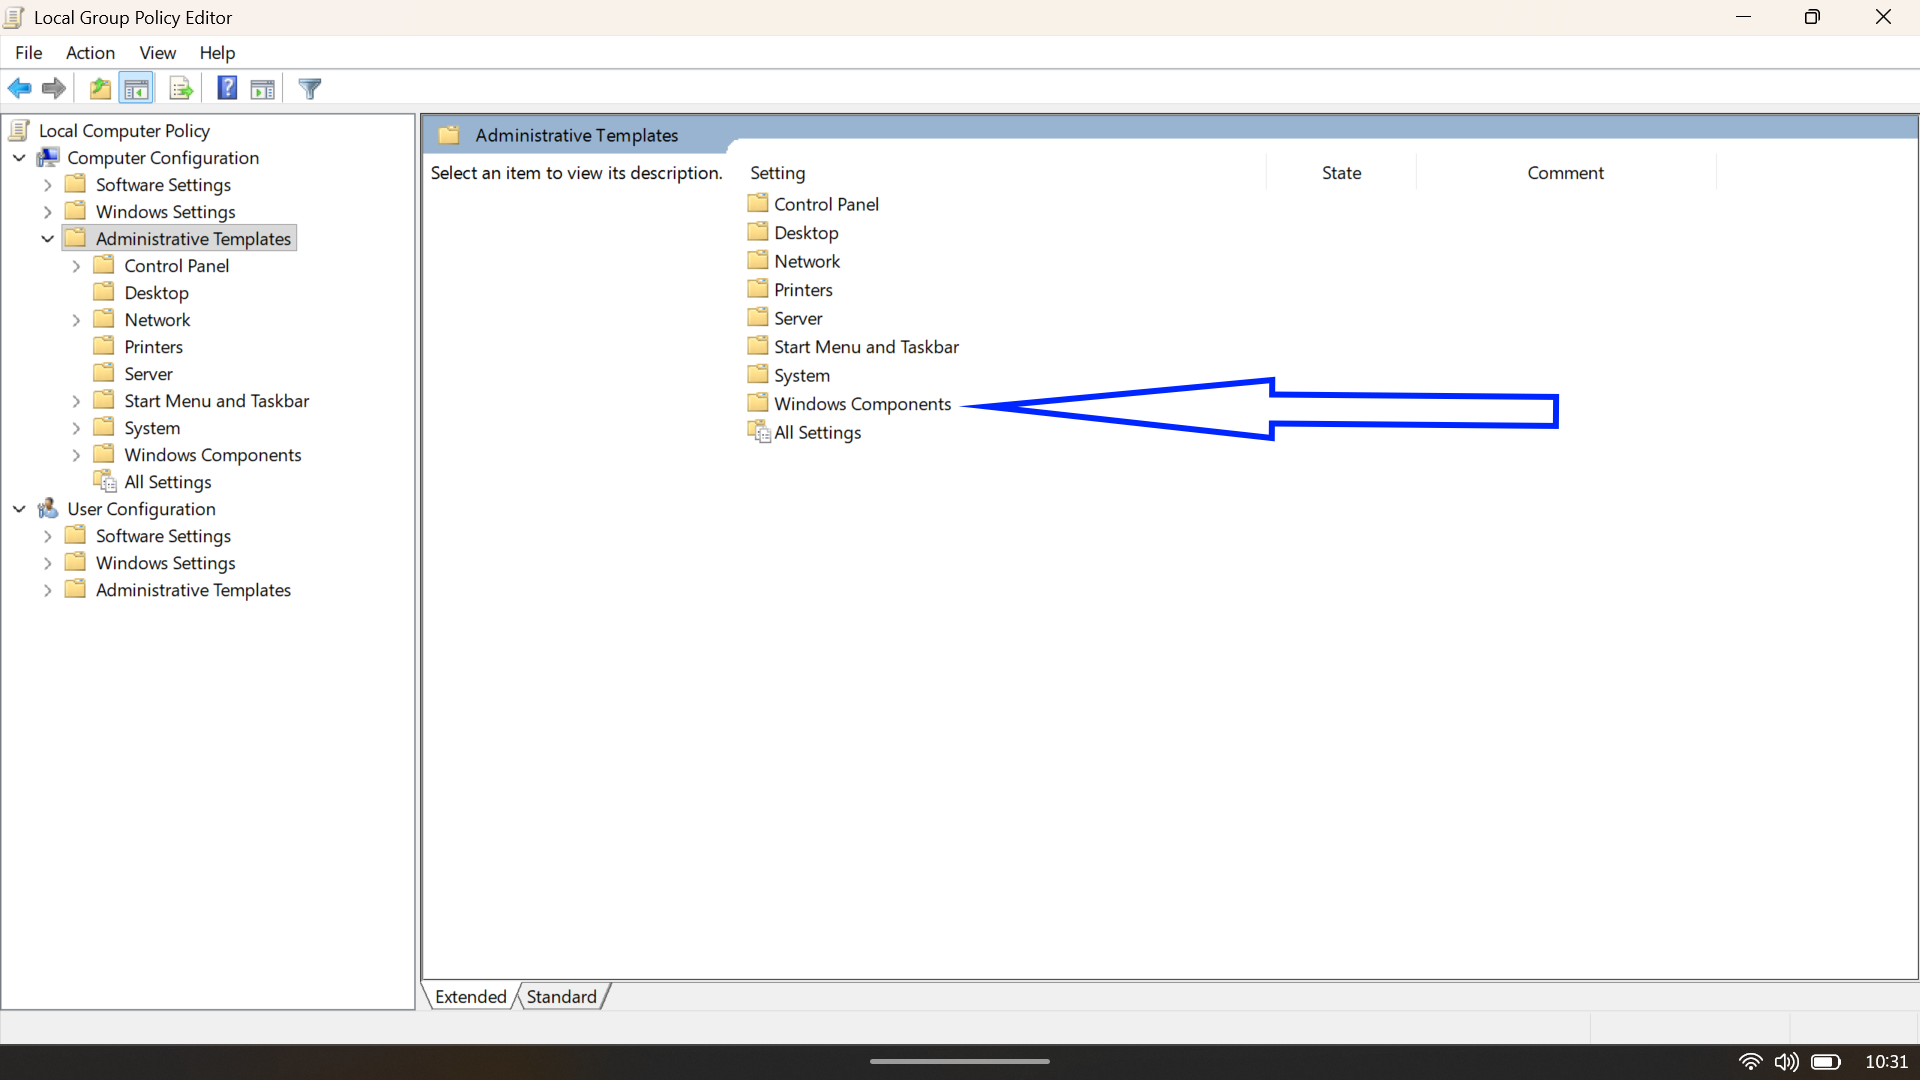
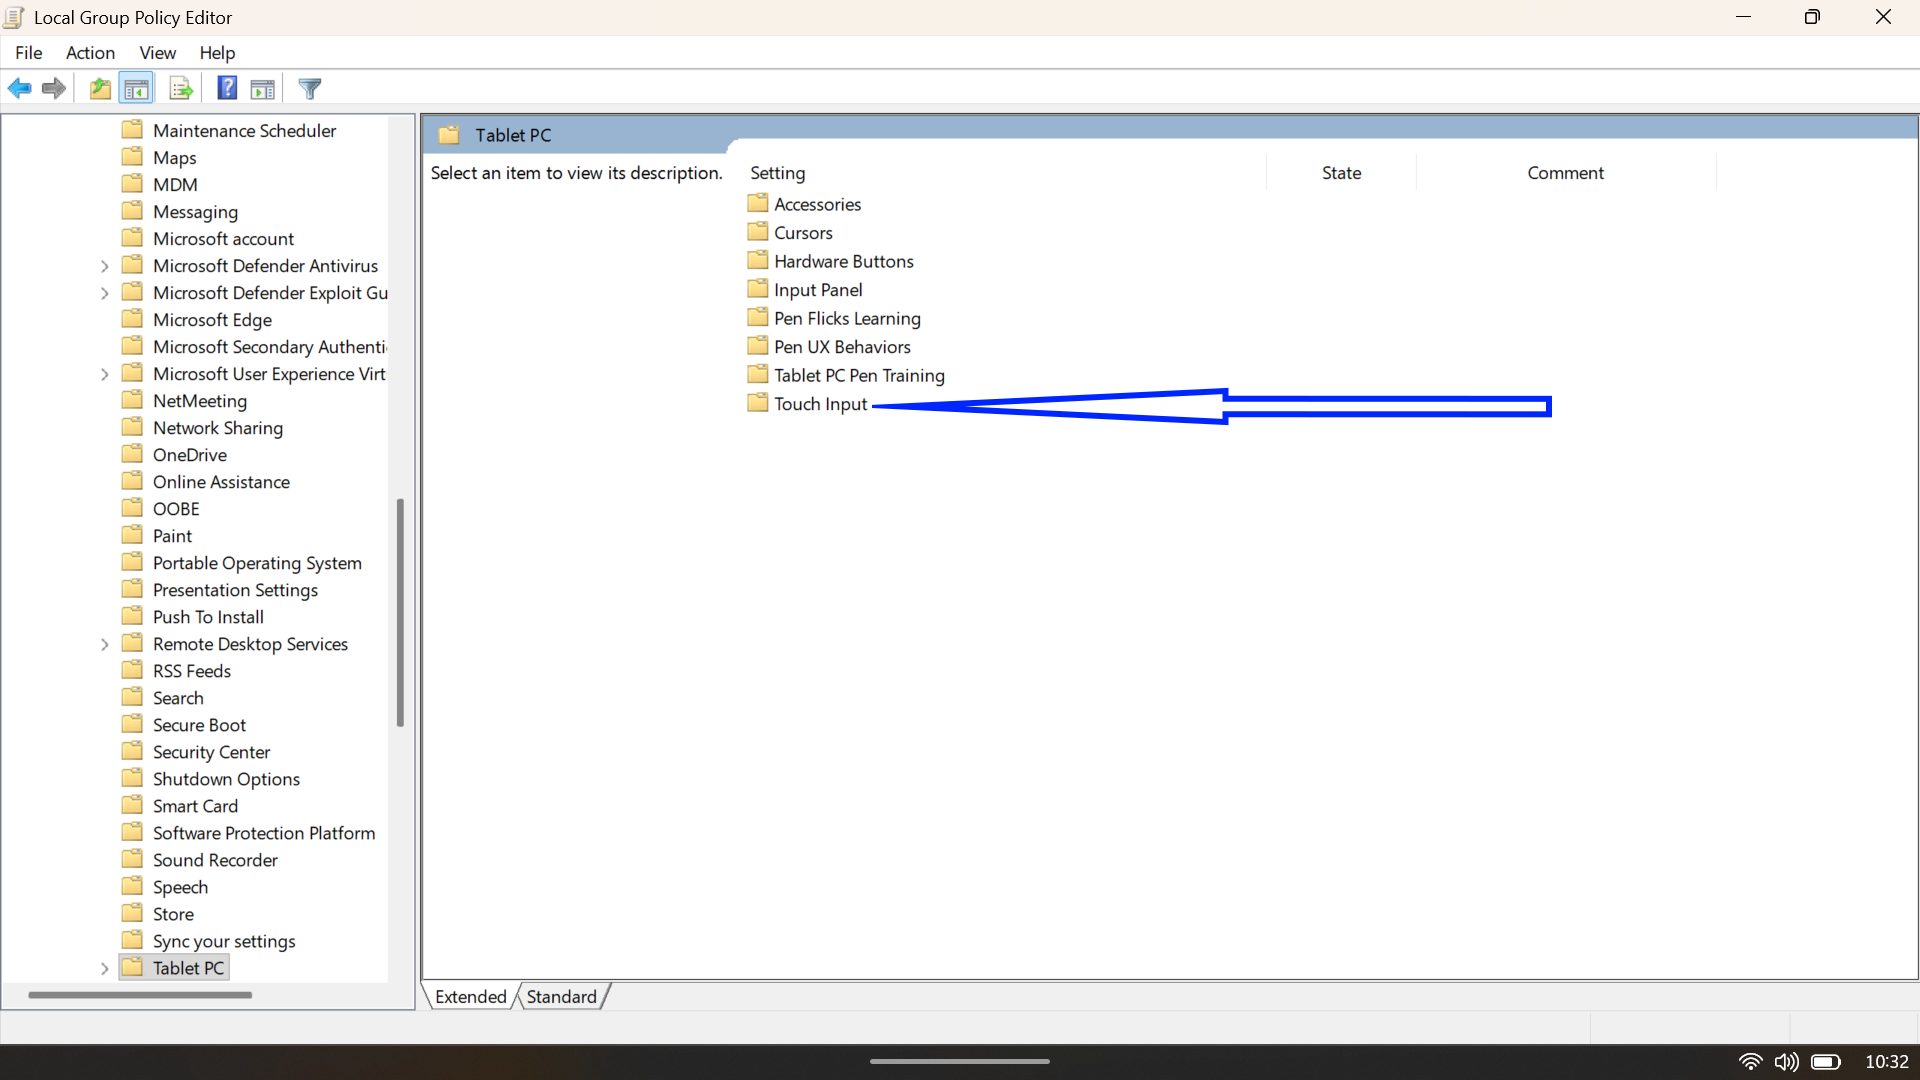
- Navigate through the following hierarchy in the left sidebar:
Computer Configuration > Administrative Templates > Windows Components > Tablet PC > Touch Input

- In the right pane, locate the policy named Turn off Tablet PC touch input and double-click it.
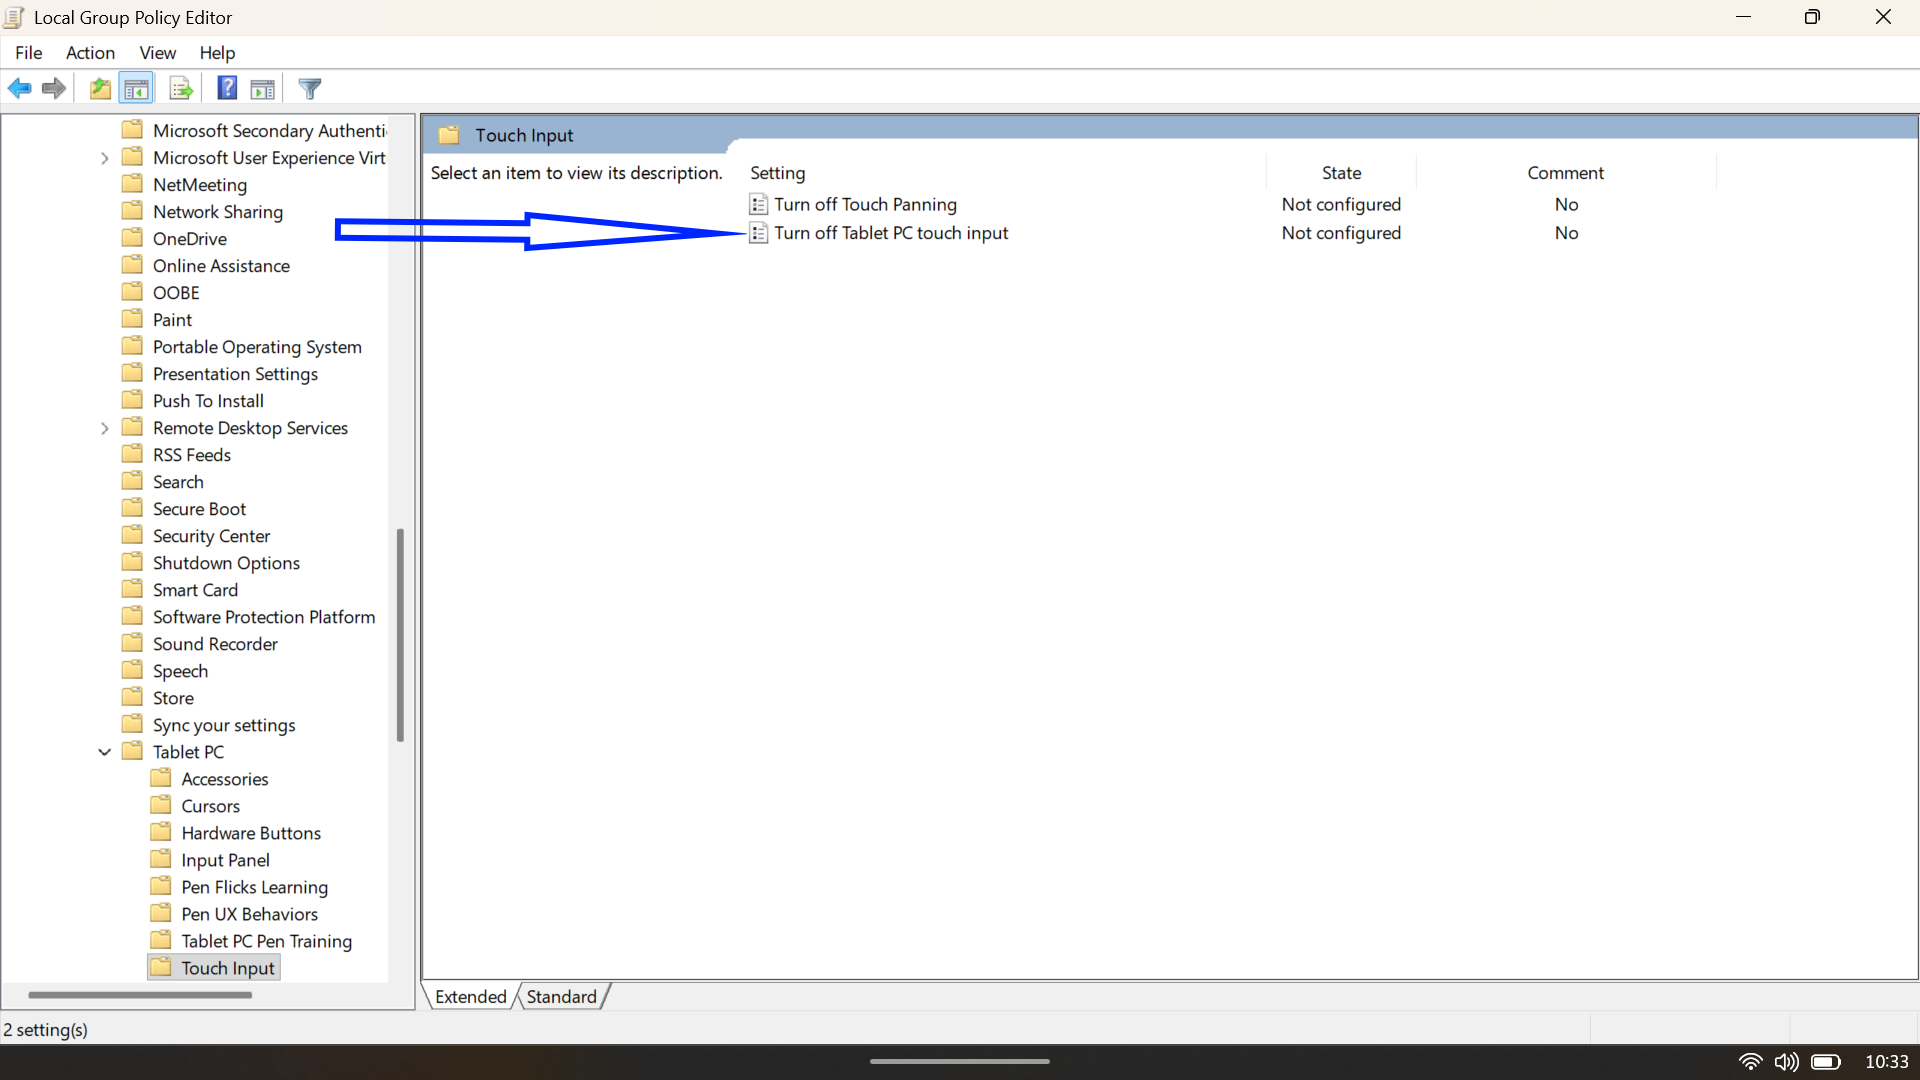
- Select Enabled in the dialog that appears, then click Apply and OK. This policy instructs Windows to completely disregard touch input across the entire system.
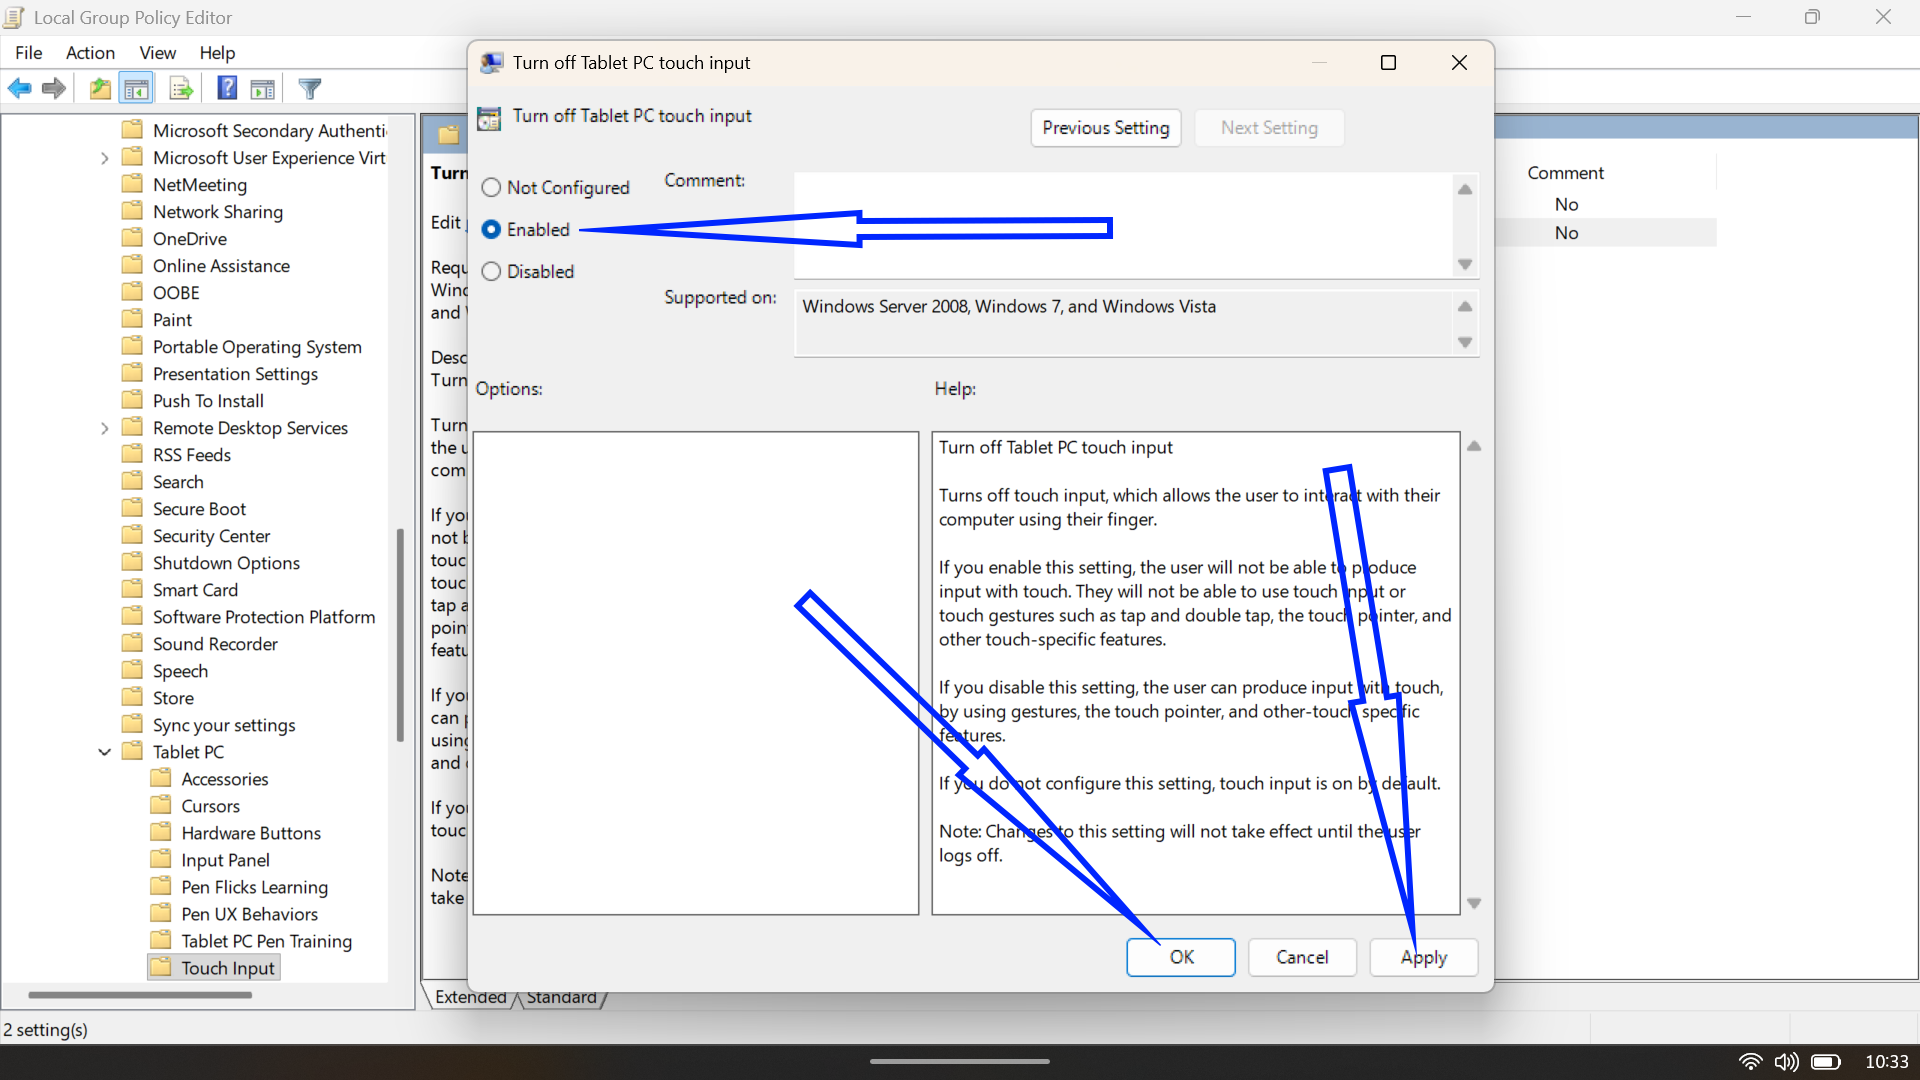
- Close the Group Policy Editor and restart your computer. After the reboot, the touch screen will be disabled at the policy level.
If you ever want to undo it, go back to that same policy, set it to Not Configured or Disabled, and restart again.
Conclusion
Rach method has its own personality. Device Manager is quick and simple, the Registry and Terminal routes are more permanent, and Group Policy brings that enterprise-level sense of control. Pick the one that matches your comfort level and the version of Windows you are running.