In 2025, protecting your privacy on Facebook matters more than ever. Facebook still sets many of its options to public or semi-public by default, which means your posts, photos, and personal details might be visible to more people than you realize.
The good news is that you can take control of your privacy in just a few minutes. This guide walks you through the exact steps to make your Facebook profile as private as possible on both mobile and desktop.
How to Make Your Facebook Private on Mobile
Making your Facebook profile private is extremely easy on mobile. Follow these steps.
Review Audience Settings
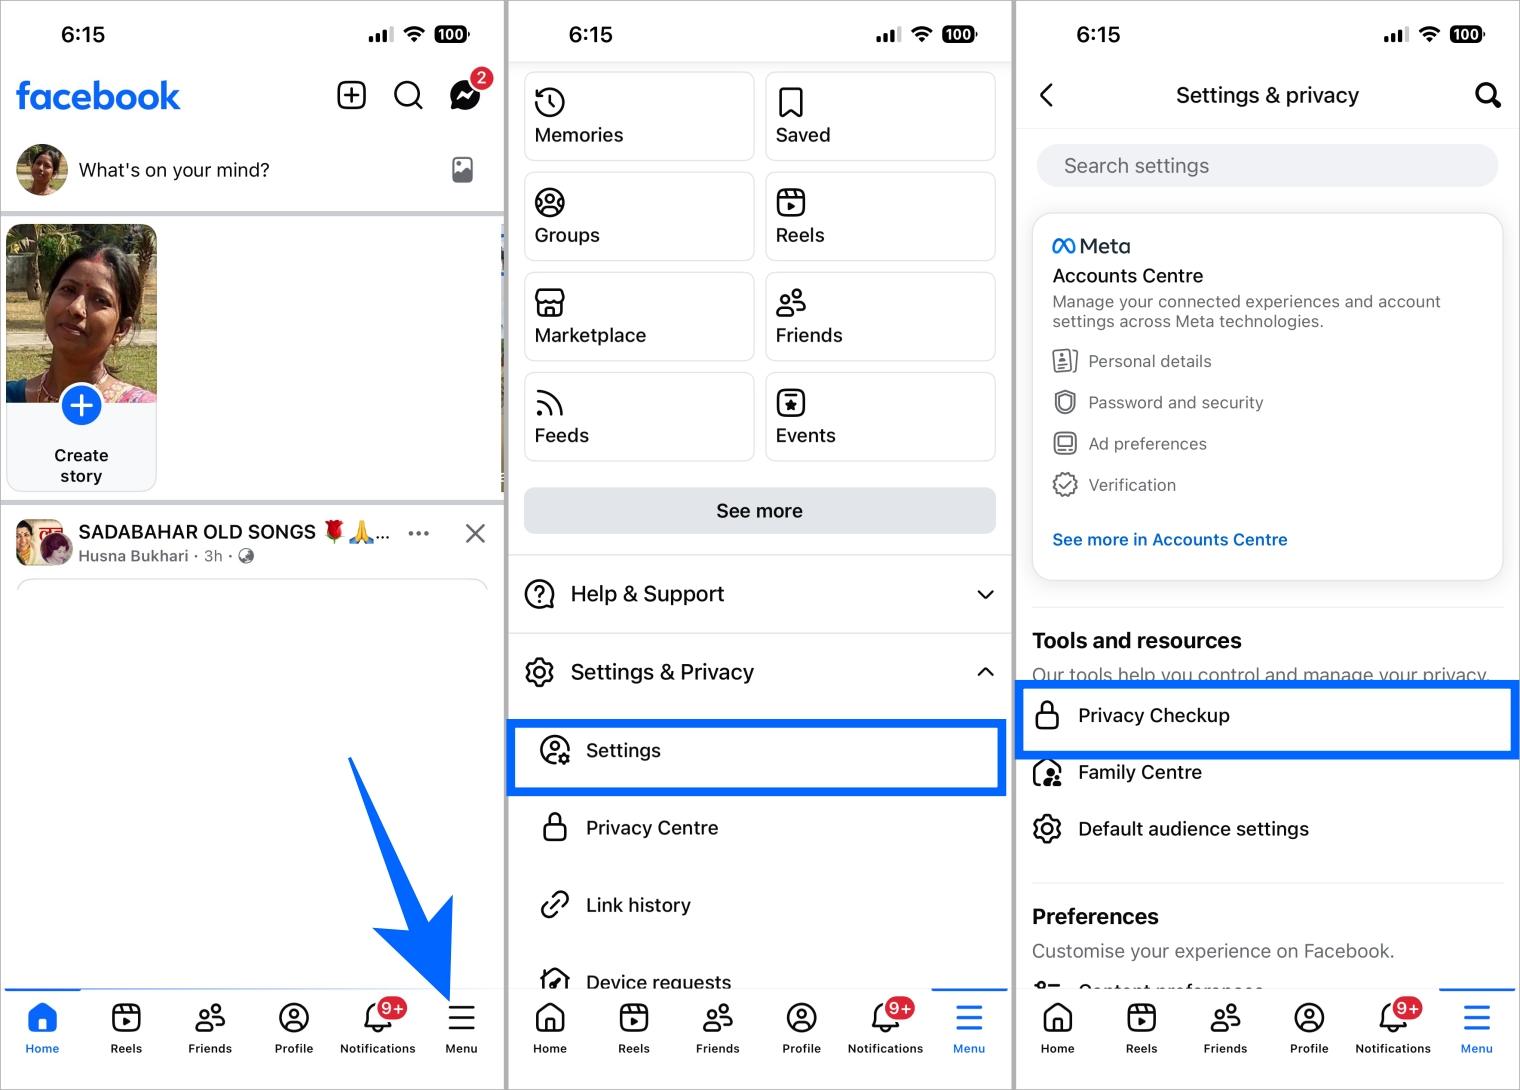
- Open the Facebook app on your smartphone and tap the Menu icon near the bottom-right corner of the screen.
- Scroll down and go to Settings & Privacy > Settings.
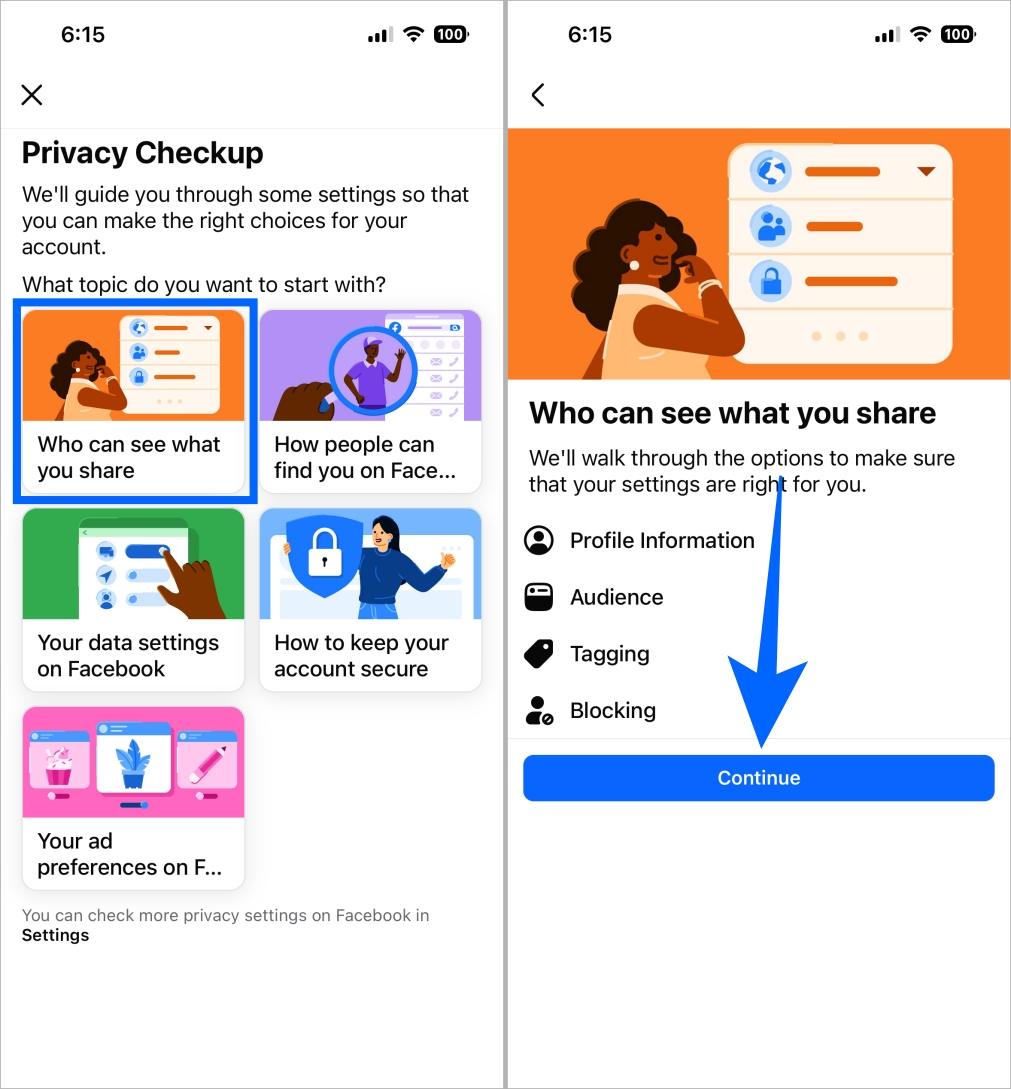
- Tap Privacy Checkup.

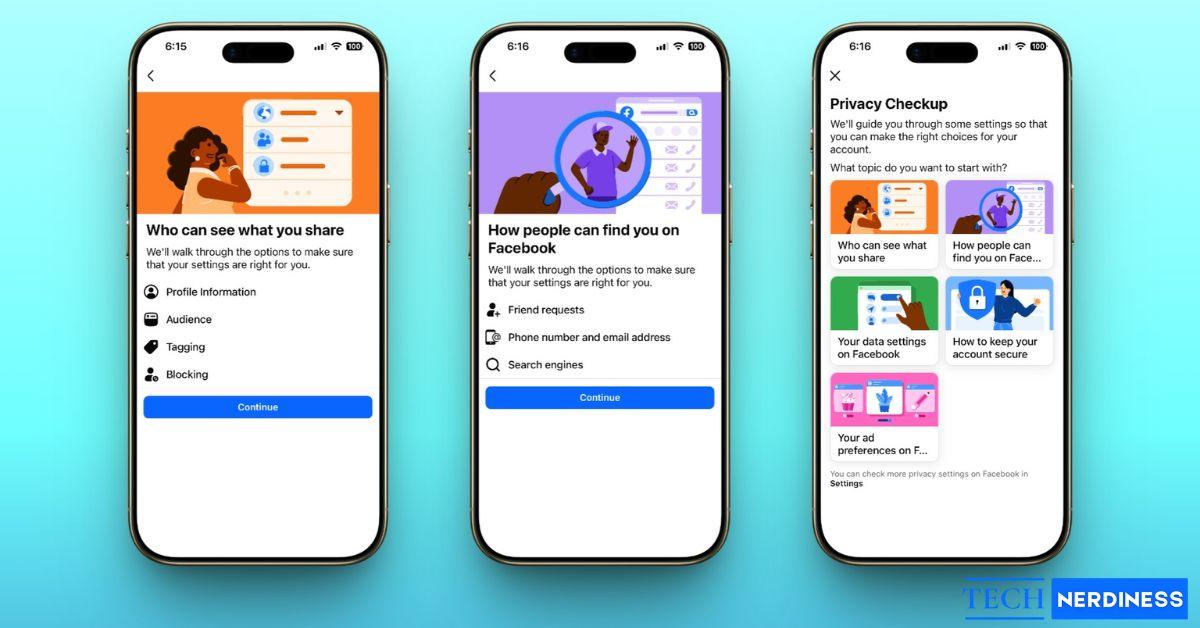
- Now tap Who Can See What You Share.
- Tap Continue to proceed further.

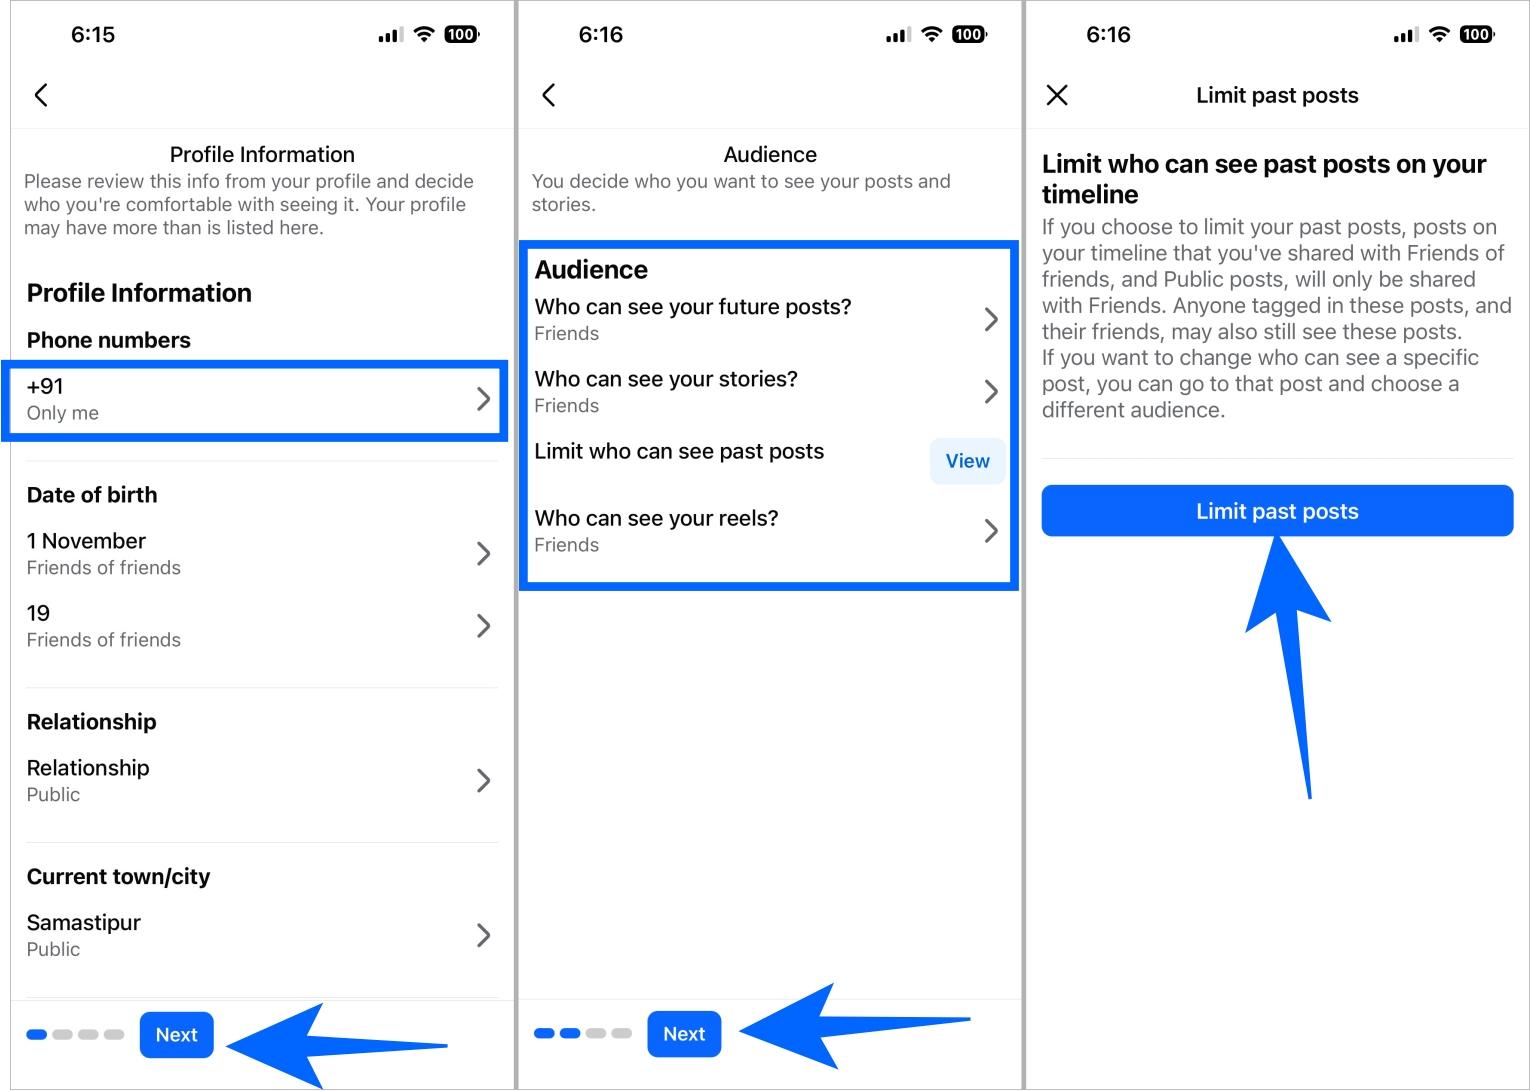
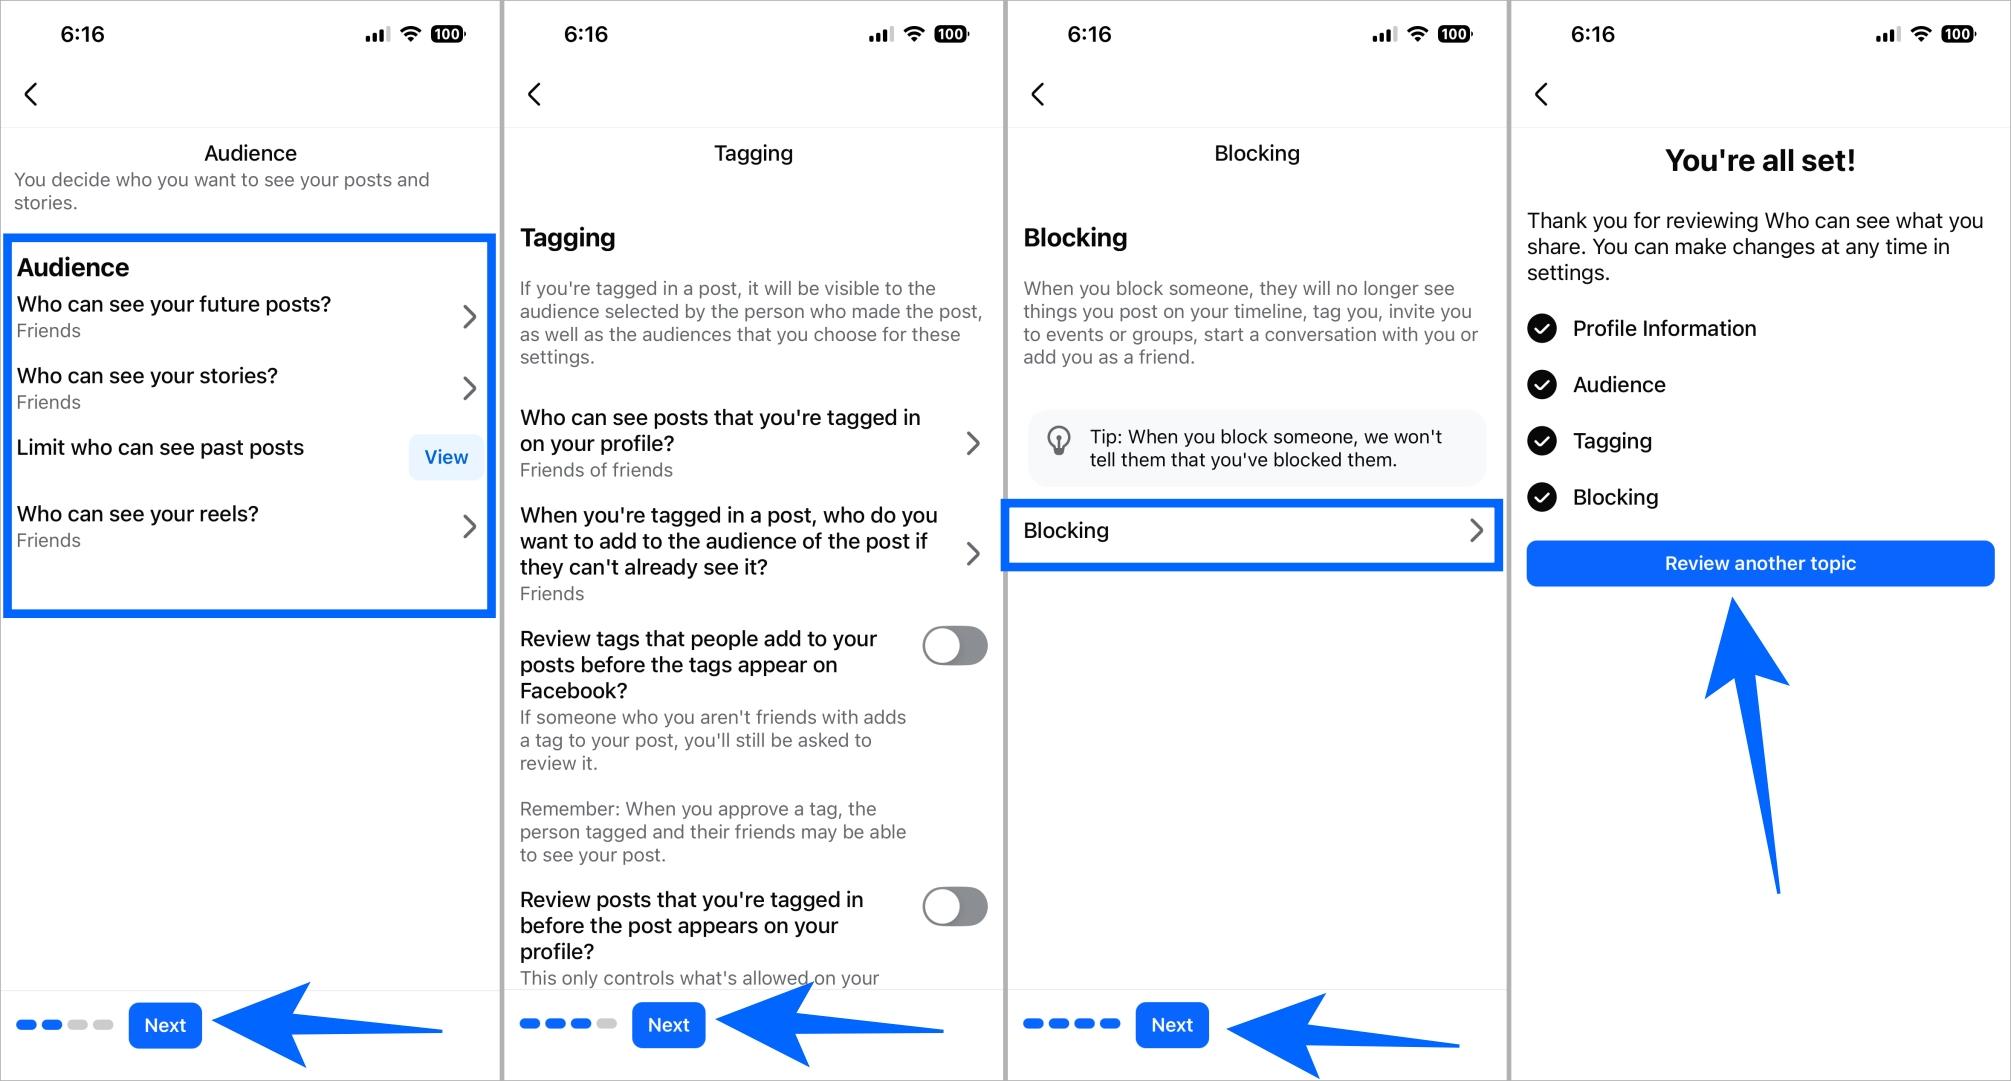
- Now tap on the items you wish to change and select Only Me to set them as private. Then, tap Next.
- Change the audience of your posts, stories, and reels by tapping on them and selecting Friends.
- Tap View next to Limit who can see past posts to limit your past posts to friends only.
- Again, tap Limit past posts and follow the prompts to limit your past posts audience.

- Tap Next to proceed further.
- Now, review your tagging settings and then tap Next.
- If you wish to block or unblock someone, tap Blocking or else tap Next.
- Tap Review another topic to finish changing the privacy of your posts’ audience.

Review How People Can Find You
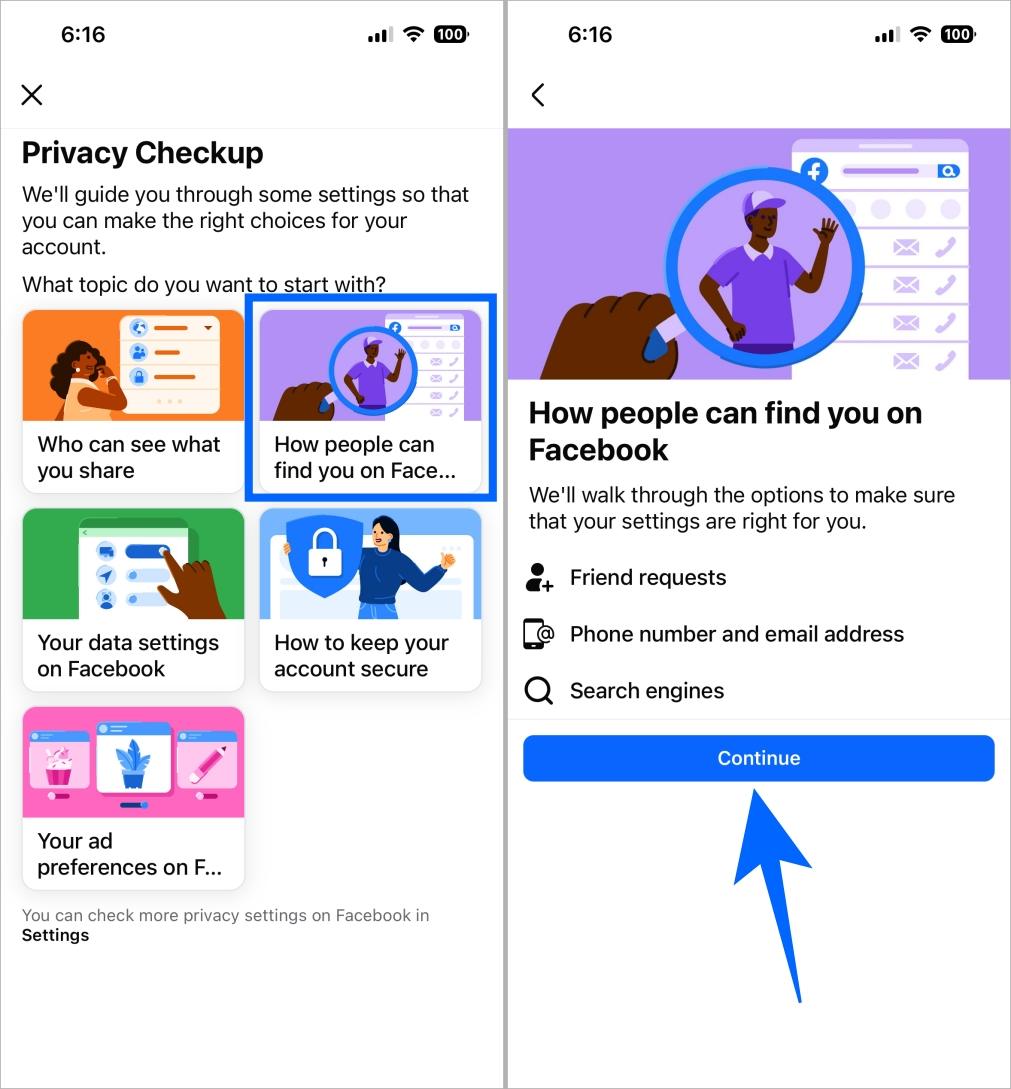
- On the Privacy Checkup page, tap How People Can Find You on Facebook.
- Tap Continue to move forward.

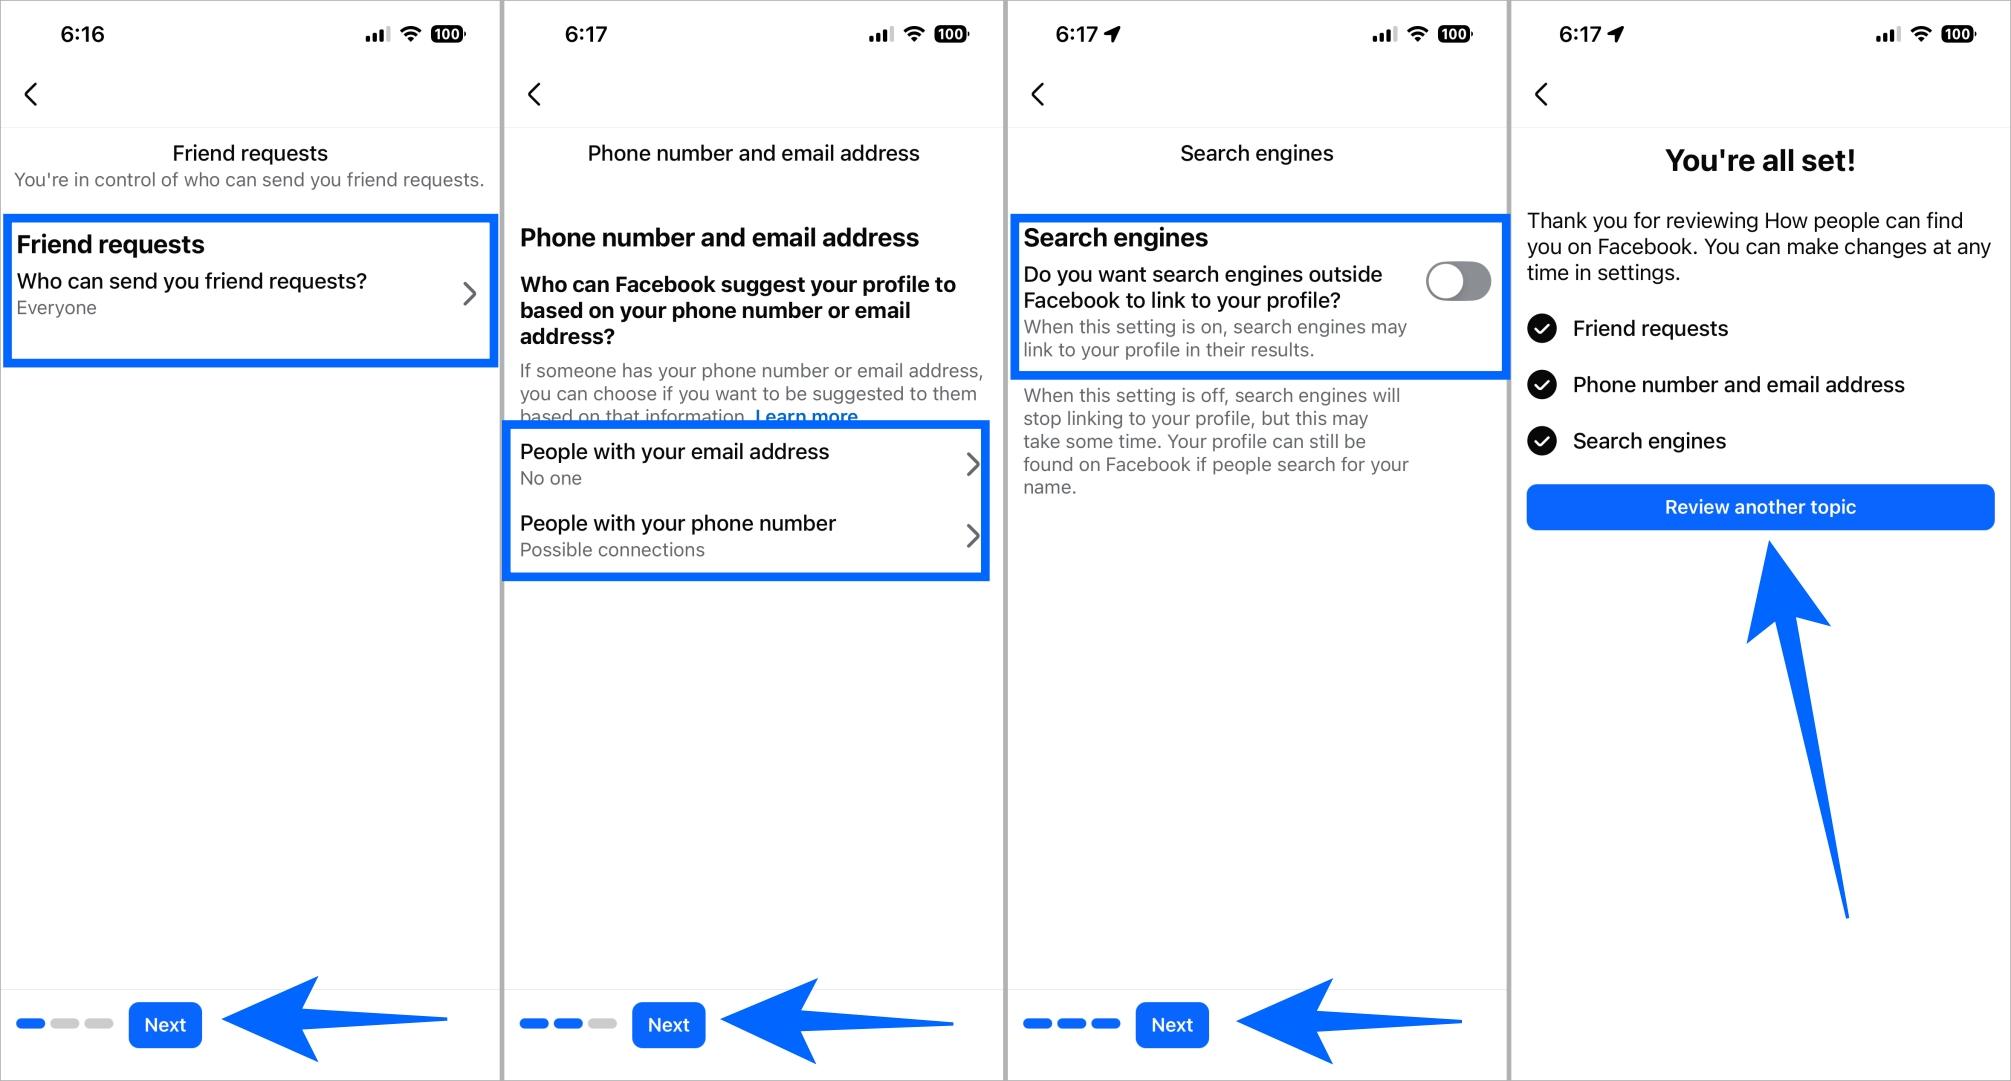
- Tap and change Who can send your friend requests?‘, once done, hit Next.
- Change who can find you with your number and email, and then tap Next.
- Keep the search engine toggle off and tap Next.
- Now, tap Review another topic.

Review Your Data Settings
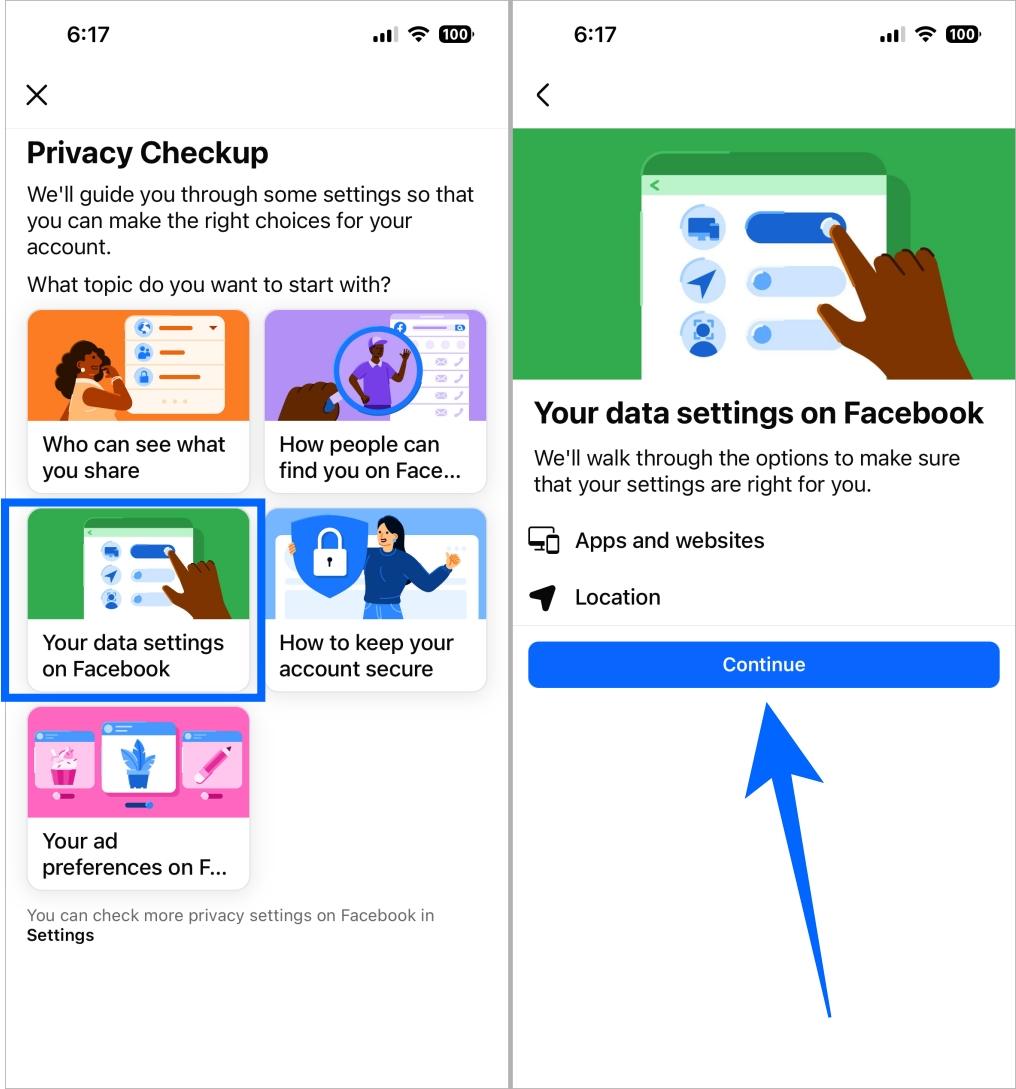
- You’ll be redirected again to the Privacy Checkup page, tap Your data settings on Facebook.
- Tap Continue.

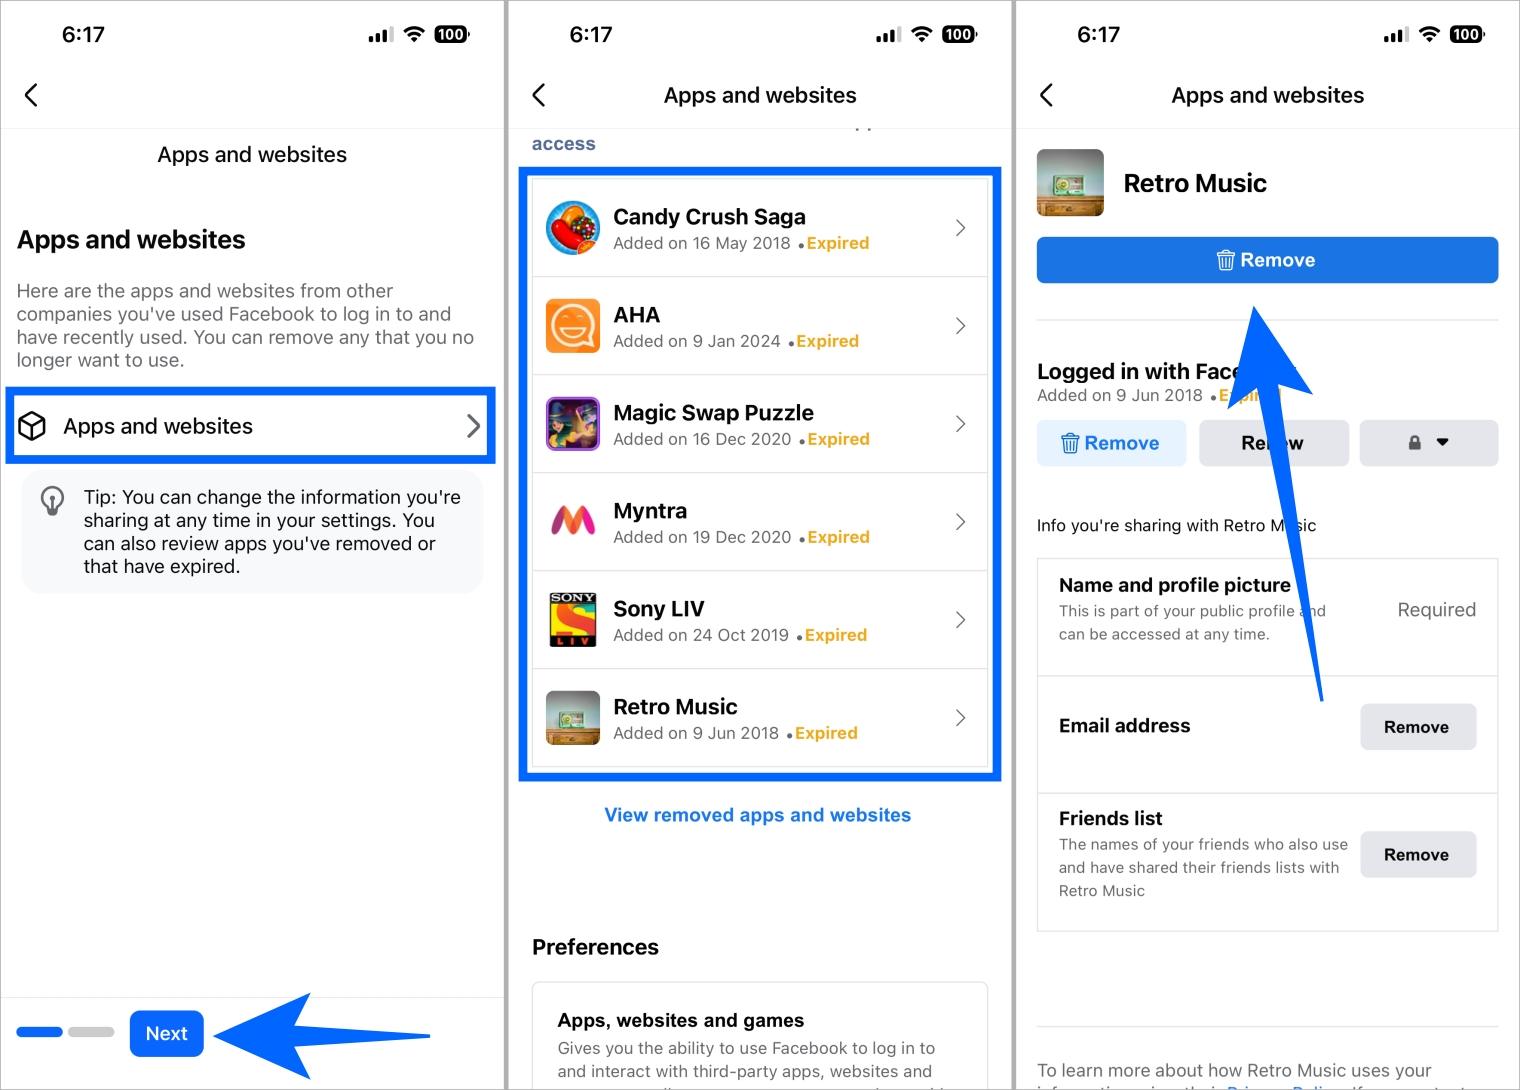
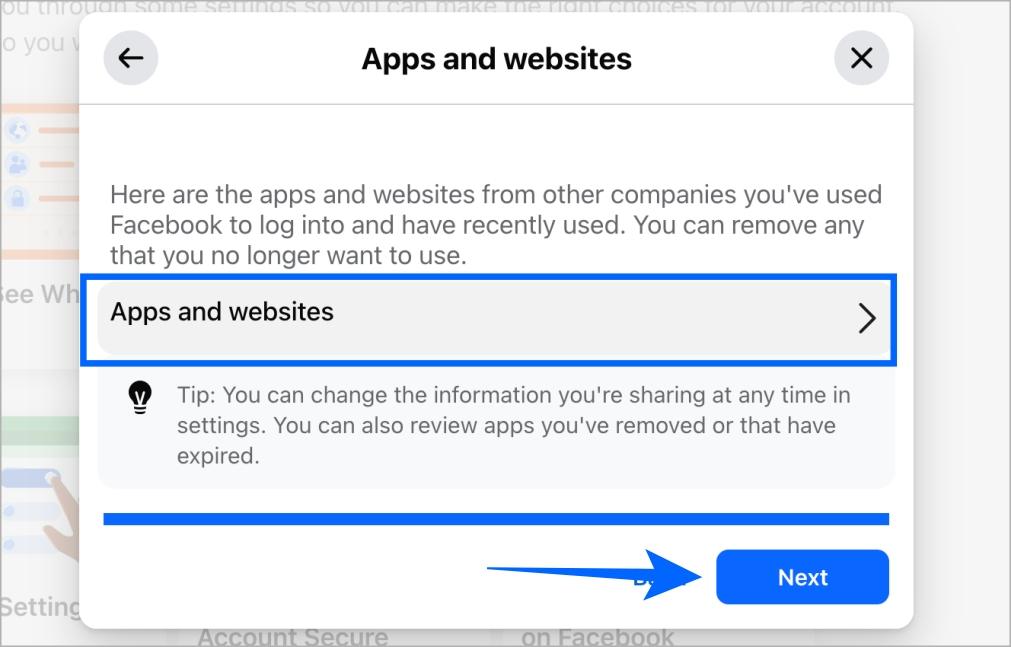
- Tap Apps and websites to manage their access to your Facebook profile.
- Tap on the app you wish to remove.
- Now, tap Remove to remove the app’s access.

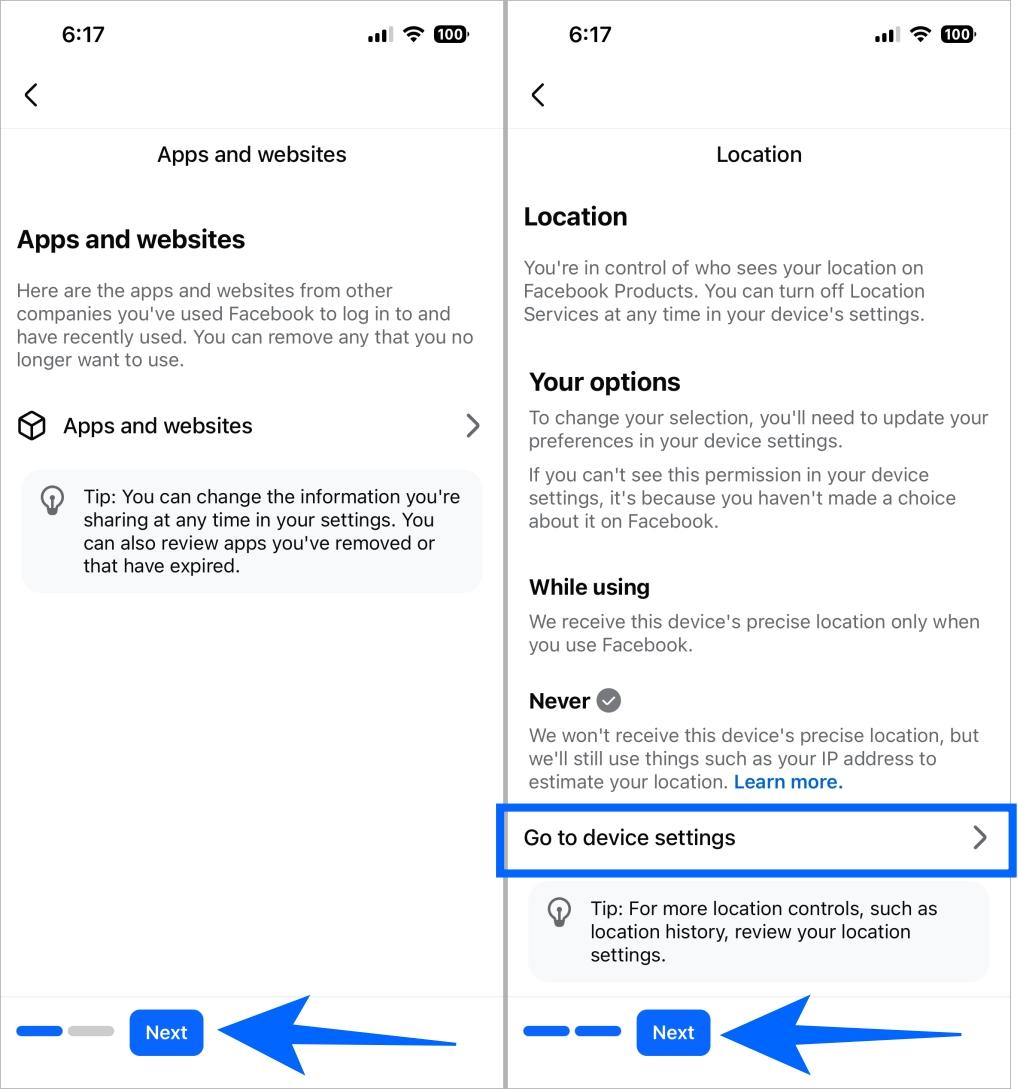
- Tap Next.
- Manage your location privacy by tapping on Go to device settings. Once done, hit Next.

And that’s it, now you have successfully turned your Facebook profile into a private one.
Pro Tip: Learn how to lock your Facebook profile for the utmost privacy.
How to Make Your Facebook Private on Desktop
The steps to make your Facebook private are slightly different on the web because of the interface. Simply follow these steps.
Review Audience Settings
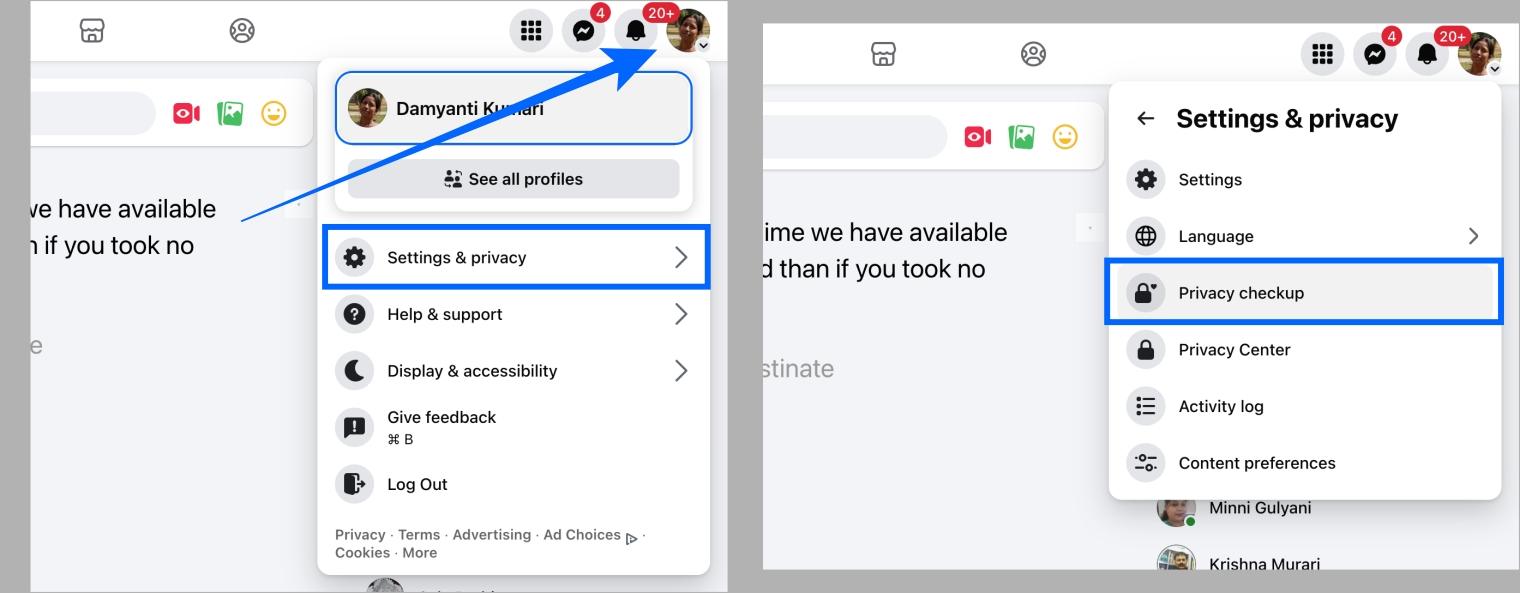
- Log in to Facebook using your choice of browser and click on your profile near the top-right corner of the screen.
- Now, click Settings & Privacy.
- Click Privacy checkup.

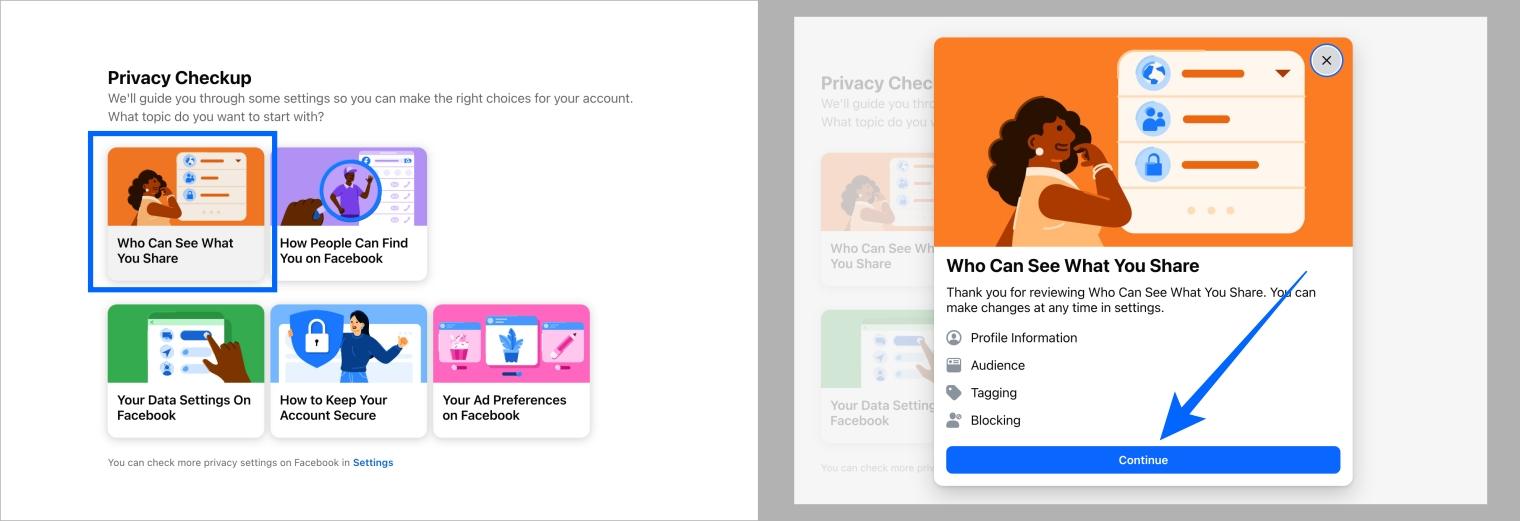
- On the Privacy Checkup page, click on Who Can See What You Share.
- Click Continue to proceed further.

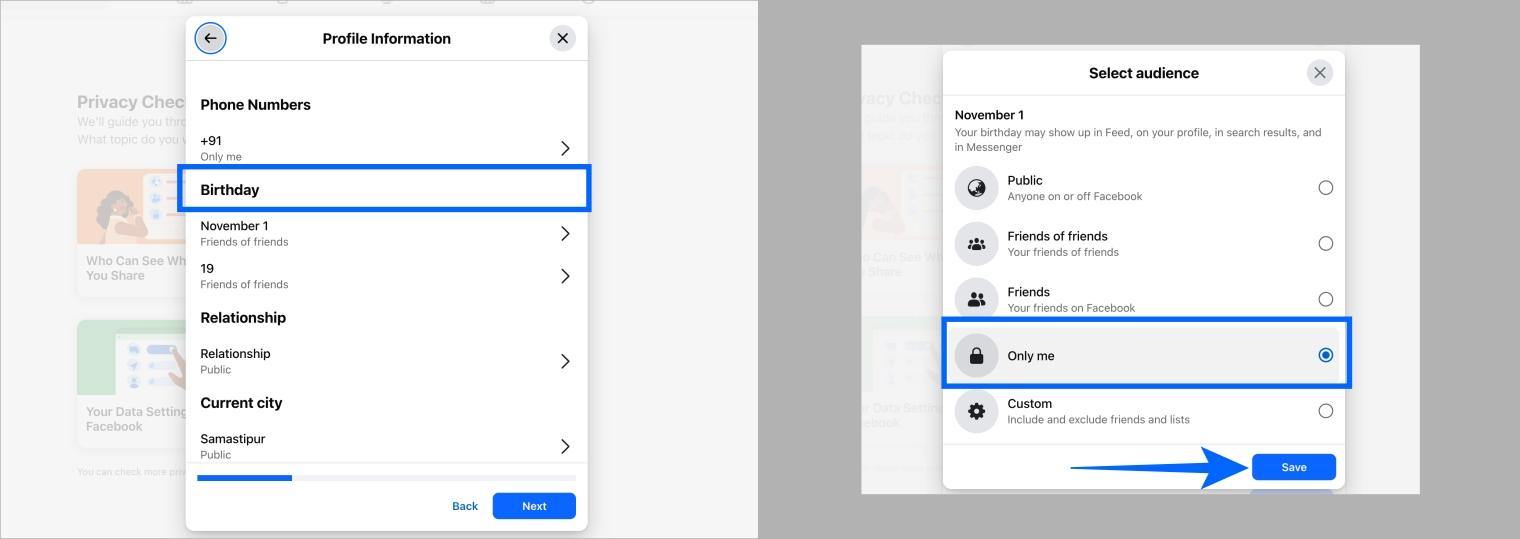
- Now, click on the items that you wish to keep private. For example, I’m clicking on birthdate.
- Select Only Me from the list and hit Save.

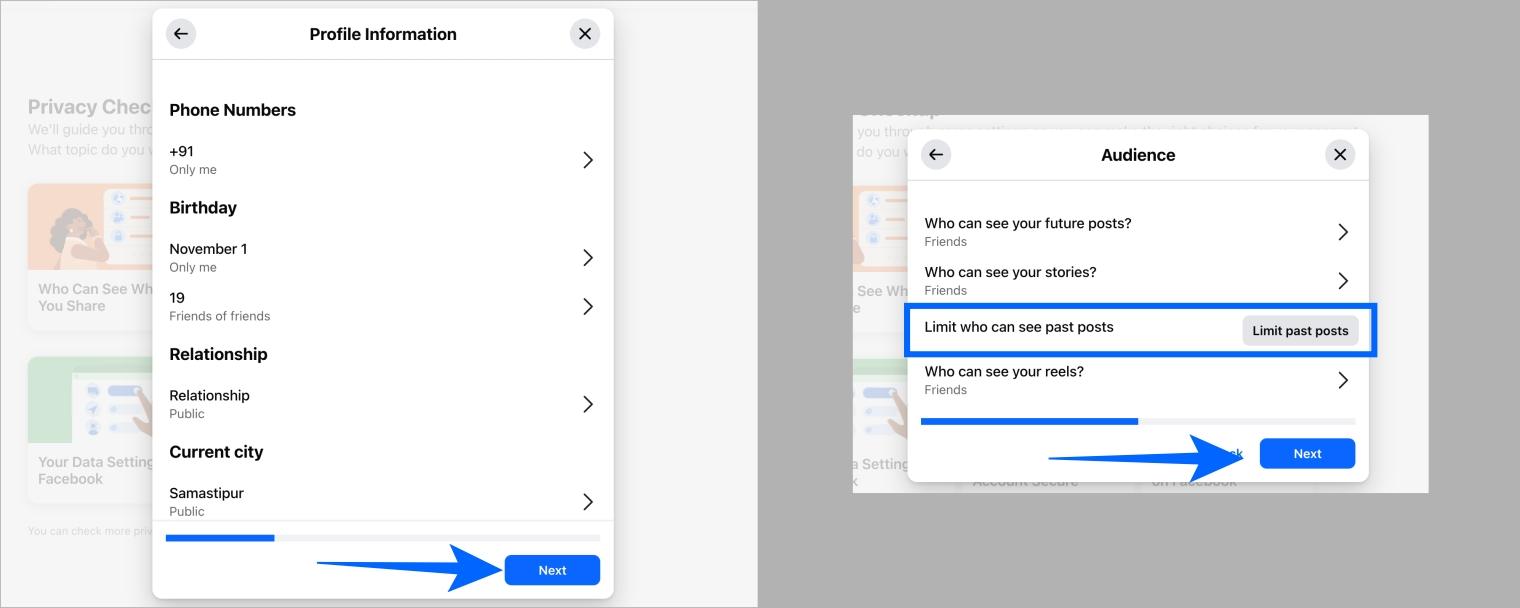
- Now repeat the same for all the things you wish to keep private. Once done, click Next.

- On the next page, set Audience for your posts, stories, and reels to Friends.
- Once done, click on Limit who can see past posts.
- Click Limit past posts to keep your past posts private to your friends only.

- Now, click Next and review your tagging settings. Click on any item and select Friends to keep it more private. Once done, click Next.
- On the next page, review blocking settings if you wish to block or unblock someone. Click Next to move forward.
- Click Review another topic.

Review How People Can Find You
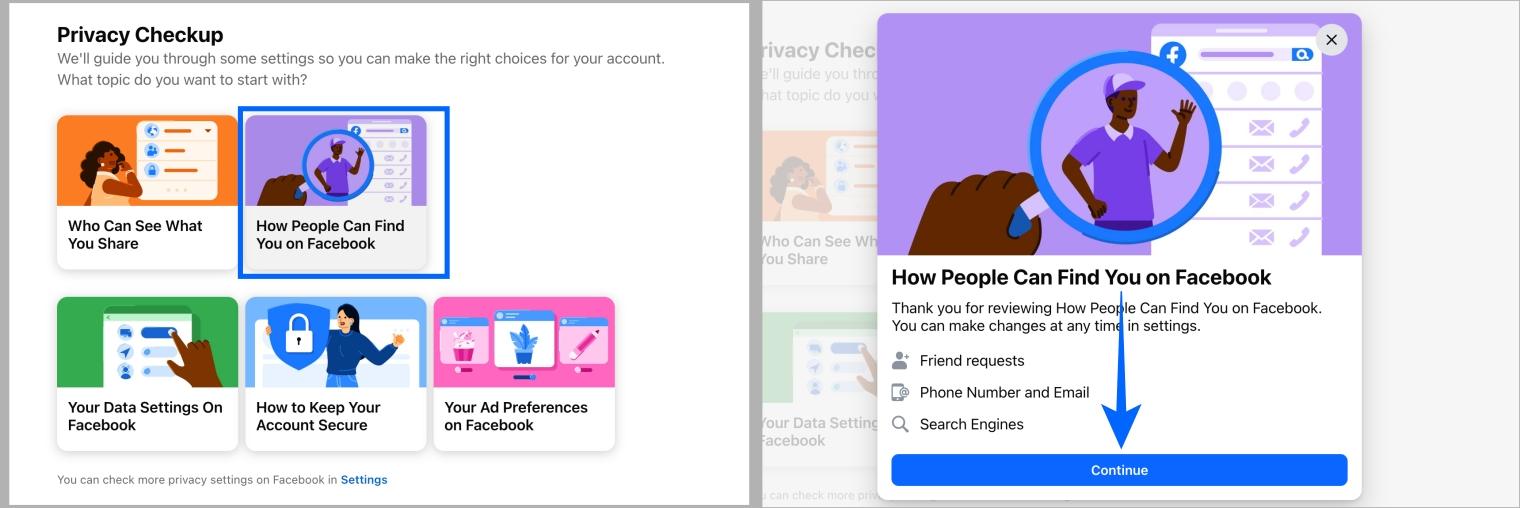
- On the Privacy Checkup page, click How People Can Find You on Facebook.
- Click Continue to proceed forward.

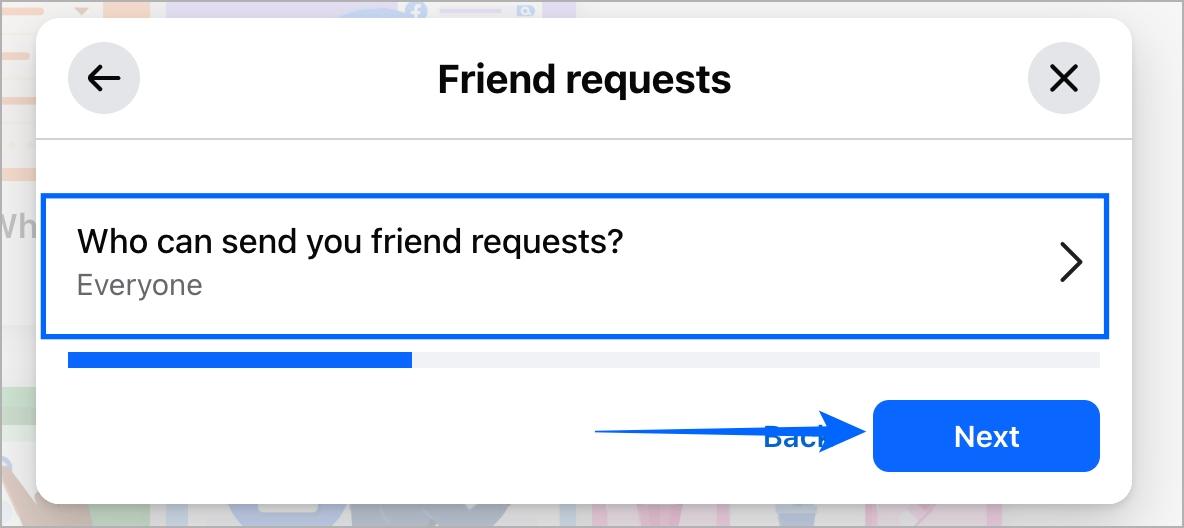
- Review ‘Who can send you friend requests?‘ and then click Next.

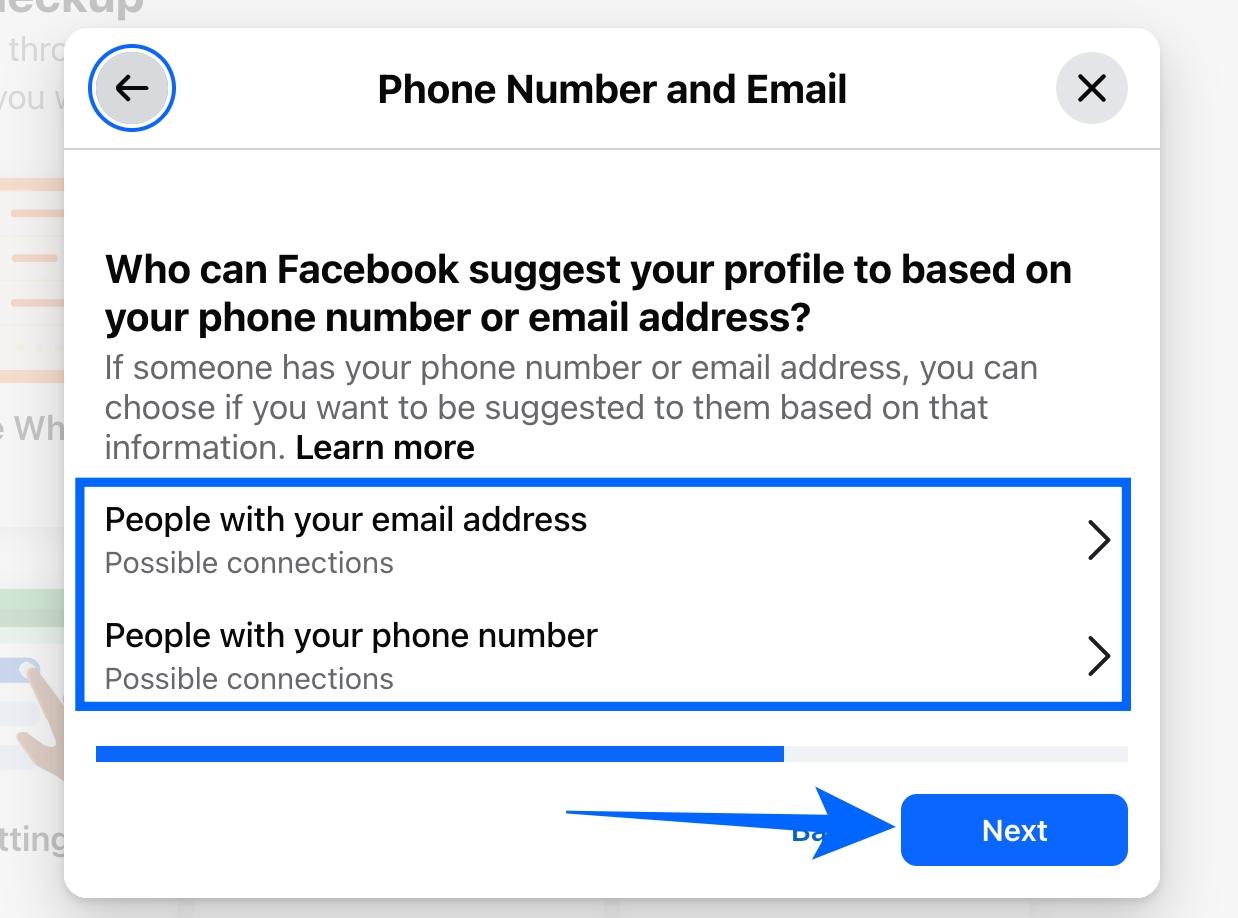
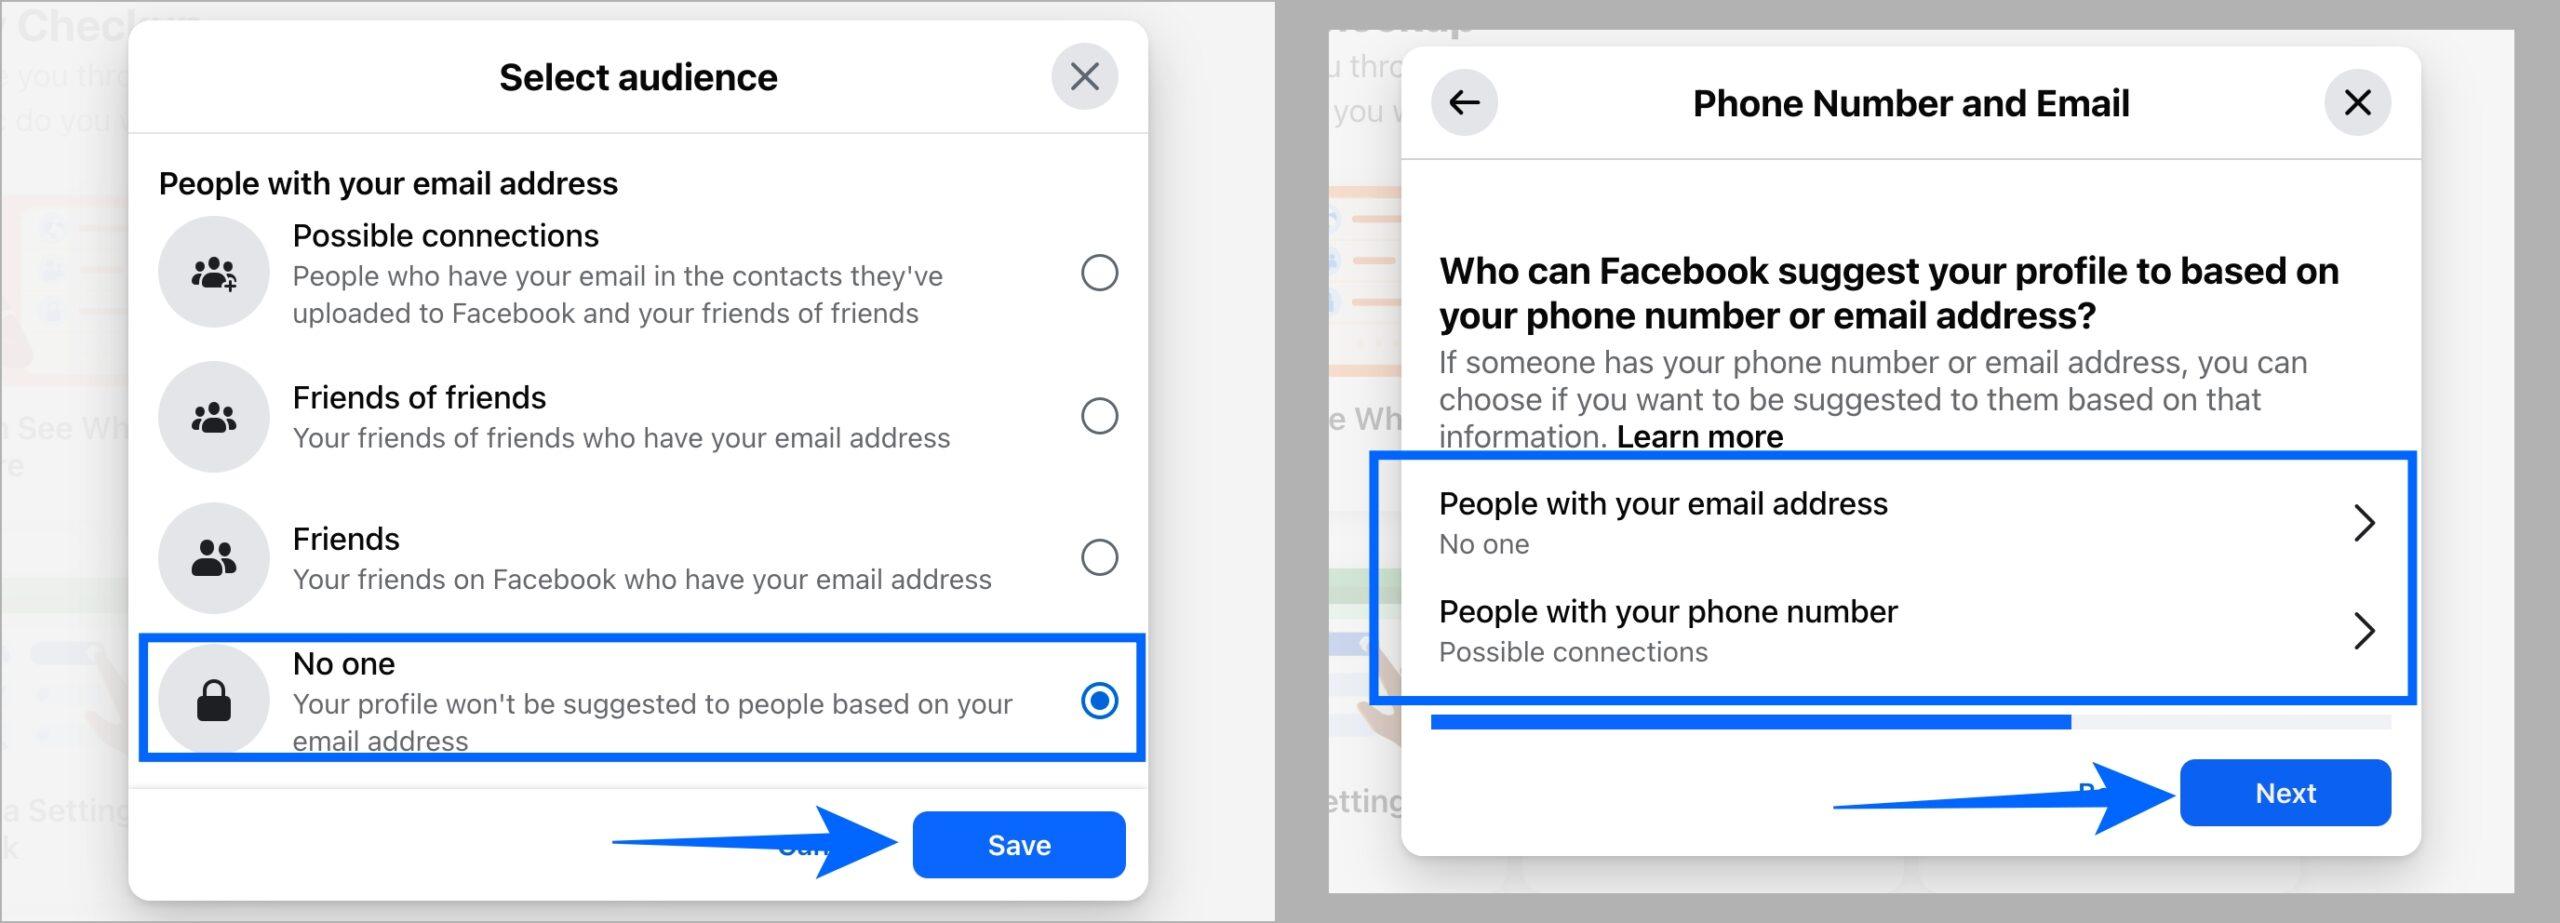
- Now review who can find you by your phone number or email address. Once done, click Next.


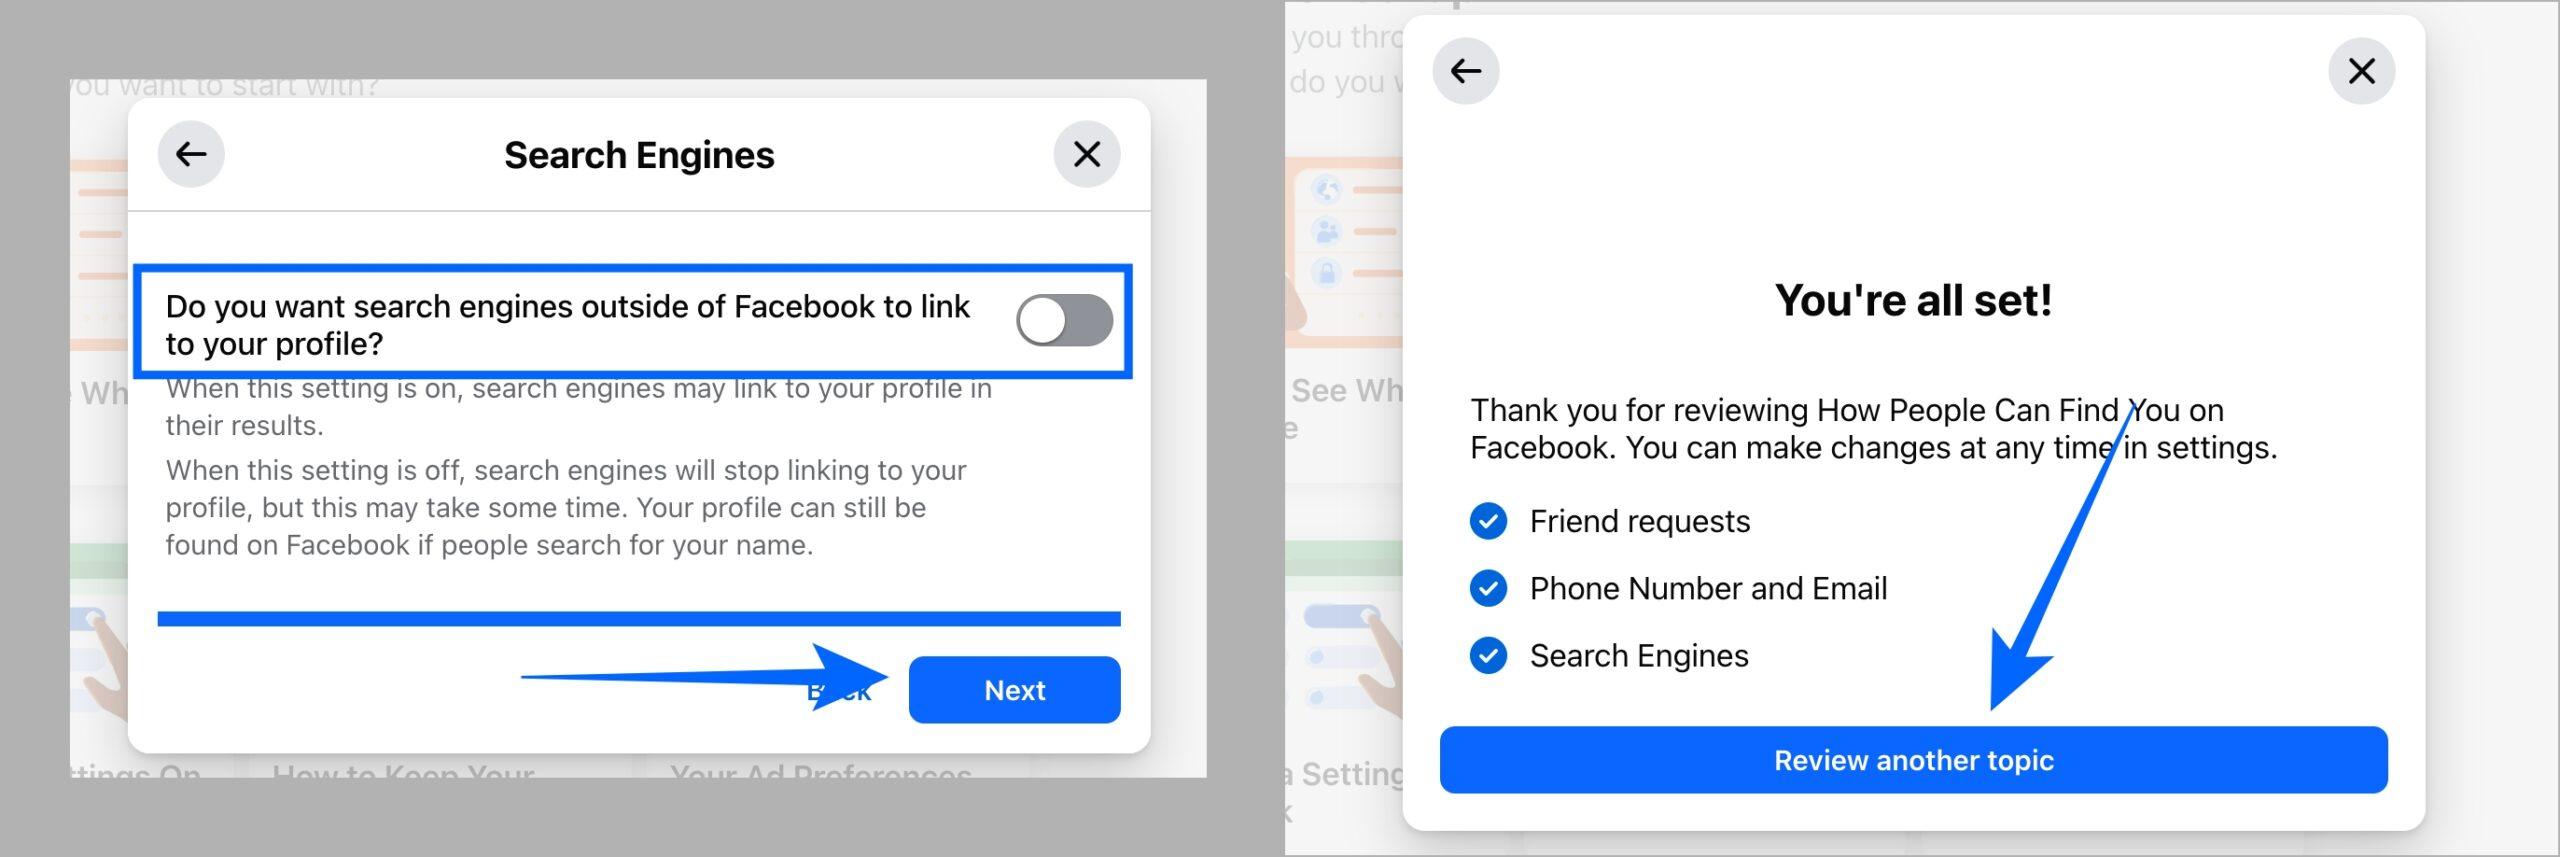
- Leave this toggle Do you want search engines outside of Facebook to link to your profile? turned off and click Next.
- Click Review another topic to close.

Review Your Data Settings
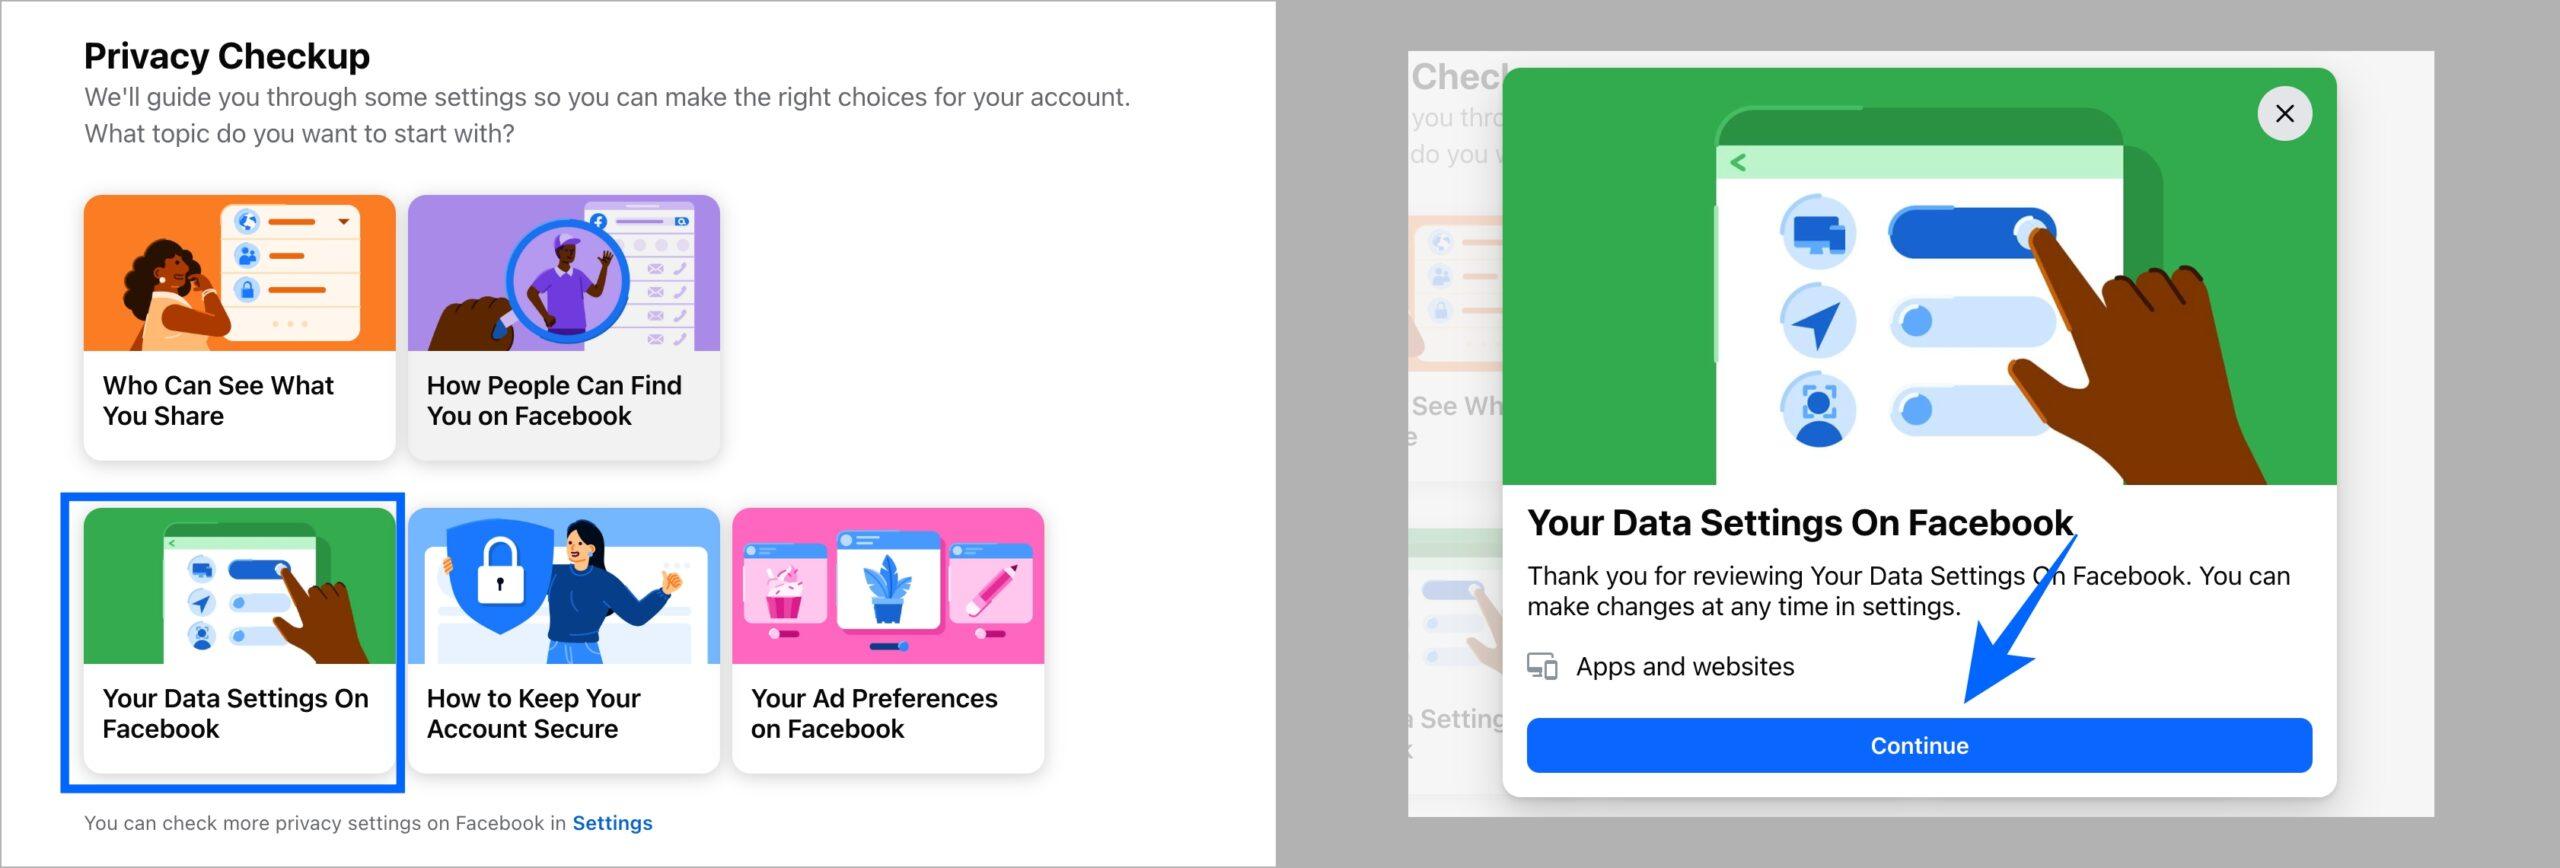
- Once you’re back on the Privacy Checkup page, click Your Data Settings On Facebook.
- Click Continue to proceed forward.

- Click Apps and websites and click Next.

- If you wish to remove an app, scroll to the app in the list and click on Remove next to it.
- Again, click Remove to confirm.

And that’s it, now your public Facebook profile has turned into a Private Facebook profile. Now, nobody else apart from your friends will be able to see your posts, stories, reels, etc.
Extra Tips for Maximum Privacy
If you are concerned someone might misuse your information, you can temporarily deactivate your account.
- Just go to Settings > Your Facebook Information > Deactivation and Deletion > Deactivate Account.
- Follow the prompts to deactivate your Facebook profile.
Conclusion
By adjusting who can see your posts, stories, reels, and personal details, and by tightening search settings and controlling your friend list, you can turn your Facebook profile into a more private space where you decide who sees what.
FAQs
No. You cannot make your profile fully unsearchable. You can deactivate your account, which removes your profile from search during that time.
The photos remain on the original poster’s profile. Hiding a tag only removes it from your timeline. If you want the photo gone, you can ask the person who posted it to delete it.
You might also like:

